Fruit Flies, Lemons, and A New Book

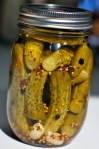
It is late September and we still have fruit flies!  I thought these guys were supposed to go away as the temperature dropped!  This year they appear to be sticking around, possibly it is all the yummy things I am trying to preserve.  Happily, I have a tried and true solution that keeps them at bay.  What is it, you ask?  I put a small amount of cider vinegar in a bowl with a few pumps of dish soap.  The sweetness of the cider vinegar draws them in and the soap coats their wings, so they don’t fly out.  Voila!  This sounds awfully vicious, I know, but I really hate fruit flies.  One more tip, I tried both regular cider vinegar and an organic vinegar that I happened to have and for some reason, the bugs prefer the non-organic.  There you have it, go forth and rid your kitchen of these pests!

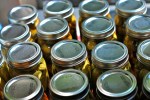
Next, I was just given a book that I cannot wait to tell you about.  America’s Test Kitchen just published a book this month called: d.i.y. cookbook can it, cure it, churn it, brew it.  It is “100+  foolproof kitchen projects for the adventurous home cook.”  It is so cool.  I am a little bit giddy about it.  It covers lots of the canning and preserving we have talked about before, but it also goes new and exciting places such as cheese making, charcuterie, and home brewing… how to make corn chips and marshmallows too!  If you were to buy one book to test some fun new things out in your kitchen, this would be the book I recommend!  The directions seem clear and the pictures are lovely and informative.  I am excited to try making lots of things from this book.


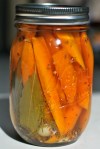
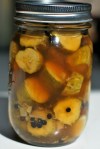
One of the recipes is for Preserved Lemons.  This is something I have been intrigued with for a little while now and I am happy to report it is very simple.  Essentially by adding kosher salt to lemons and allowing them to cure for a few weeks, you end up with rinds that have become soft in texture and mellow in flavor, with a truly interesting brininess from the salt.  You can then keep them on hand in your fridge for about 6 months.  One can add them to salads or serve them with roasted vegetables to add a bright citrus flavor that seems like it would enhance just about anything!  I am currently in the curing stage with mine, but I have great hopes that this will become a staple in our house.  It seems like we always have a few lemons around, don’t you?

The recipe that I used for this was actually from another cookbook, Canning for a New Generation, by Liana Krissoff.  I just used the two lemons that I had in my fridge already and a smaller pint size jar, as I think that is a more usable amount, but do whatever feels good to you.

Preserved Lemons

This is a classic North African staple; the funky salted lemons are featured in tagines, salads, rice dishes, and so on.  To use the lemons, scrape off and discard the lemon flesh, leaving just the preserved peel.

5 lemons, (about 1-1/4 pounds), washed
1/3 cup pure kosher salt
1/3 to 1/2 cup fresh lemon juice, as necessary

Pat the lemons dry and cut them lengthwise into eighths.  Layer the wedges with salt in a clean 1-quart jar, pressing them down with a wooden spoon handle to fit the jar.  Cover and set aside in a cool spot for 3-4 days.  The juice will be drawn out and should cover or almost cover the lemons.  Push the lemon wedges down so they are all submerged in the brine; if necessary, add more lemon juice to cover.  Put the lid back on the jar and set in a cool spot for about 3 weeks, until the peel is soft.

The preserved lemons will keep, covered, in a cool spot, for at least 6 months; use a clean, dry utensil to remove wedges and make sure all the peel remains covered in brine.  Discard any parts that exhibit mold.

Makes 1 quart

And the Winner is…

When one of my best friends got married seven years ago, her 92 year-old grandfather spoke during the wedding and he stole the show.  He gave some wonderful marital advice that Gus and I refer to to this day.  He spoke with fifty years of marriage under his belt and he said something to the effect of, “For a marriage to last, there are three things you need to say to your partner.  Hopefully the first one is easy and you say it often, ‘I love you.’  The second one can be a little bit more tricky, but is still very important, ‘I’m sorry.’  And the third can be downright maddening, but is probably the most important of all… ‘You might be right.'”

So honey, “You might be right.”

When I decided to try making pickles this summer, you might remember that my husband’s one request was that we please try a few different recipes in small batches, versus going whole hog down the road of one untested recipe and then not liking it, but having a massive amount of jars sitting waiting to be consumed or not (I assume this was his thought process).  Although I followed his advice, I did think it was rather silly, because of course all the pickles would be delectable.  Well, it turns out I was wrong… and this was a good idea.  I tried three recipes and there is a very clear winner!  Yippee!  The one that I thought would be the best, was not, in fact it was not good at all.  But I still call the event a success, because one of the recipes turned out very well.  It is a classic dill style and has just the right amount of tart, dilliness to enjoy many different ways.

So, as promised, here is the recipe for the very clear winner, Spicy Dill Pickles.  The recipe I used was from Tart & Sweet, by Kelly Geary and Jesse Knadler – a wonderful cookbook that takes urban canning to the next level with innovative recipes and great instruction.  This particular recipe is very straightforward and easy.  With pickling, since you add your spices to the jar itself, you can play with how spicy to make your pickles or omit a spice completely if it is not to your taste.  So satisfying!

Spicy Dill Pickles

4 cups white vinegar

2 cups water

1/4 cup kosher salt

4 1/2 pounds Kirby cucumbers, ends trimmed, quartered into spears

Per Jar

3 cloves garlic

3 dill heads or 4-5 large dill sprigs

2 hot peppers, such as habanero or serrano

1 tablespoon yellow mustard seed

1 tablespoon brown mustard seed

1 teaspoon dill seed

1 teaspoon black peppercorns


Bring the vinegar, water, and salt to a boil in a medium nonreactive pot.  Stir to dissolve the salt.

Place garlic, dill, peppers, and spices in each hot jar.  Pack cucumbers in as tightly as possible without crushing.  Pour in boiling brine, leaving 1/2 inch headspace.  Make sure the cucumbers are submerged in the brine.

Check for air bubbles, wipe the rims, and seal.  Process for 15 minutes, adjusting for elevation.  Yield 4 quarts.

Note: I brined the pickles overnight and kept my pickles whole as they were on the small side.  I also used pint jars versus quart, so my yield was 8 pints.  I will try these again next year, but I might also try fermenting a batch to see how they compare!

Happy Pickling!

Pretty Packages

Because who doesn’t love receiving mail… and a pretty package at that?  All Poole Party Designs packages come “ready for gifting” with beautiful tissue and bow.  Gift wrap included.  Why, you ask?  Because I love making pretty packages and hopefully it takes one thing off of someone else’s to-do list.

This clearly is a family affair.  My assistants went with me today to the post office to mail the first round of shipments out to our customers!  My what a great help they were!  I know you are jealous.  These guys are the best in the business.

Thanks everyone for all your wonderful words of encouragement!  I appreciate it so much in these early days!

Poole Party Designs :: OPEN for Business

Based on the all the fun I have been having sewing and the positive feedback from both Inspiration and Product Testing, I decided to open an Etsy shop to sell my handmade items!  We’re pretty excited around here!

Click on the above page titled Shop to see what we’re up to!

Thanks for visiting!

~ Lesley

The Point.

For me, the point of this blog is to share inspiration among us through everyday life.  If by reading something I write, someone feels inspired to try something new, or think about something in a different way, then there is a point to all this writing and documenting.  My 35th birthday was this week and I feel so satisfied because I inspired.  My mother read the post about my  grandmother and her secrets … and felt inspired.

Not only has she challenged me to a “taste off” between my pickle recipes and her version of my grandmother’s pickle recipe.  (More on that sometime soon…)  I can’t wait!!

But, she also made a birthday cake for me in the tradition of my grandmother!  What a wonderful surprise.  My grandmother had two cakes that she would bake and she kept the process a secret: “the checkerboard” and “the rainbow”.  So this year I received a checkerboard cake for my birthday from my mom, a woman who does not love to cook.  I love that she felt inspired to figure out the mystery of “the checkerboard” and that I was the recipient of this fun!  Thanks, Mom!  You’re a wonderful mother and an inspiration to me too.

How cool is that?  There is a surprise checkerboard pattern inside.  I believe you can do either two or three colors.   I can just imagine purple and pink from a childhood birthday party decades ago.  In addition to this surprise cake, there was also a package for me to unwrap.  It was the secret… a special pan from Wilton that makes all this magic possible:  Checkerboard Cake Pan.  Who knew?  There are different brands, of course, that make this special pan, Wilton just happens to be the one I was gifted.

I see many a checkerboard cake in my future (and my past)… Happy Baking!

This slideshow requires JavaScript.

Warm Welcome

Welcome, Baby B.

My good friend, M, is approaching the due date of her third daughter.  All her ducks are in a row and now she is waiting for baby’s arrival, just a few weeks away.  Since she has all the material things she needs, one might think that a shower is superfluous, but I disagree.  The birth of any baby changes things forever for a family.  They go from a “family-of-four” to a “family-of-five” and things will never, ever be the same.  As I mentioned in a previous post (Nervous), this “time in waiting” is unlike any other before or after.  A tension exists between the appreciation of what has been and the excitement of what will be.  The beauty of the family that is, with that which is unknown.

When approaching the birth of my third baby, all I wanted was time to be with women close to me and a moment to celebrate my baby.  Life can be such chaos that I found carving out a space to be present with baby the hardest thing of all.  Friends hosted a luncheon for me and it was so lovely.  It was exactly what I wanted.  I wanted to be able to do the same thing for M.  Although she may not need more onesies, she probably does need her friends and family more than ever and a space to enjoy her baby.

We met at The Pink Door and had a fabulous evening.  Mother Nature cooperated and delivered a gorgeous sunset.  The food was artfully done and delicious to boot.  I tried for all things feminine with lots of flowers and included a faux flower for each lady to wear however she chose.  Everyone looked festive and feminine.  M, you are so special.  I hope you know how much you and Baby B are loved!

This slideshow requires JavaScript.

my grandmother, pickles, and a good secret

My grandmother passed away two years ago this week and I feel like I am saying goodbye all over again.  She was a phenomenal, modern woman whom I loved dearly and had a great impact on my life.  She was smart and sassy and loved her independence.  She could be a bit prickly, and was not your typical grandma.  Despite this, she baked birthday cakes and pies for our family gatherings.  She made delicious airy waffles and something amazing that we call “cheese puffs” in my family, that only came out on holidays.  Since my grandmother’s death, I have been in possession of her cooking file, a bulging binder that is filled, past full, of recipes and personal notes.  It has felt too intimate for me to really look through this piece of her over the past two years – but it sits in my pantry and waits for me; waits for the right time.  Lately, I find myself thinking about her and wondering things that I now cannot ask, and it is probably a perfect place for me to go hunting to find some answers, culinarily speaking at least.

The ladies in my family love a good secret.  They relish knowing a recipe (waffles, chocolate chip cookies, pickles) and keeping it special by not sharing that recipe with friends, and barely with family.  On occasion, a trade has been made for someone else’s treasured recipe, but that has happened too frequently.  Growing up, I remember a family legend was to talk about how the secret ingredient of our prized waffles was marshmallow cream, thinking that anyone who was listening might try to duplicate this hallowed recipe and ruin their waffle maker by including this sweet and sticky ingredient.  I’m not sure anyone was ever really listening, but it made us all laugh.

That brings me to pickles.  For a woman who didn’t mind hard work and had perfected pie dough, I am perplexed by her approach to pickles.  She had a recipe for refrigerator pickles, that I have made, that is a bit of a scam.  (reader: surprised gasp!) I am not sure how much more I can say, for fear that I will be kicked out of my family for outing her.  But, suffice it to say, there is no canning involved and the cucumbers were already a bit pickled when she got to them.  This one recipe makes me so curious…  (I think it actually is another thing that has inspired me to learn how to preserve food properly.)  For a lady that was not outwardly daunted by anything, I sit here feeling that the reason she went to the trouble for this “semi-homemade” recipe is because it was a just a damn good secret.  That’s the kind of lady she was.

It is probably no coincidence that this is the week I have chosen to make pickles for the first time.  I have tried pickling other veggies (carrots, beans, and okra), but so far had felt daunted by traditional cucumber pickles.  If you look into pickles there are a few different processes you can try: brining, refrigerator, fermenting, canning, pasteurizing and all turn out a little differently.  Hearing that I was interested in adding cukes to the list this season, my husband tentatively asked if this could be a “test year” of small batches to try a few different recipes with the hope of landing on one that we love and might repeat in a bigger way next year.  (I assume that this is opposed to jar upon jar of pickles sitting in our pantry that we do not love.)  So that’s what I did.  I made three plus batches of cucumber pickles yesterday using different ingredients and taking copious notes on what I actually did since I cannot rely on my memory at this point.  In a few weeks, when we start cracking these babies open, I plan to report back to you which ones we love, and guess what… I’ll even share the recipe.

This goes against everything holy in my family and makes me chuckle about what my grandmother would think of this blogging generation and the ease of sharing information (and recipes).  On the other hand, it pleases me to share what I am learning and I know my grandmother would approve of that.

Author’s Note (added 01/07/13): Click here to see how the pickles turned out!

Apricot Rosemary Jam

Today is apricot rosemary jam day.

I made this jam last year and loved the herbal notes that the rosemary adds to the flavor.  It is wonderful over a bit of goat cheese or as a marinade for chicken.  Unfortunately for me, I made only enough to pass along for gifts and didn’t remember to keep even one jar for our house!  This past Sunday I bought 22 pounds of apricots from our local farmer’s market to make sure I made enough!  I am excited to report that the rosemary that I am using this year comes from our little garden.


The recipe I am using is inspired by a post from Food in Jars:(http://www.foodinjars.com/2011/07/urban-preserving-apricot-rosemary-jam/)

One of the reasons I like it is that it is very easy.  I am a bit of a lazy preserver, in that I don’t really relish the idea of extra work (as in, taking the skin off of fruit).  With apricots, all you need to do is pull them apart, take out the pit and you are good to go.  The other reason I like this recipe is that it is quick.  I made six batches (24 half pints) in about 3 hours, which is exactly how long I had since preschool camp this week is from 9:00am – noon.


The cherubs are on their way home, so quickly here is the recipe if you feel inspired:

Apricot Rosemary Jam (makes 4 half pints)

4 cups apricots (halved and pitted)

2 cups sugar

3 tablespoons finely chopped rosemary (or omit for traditional apricot jam)

4 tablespoons lemon juice

Mash apricots, not necessary for them to all be the same size.  Place apricots, sugar, and rosemary in a non-reactive pot and bring to a boil.  Cook for about 10 minutes, until fruit thickens and runs slowly and thickly off back of spoon.  Add lemon juice.  Stir to combine.  Remove pot from heat.

Ladle jam into four half pint jars.  Wipe rims of jars with wet paper towel, apply lids and rings and process in your boiling water canner for 10 minutes.

Remove jars from pot.  Let cool.  When jars are cool enough to handle, test seals.  If seals are good, store jars in a cool, dark place.  If any of the jars did not seal, place those jars in the fridge and use within a month or two.

Enjoy!

This slideshow requires JavaScript.

Jam Session

Gosh, I love this time of year!  Amazing produce is in high abundance and local berries can be found around every corner.  I feel so very lucky to have delicious food available year-round, but summer is such a satisfying time for the senses!  When spring and summer arrive, I am reminded how much better in-season fruits and veggies taste!  The berries I have been seeing lately are so beautiful.  So rich in color and flavor, and they smell divine.  If we can’t have fresh summer berries all year long, opening a homemade jar of preserves to enjoy on your morning toast is the next best thing!

Last year was my first year making jam and I am hooked!  I dove in after being inspired by a friend, K, who preserves an entire pantry for the year.  Hundreds of pounds of produce… I agree, she is amazing.  On a much smaller scale, I learned to can with a good friend, S, who was also a jamming neophyte and we felt our way together.  I highly recommend this route.  If you want to try it, find a like-minded friend who is also curious and just go for it.  It became a wonderful time for real adult conversation and each session we came away with a very satisfying product (a project with a beginning and an end – hallelujah!).  Last year at this time I was pregnant and I am pretty sure this whole thing started because of a nesting urge and a wish to control something.  Baby was due in late December, so I became a little manic about being “ready” for the holidays.  Man, was I ready.

In my quest to become a preserving goddess, I found a few books to help me on my way.  There are so many great books out there, these are just the ones I happened to pick up and can recommend to you:

Tart and Sweet, 101 Canning and Pickling Recipes for the Modern Kitchen, by Kelly Geary and Jessie Knadler:  I literally read this book cover to cover before bed it was so interesting.   I love the approachable way that they describe the chemistry involved in canning.  It is part manual, part artisanal food appreciation.   I would not recommend this be your only resource for recipes, but I really enjoyed it for its style and inspiration.

http://www.amazon.com/Tart-Sweet-Canning-Pickling-Recipes/dp/1605293822/ref=sr_1_1?ie=UTF8&qid=1342814858&sr=8-1&keywords=tart+and+sweet

Canning For A New Generation, Bold Fresh Flavors for the Modern Pantry, by Liana Krissoff.  This book is a bit more traditional, but still meant for the modern canner.  I found the accompanying recipes for food dishes using the preserves helpful as well.

http://www.amazon.com/Canning-New-Generation-Flavors Modern/dp/1584798645/ref=pd_bxgy_b_img_b

Ball Complete Book of Home Preserving.  This is a canning bible to some.  Great resource to have on hand, but less fun than the others.

http://www.amazon.com/Ball-Complete-Book-Home-Preserving/dp/0778801314/ref=pd_bxgy_b_img_b

This week I’ve had a few jam sessions and I think I am up to about 30 lbs of berries (turned into freezer jam and small-batch canned jams)!  Raspberry jam is my favorite and oh-so-summery – I am feeling particularly inspired by the golden raspberries pictured above.  Aren’t they beautiful?  I chose to follow a pretty standard recipe from Tart & Sweet and am very happy with the results.

If you are interested, this is the perfect time of year to give canning a try!  I am happy to share any and all that I have learned and would like to pass on a few words of wisdom that were shared with me.

1)  Only can the best produce you can find.  There is no reason to go to a ton of work preserving the same stuff you can find year-round.  Can in-season produce, as it is cheaper and of better quality than what you can find at other times.

2)  Preserve things you like!  We go through jam like it is going out of style in our house, so we make lots of berry jam.  If you don’t eat chutney normally, don’t make jars and jars of chutney.  They will sit and sit in your pantry taking up precious real estate.  I’m not saying don’t experiment, that is part of the fun.  Just keep the way you and your family eat in mind, as you try new things.

Happy Summer!!

Placemats, please!

In an earlier post, after the baby shower and onesie extravaganza, I was saying something about a new sewing project.  As happens quite a bit in my life, I got distracted.  But, I’m back at it and ready to show you my first stab at a really great (and simple) placemat design.  This design definitely showcases the fabric.  As I have kept things pretty straightforward and without much detail, it is important to choose a fabric you love!  I went with Gotcha in Summerland in grey and natural.  It gave me just the modern and sophisticated, but unfussy look I was going for!  All in all, I feel successful!  I think these placemats will look gorgeous on a summer evening with lots of bright white and maybe some yellow flowers (or orange, or pink, any color really…) to punch it up a bit.

The quick and dirty on how these were made is below if you are interested in trying to sew some fun, mod pacemats of your own!  I would not call this a full tutorial, as it is not quite perfect yet.  I learned a few things in the process, so those thoughts can also be found below.  As you will see in the photos, they turned out well – even if baby doesn’t know the difference between a sophisticated placemat and her usual burp cloth!  At least they are reversible!

Now, that I have scratched this itch, I think I need to start getting out my canning equipment!  Summer has finally arrived in Seattle!  To pickle or preserve, now that is the question!  Any requests?

This slideshow requires JavaScript.

My Notes:

This project used 1 yard of fabric, almost exactly for four placemats.  Next time I would give myself a little more fabric to play with, as I would like my mats to end up larger and I could be a bit choosier with the print layout.  The mats I made measure approximately 17.5″x13.5.”

First, I measured out my fabric.  I just looked at a placemat that I had bought along the way and used that as a rough guide, adding a few inches for seams.  I cut my fabric to be about 20″x30″ (this is a guesstimate – I promise to take better notes next time!).  The main idea is to sew this like a pillowcase on three sides, while the fabric is inside out.  Then, I turned the fabric right side out, pushed out the corners with a chopstick, and finished the last seam with the top stitch that goes all the way around.  I went with a ¾” seam, but choose what looks right to you.  I pressed the fabric with an iron at every stage and that worked well.  I didn’t remember to wash the fabric beforehand, which I will do next time  (to take care of shrinkage) and I had a hard time keeping things completely square.  Again, something I will be more diligent about next time!