Bitters

IF THE BITTER CUP CANNOT BE PASSED, DRINK IT AND BE STRONG

Jeffrey R. Holland

DSC_0041

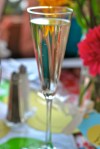
November has arrived and we need a little restart here on the blog.  September and October were surprisingly busy and I am trying like heck to keep up with my life.  I am also noticing that a different sort of drink is calling my name these days.  As the leaves turn and fall off the trees, one of the warm-ups I relish is a lovely, mixed cocktail.  This is a bit of a departure for me, as in the past I would have called myself a wine or beer drinker, but last winter I discovered rye whiskey and a fabulous cocktail from Zig Zag Cafe, called a Blessed Event.  And it is just that… I was inspired to look at this drink a bit more closely and try to recreate it at home.

DSC_0012

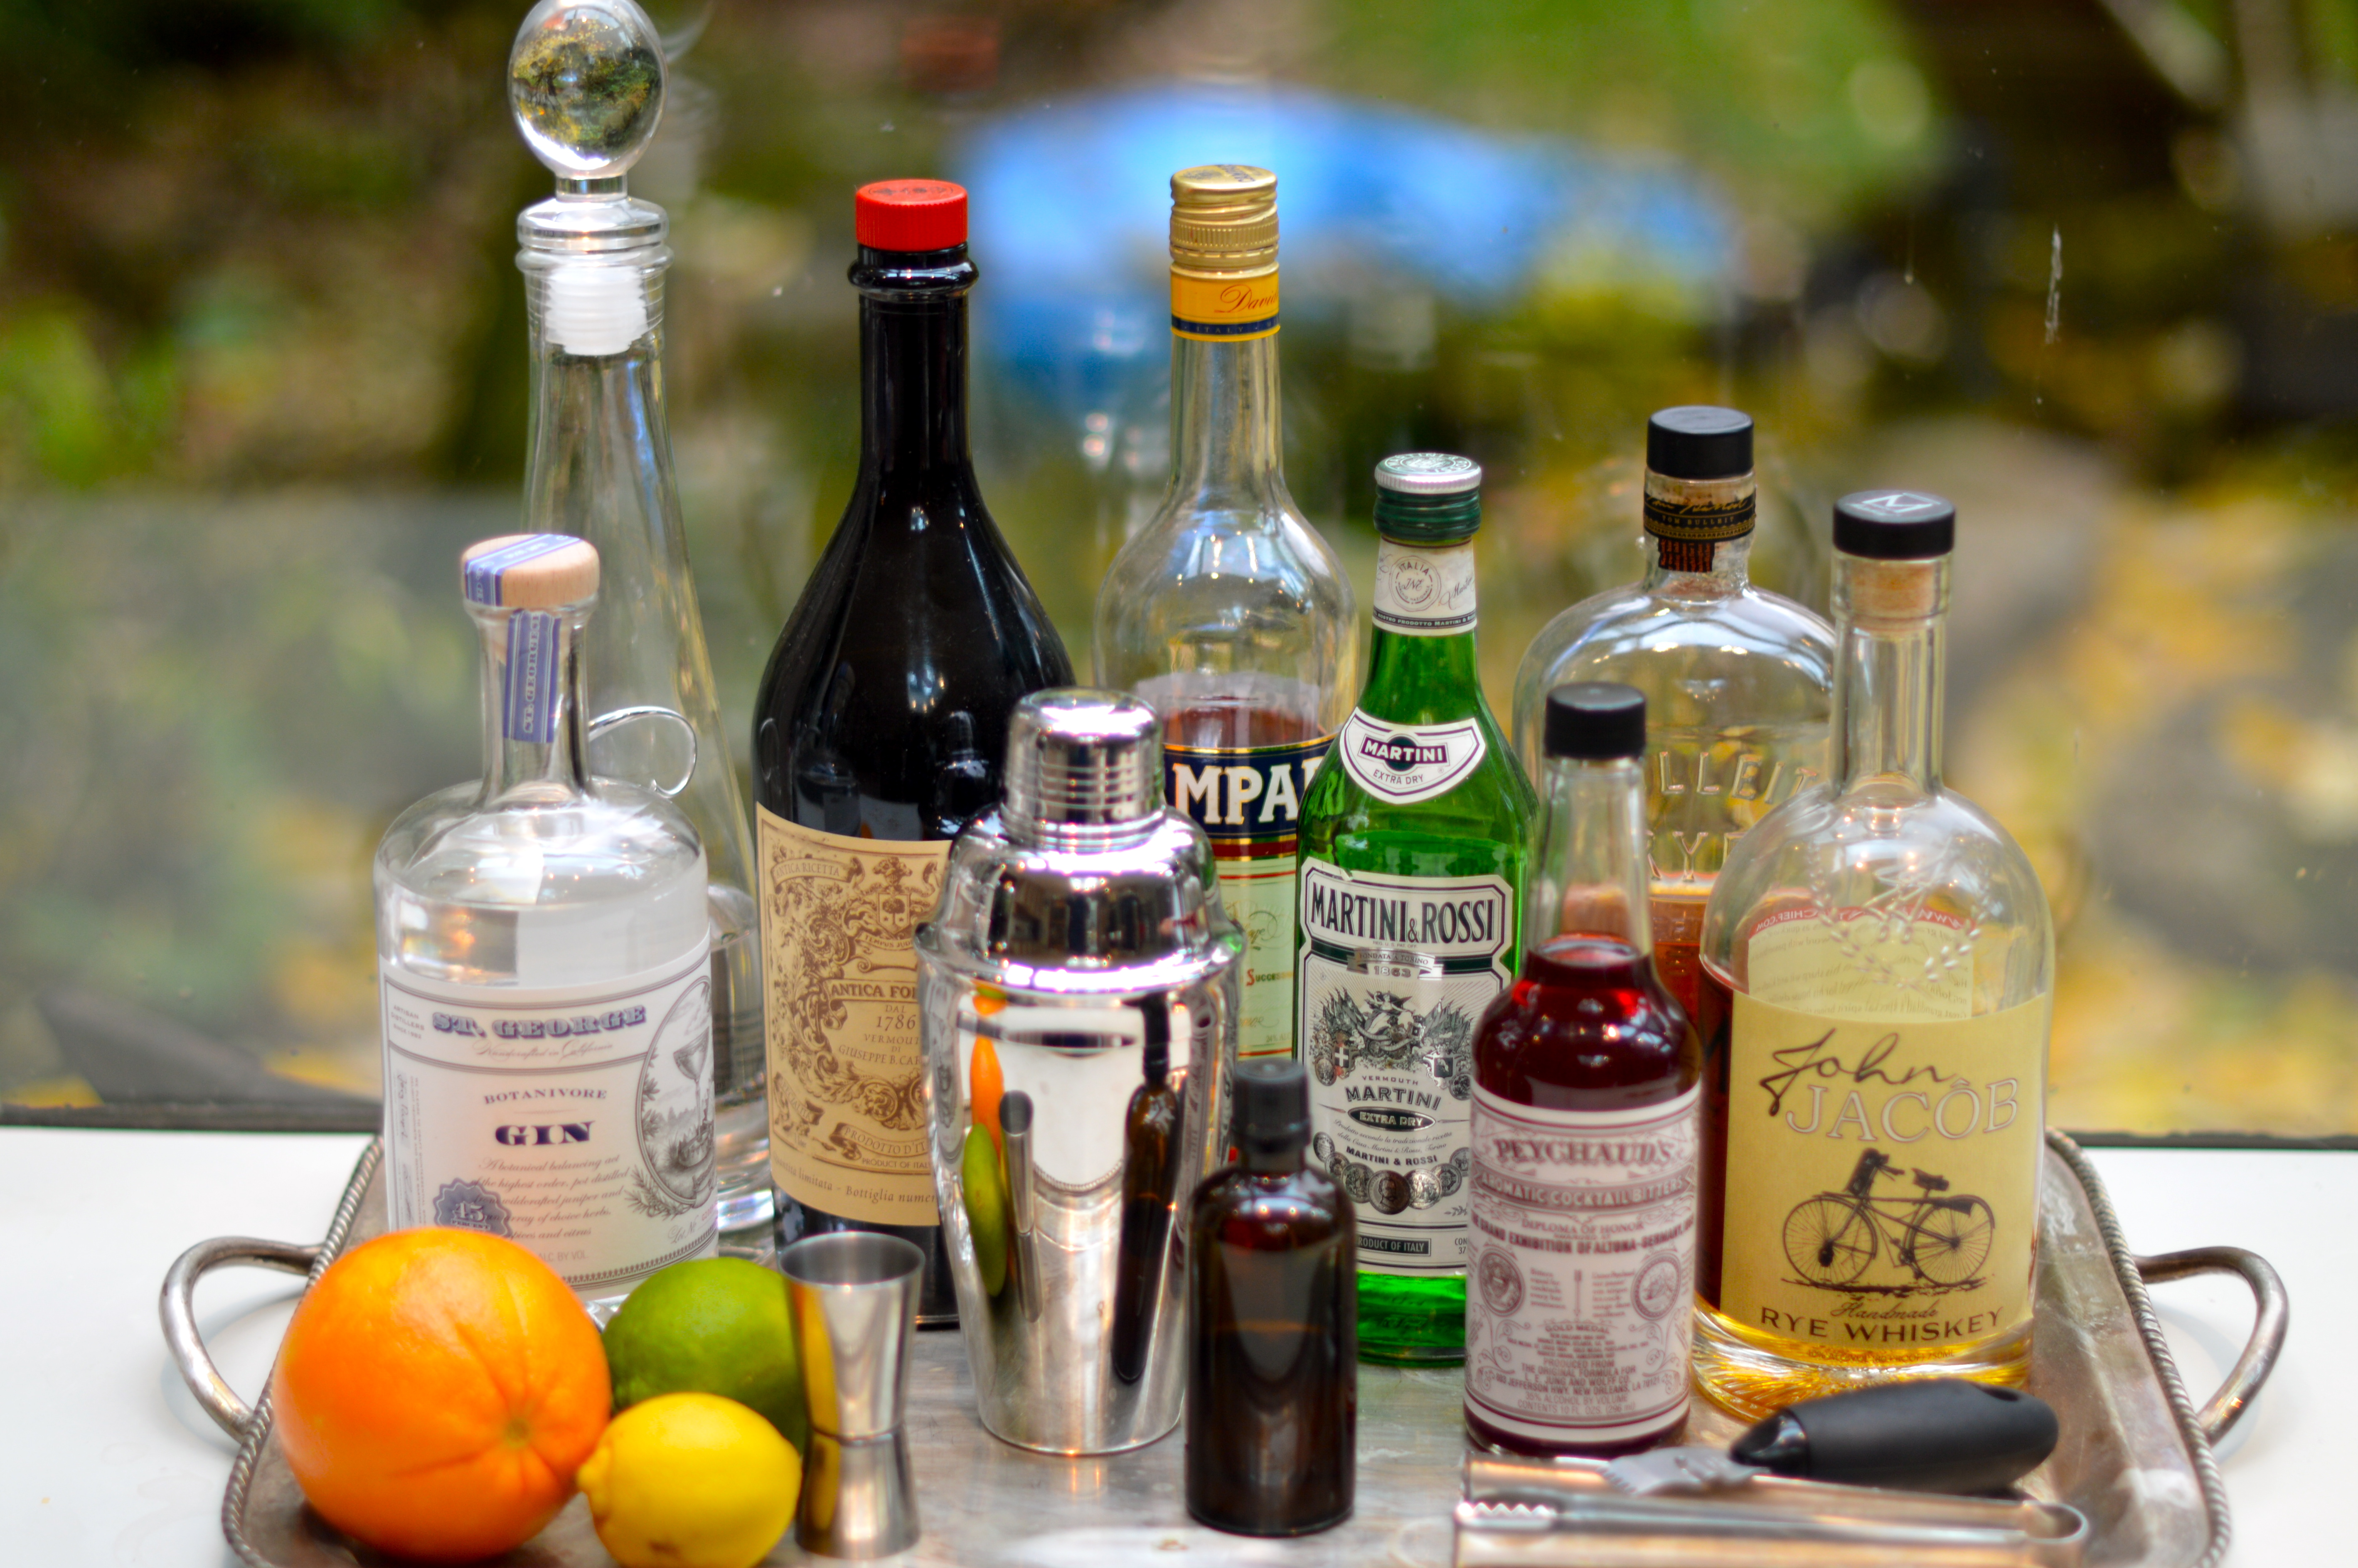
Over the last twenty years, both wineries and breweries experienced a surge in popularity and now it appears to be the distillery’s turn for a time in the spotlight.  Distilleries are popping up all over the Pacific Northwest, as well as a revival of prohibition-style speakeasy bars, specializing in the “craft cocktail”.  As we enter the season for entertaining, I recommend adding classic cocktails to your party menus.  A well-stocked bar is easy to pull together, as long as you have a few ideas of what cocktails you are ready to make for your thirsty guests!

DSC_0015

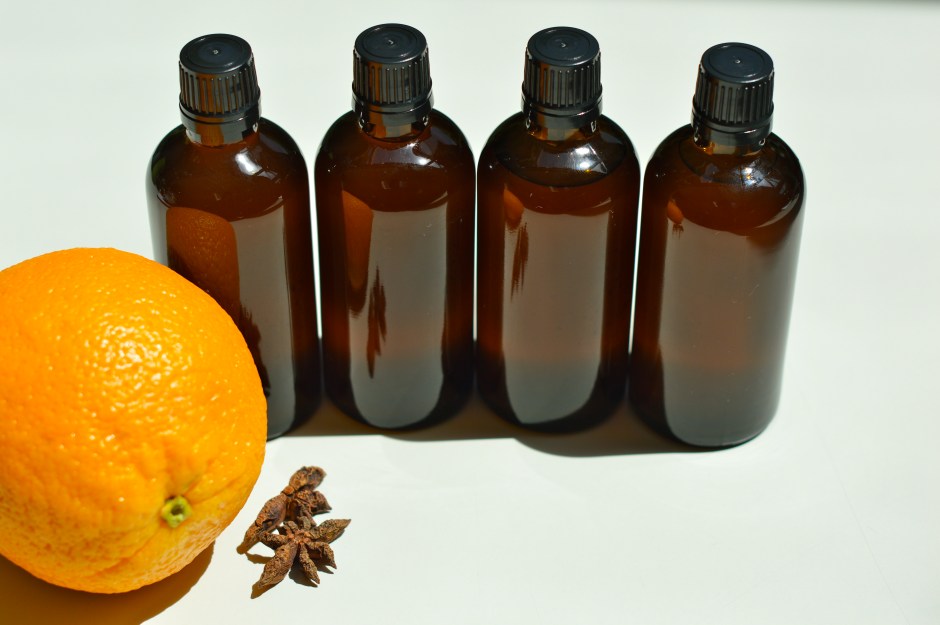
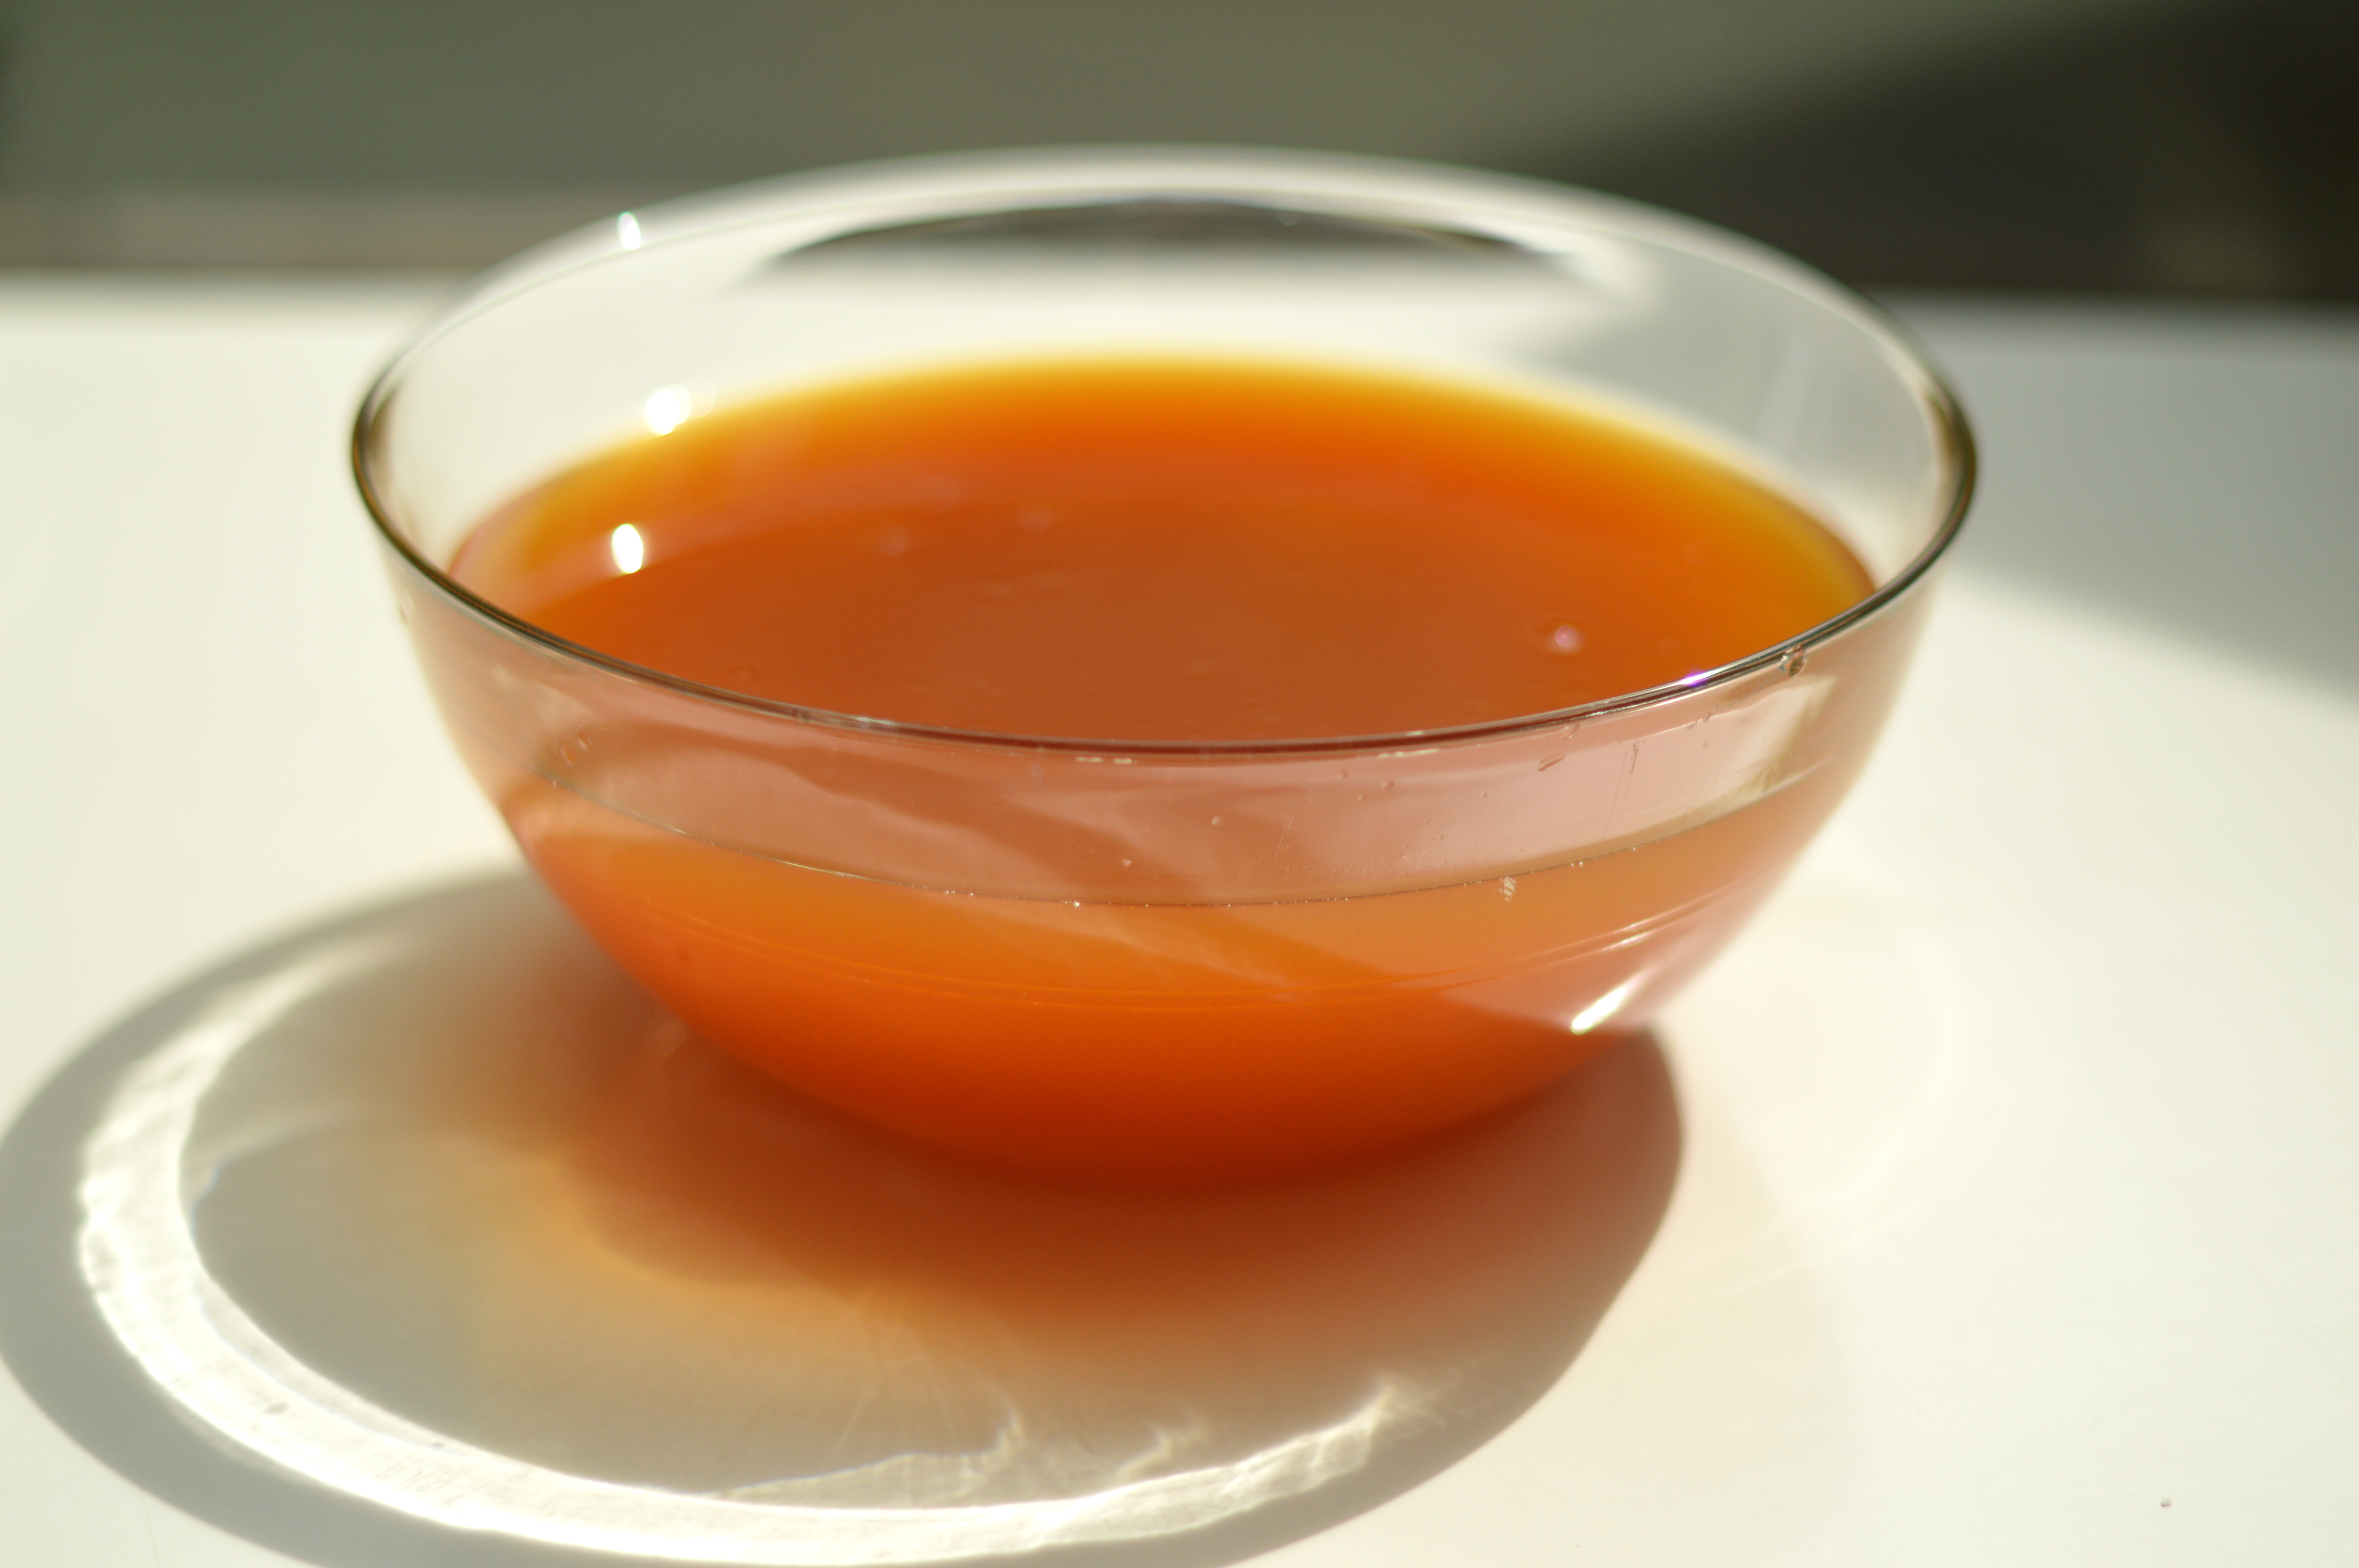
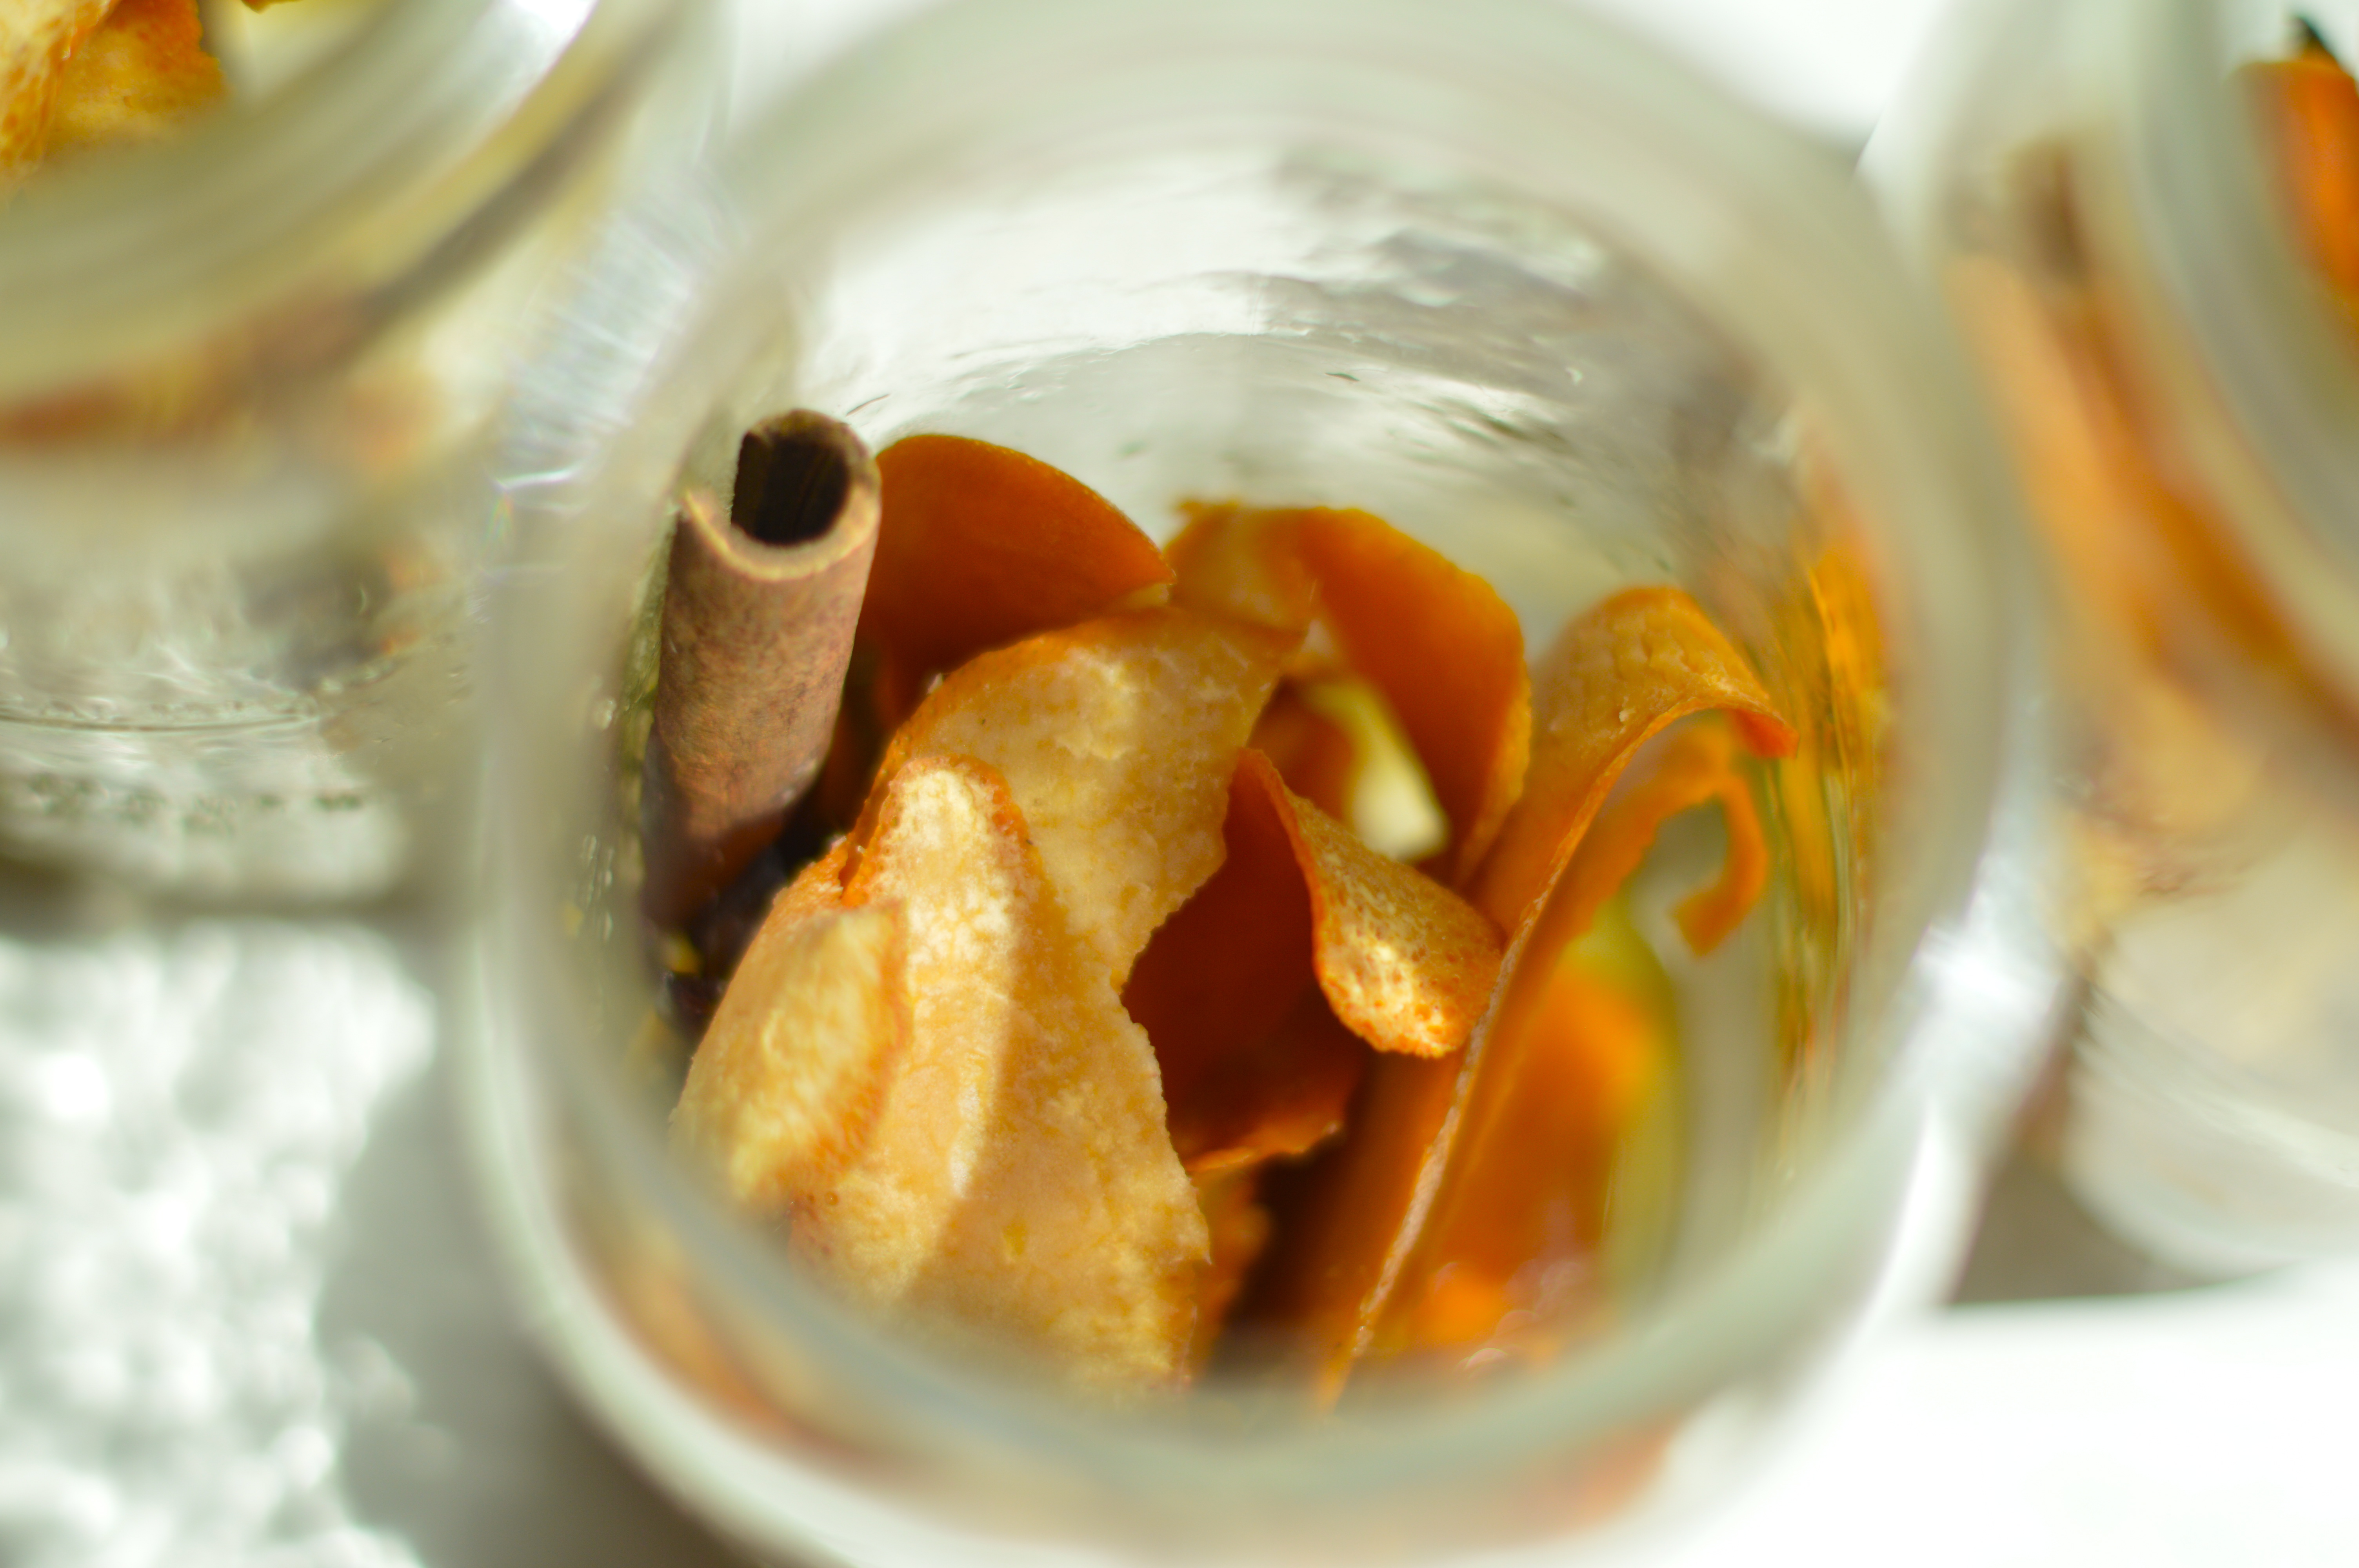
Bitters are an ingredient in many of these classic cocktails that I had never spent much time thinking about, but they are an intriguing element to be sure.  With only a dash or two, bitters can transform your craft cocktail, adding warmth, complexity, and dimension.  For a full description of bitters, head over to The Kitchn for their conversation on All About Bitters.  Last winter it came to my attention that it is possible to make bitters.  My curiosity was immediately piqued and I tried it.  Over the course of a couple of weeks, I made my own bitters using wonderfully aromatic ingredients like orange peel, ginger, star anise, cinnamon, and cloves.  Although I made this during the summer months, I kept thinking how perfect it would be come autumn.  (Scroll down to see the recipe for orange bitters and the accompanying photos).  But, if a cocktail is what you seek, we’ll start there…

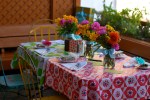
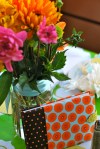
As I mentioned above, this fall has been a crazy one.  We have been getting used to the schedule of kindergarten, and this has been admittedly tougher than I thought it would be.  I’d like to raise a glass to the fact that we are two months into this new elementary school gig and all members of the Poole household are here to tell about it.  Sometimes it is just important to celebrate the fact that you are surviving.  So, without further ado… three “bitter” cocktails that you can raise your respective glass to:   

Part 1: Cocktail Recipes

1)  The Classic Manhatten

DSC_0044

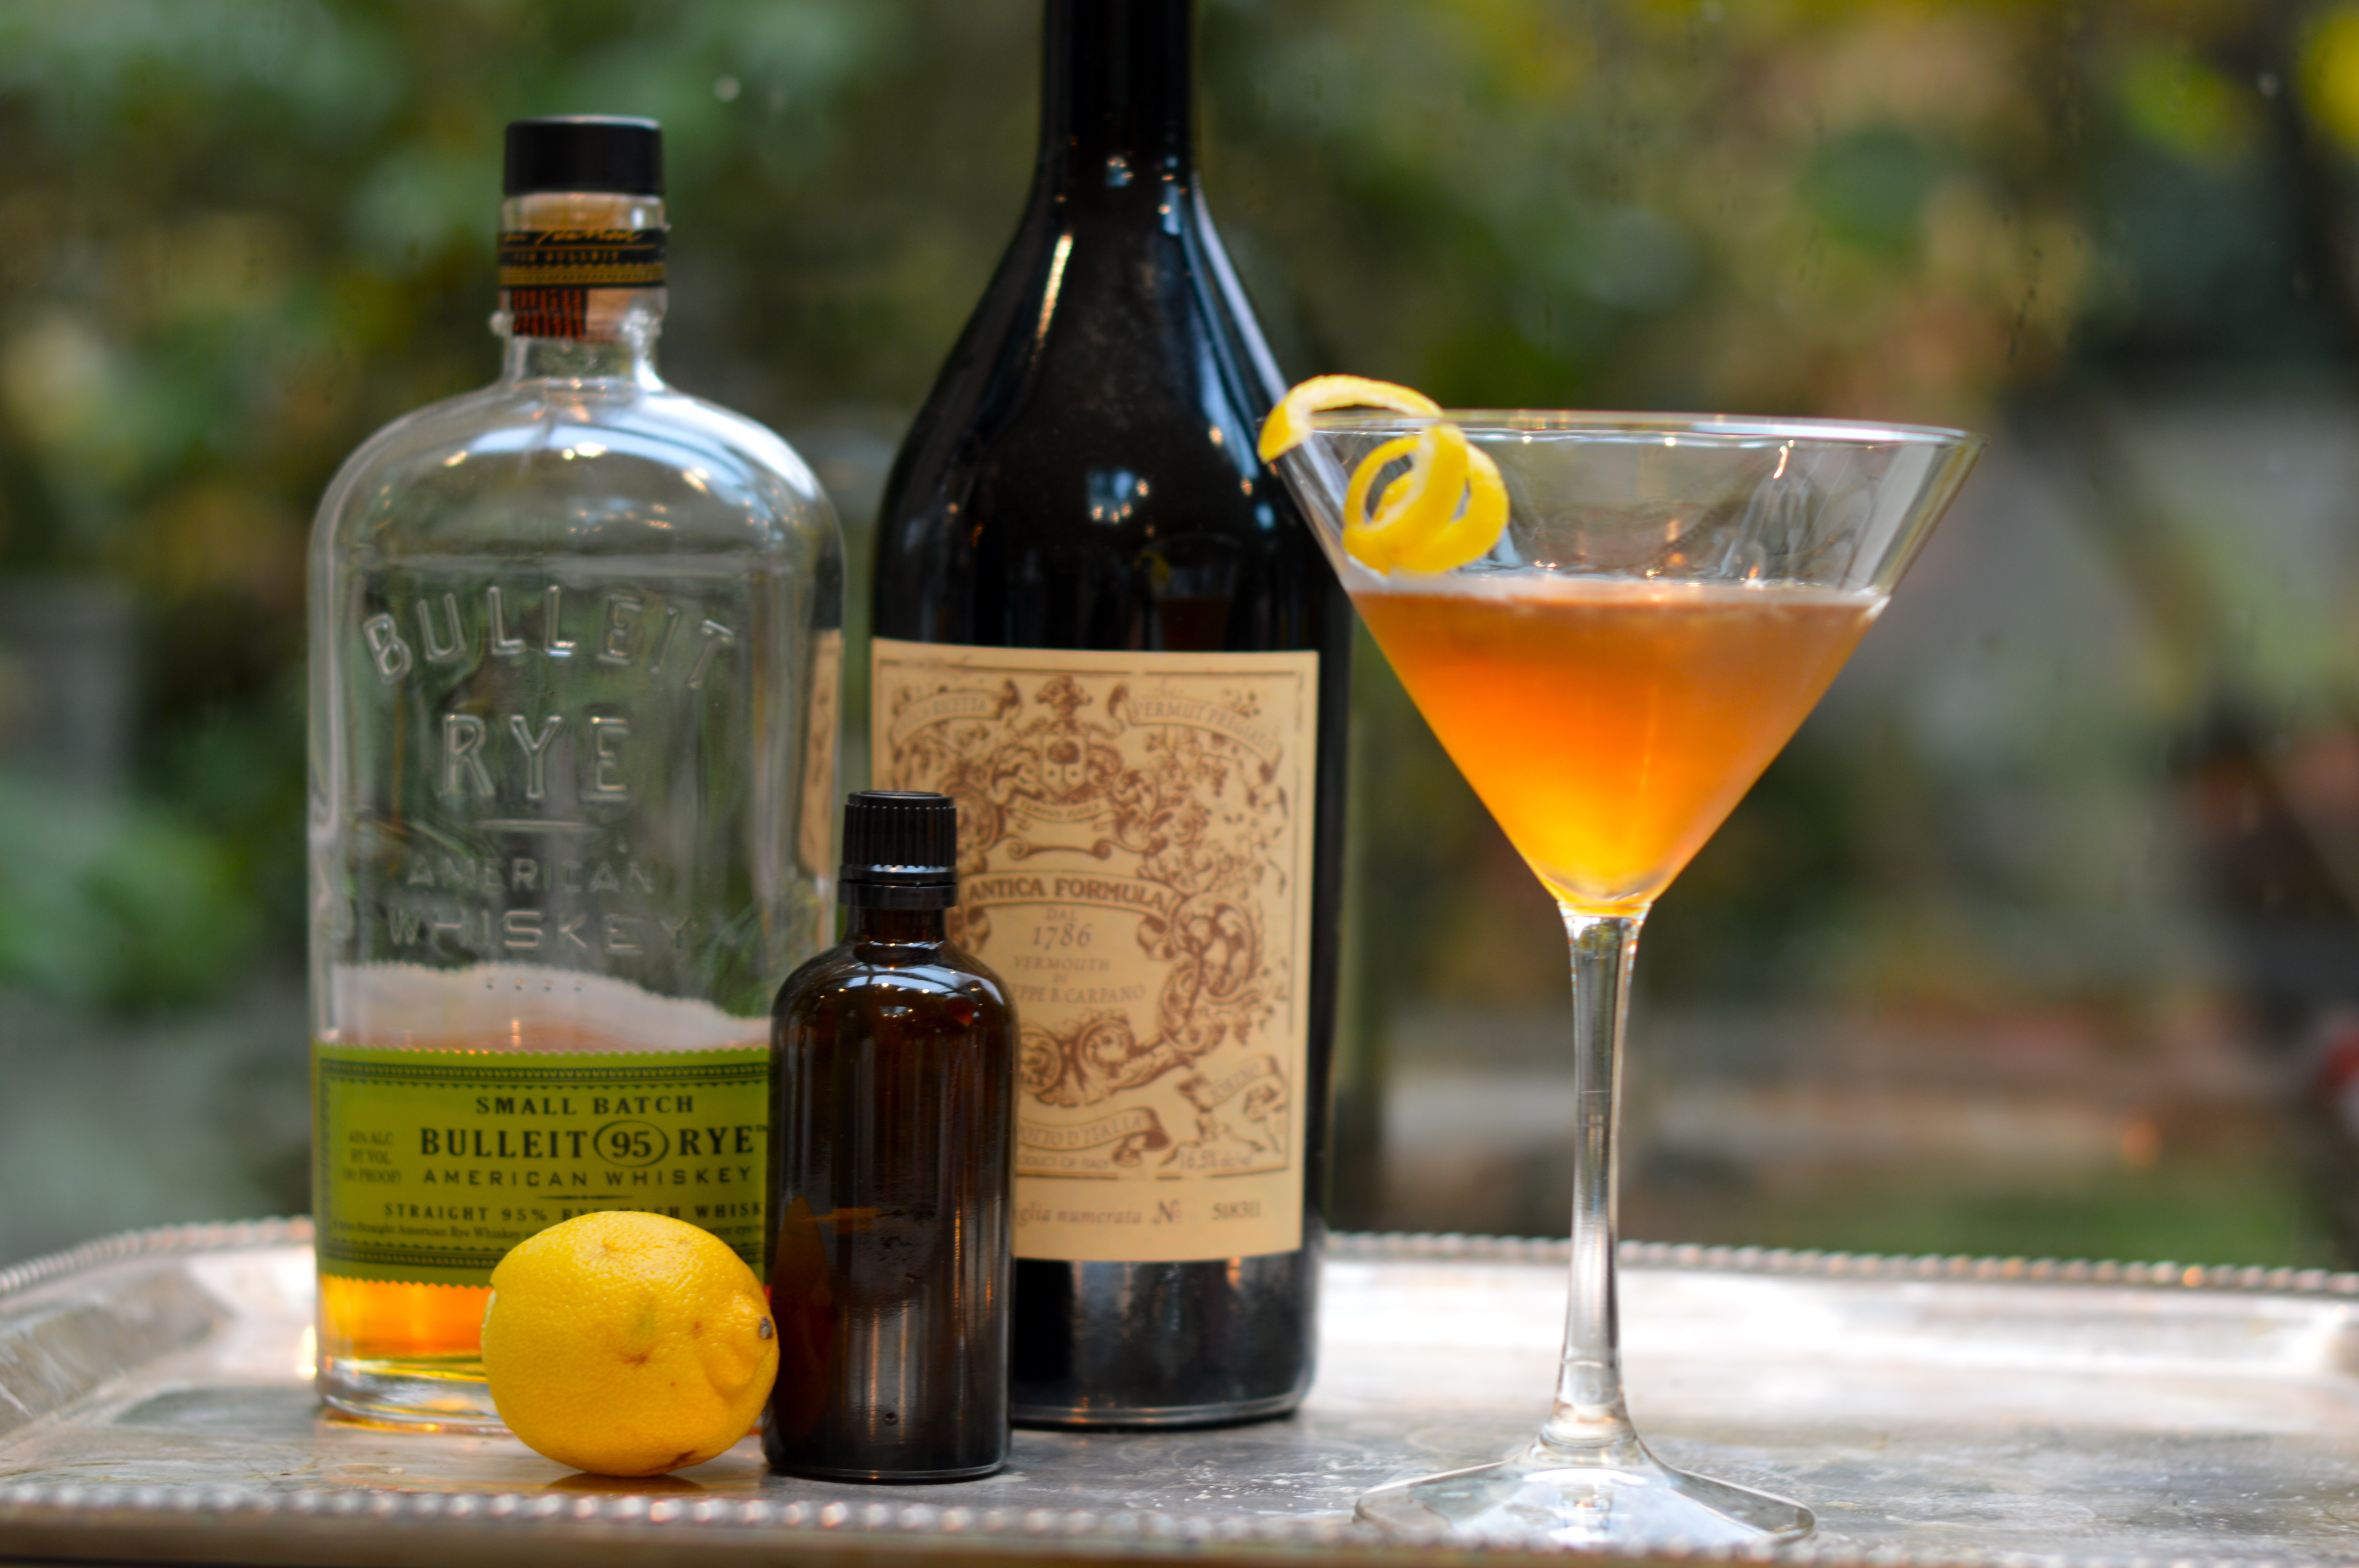
This classic cocktail was my grandmother’s favorite.  Listing it here is a nod to her and how eminently hip she was.

1 3/4 ounces rye whiskey or bourbon

2/3 ounce sweet vermouth (Carpano Antica formula is my favorite)

dash of bitters (homemade orange bitters, recipe below, was used)

maraschino cherry or twist of lemon (my grandmother always drank hers, “Up with a twist.”)

2)  Blessed Event

DSC_0048

As I mentioned above, this is my current fave.  The renowned bartender, Erik Hakinen, at Zig Zag Cafe is credited with its creation, as a twist on the classic Boulevardier.

1 ounce rye whiskey

3/4 ounce sweet vermouth (Carpano Antica formula)

3/4 ounce Campari

1/2 ounce lemon juice

3)  Soda with Bitters

DSC_0051

I loved the article written about the refreshing nature of this simple beverage found here on The Kitchn.  Bitters are known to have a medicinal quality and they add a light and refreshing, yet complex addition to a glass of soda.

Dash or two of bitters (Peychaud’s brand preferred)

Soda water

Wedge of lemon or orange

Cheers!

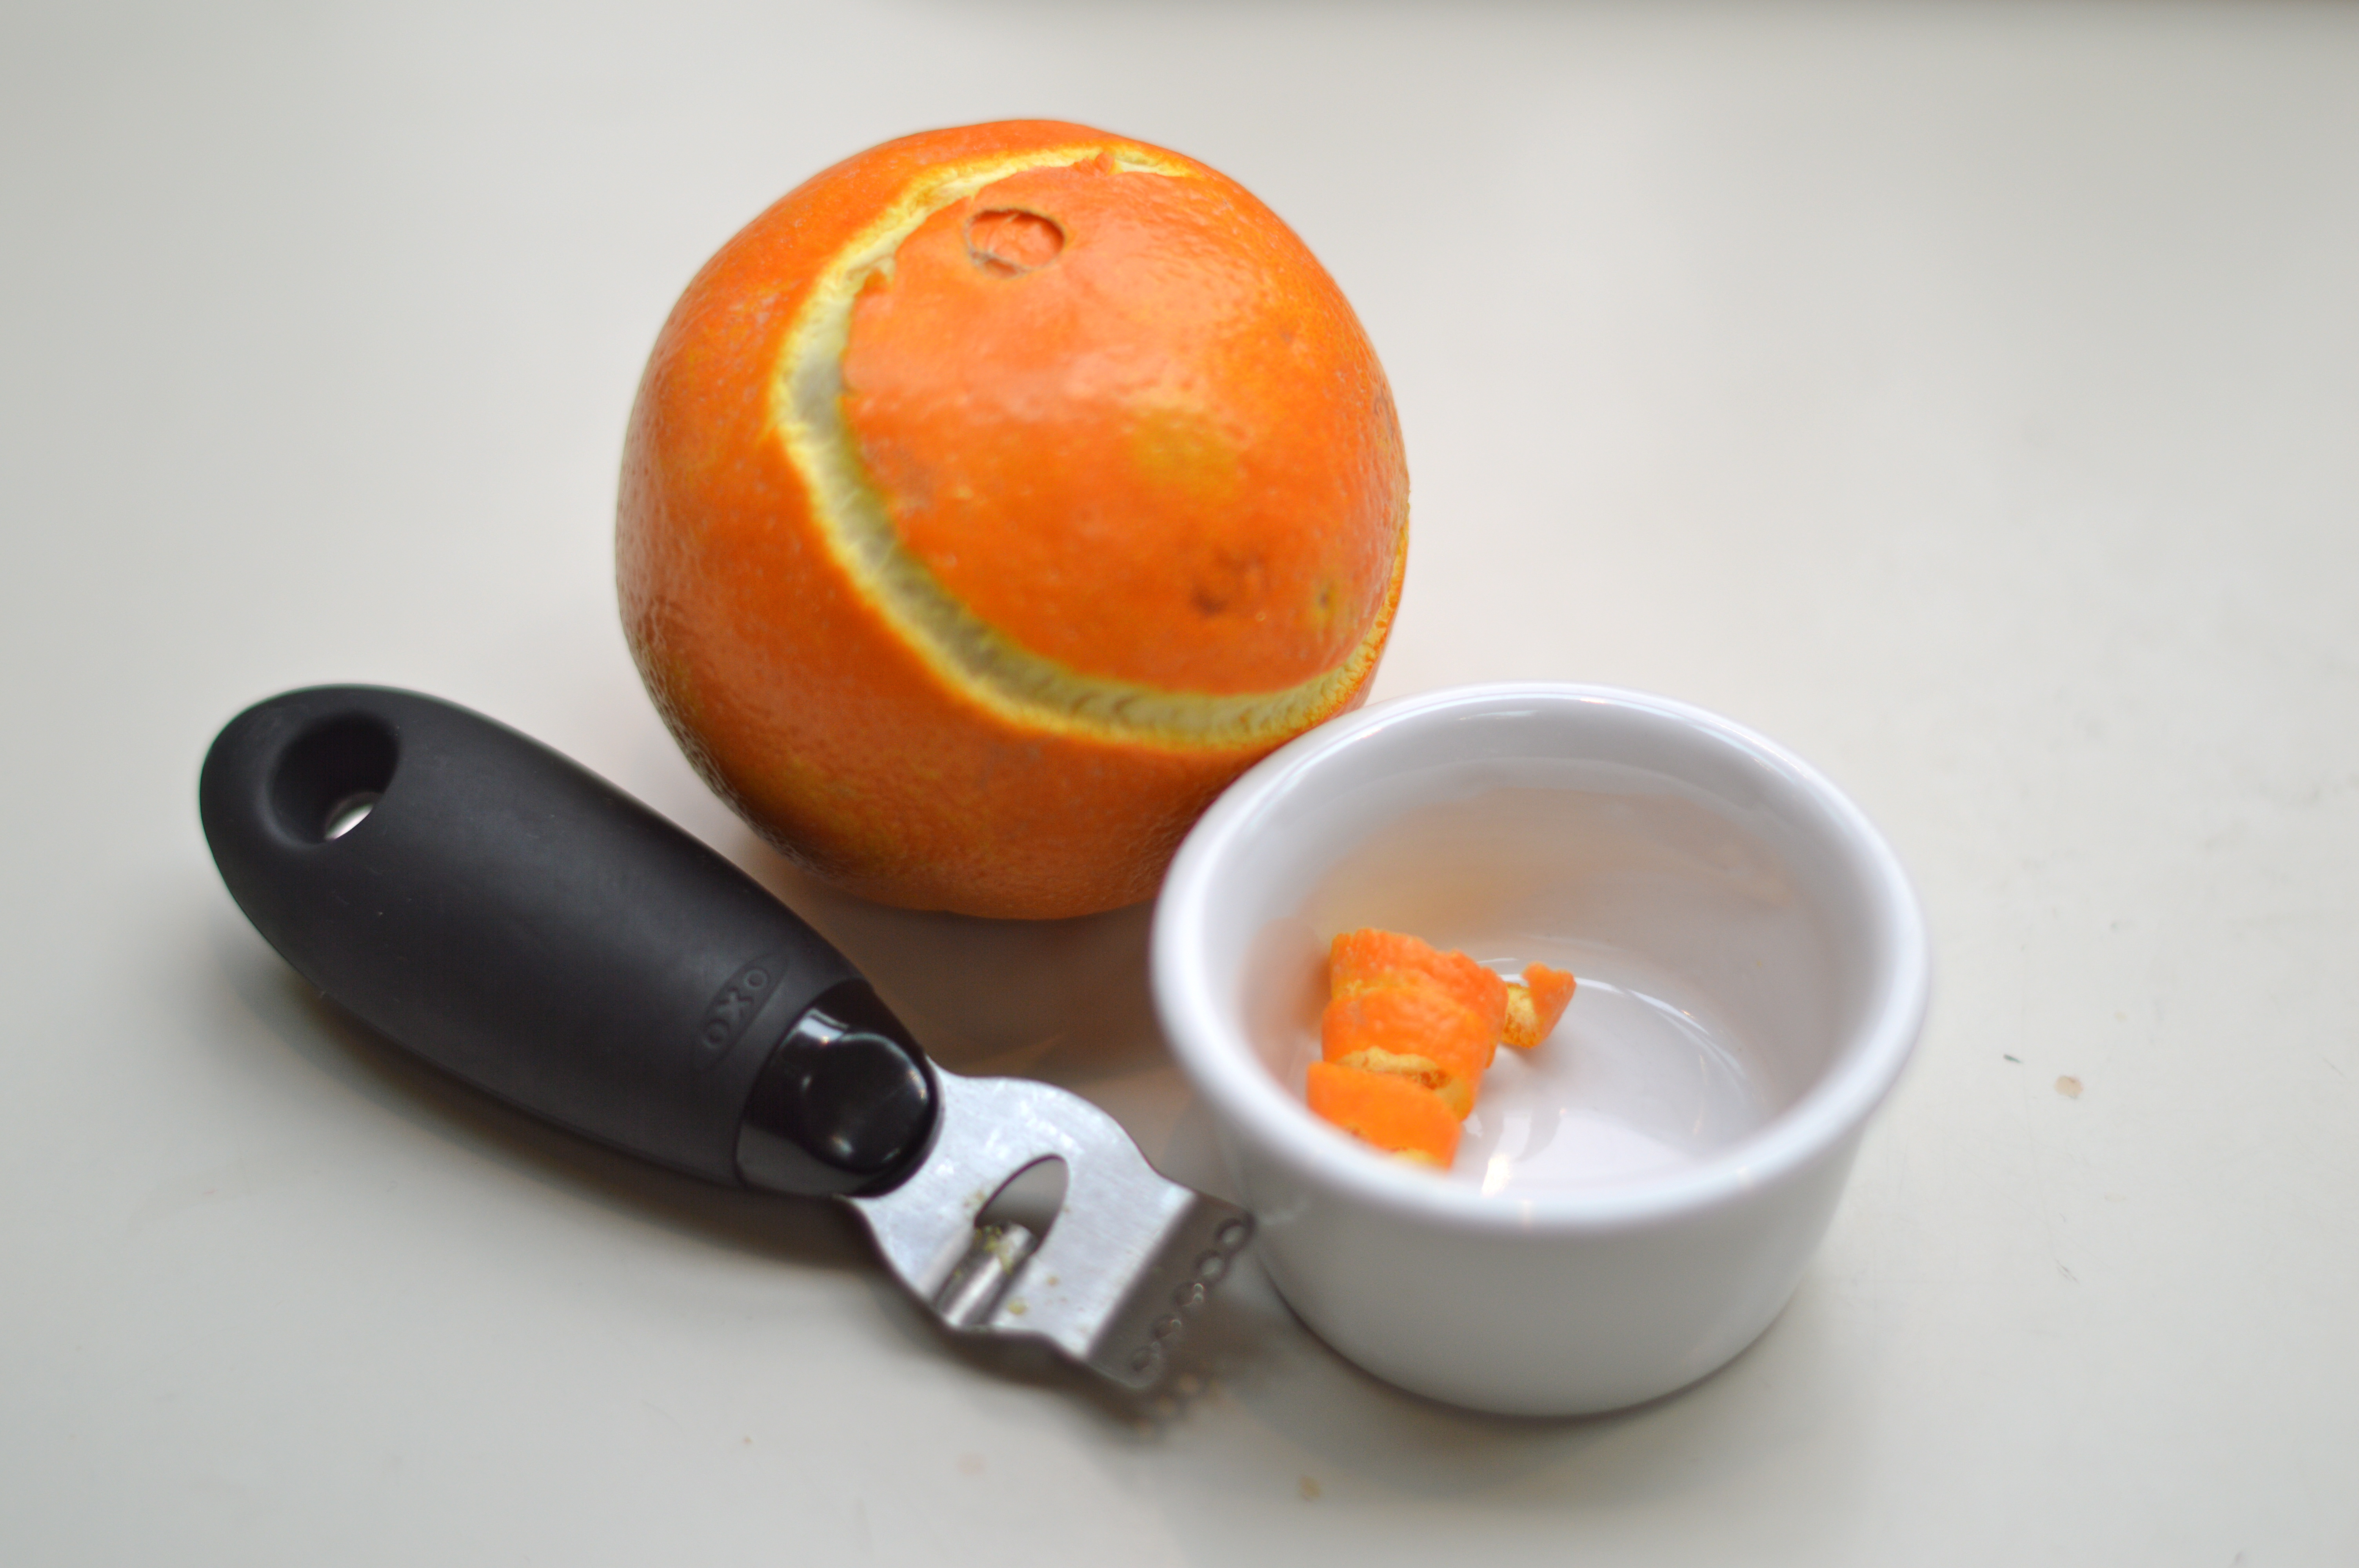
Part 2:  Making Orange Bitters

DSC_0004 DSC_0007 DSC_0016 DSC_0043 DSC_0047 DSC_0049 DSC_0051 DSC_0055 DSC_0065 DSC_0068 DSC_0073 DSC_0075 DSC_0084 DSC_0085 DSC_0094 DSC_0096 DSC_0101

Orange Bitters

  • 2 oranges 
  • 1 bottle (750 ml.) Everclear* (grain alcohol)
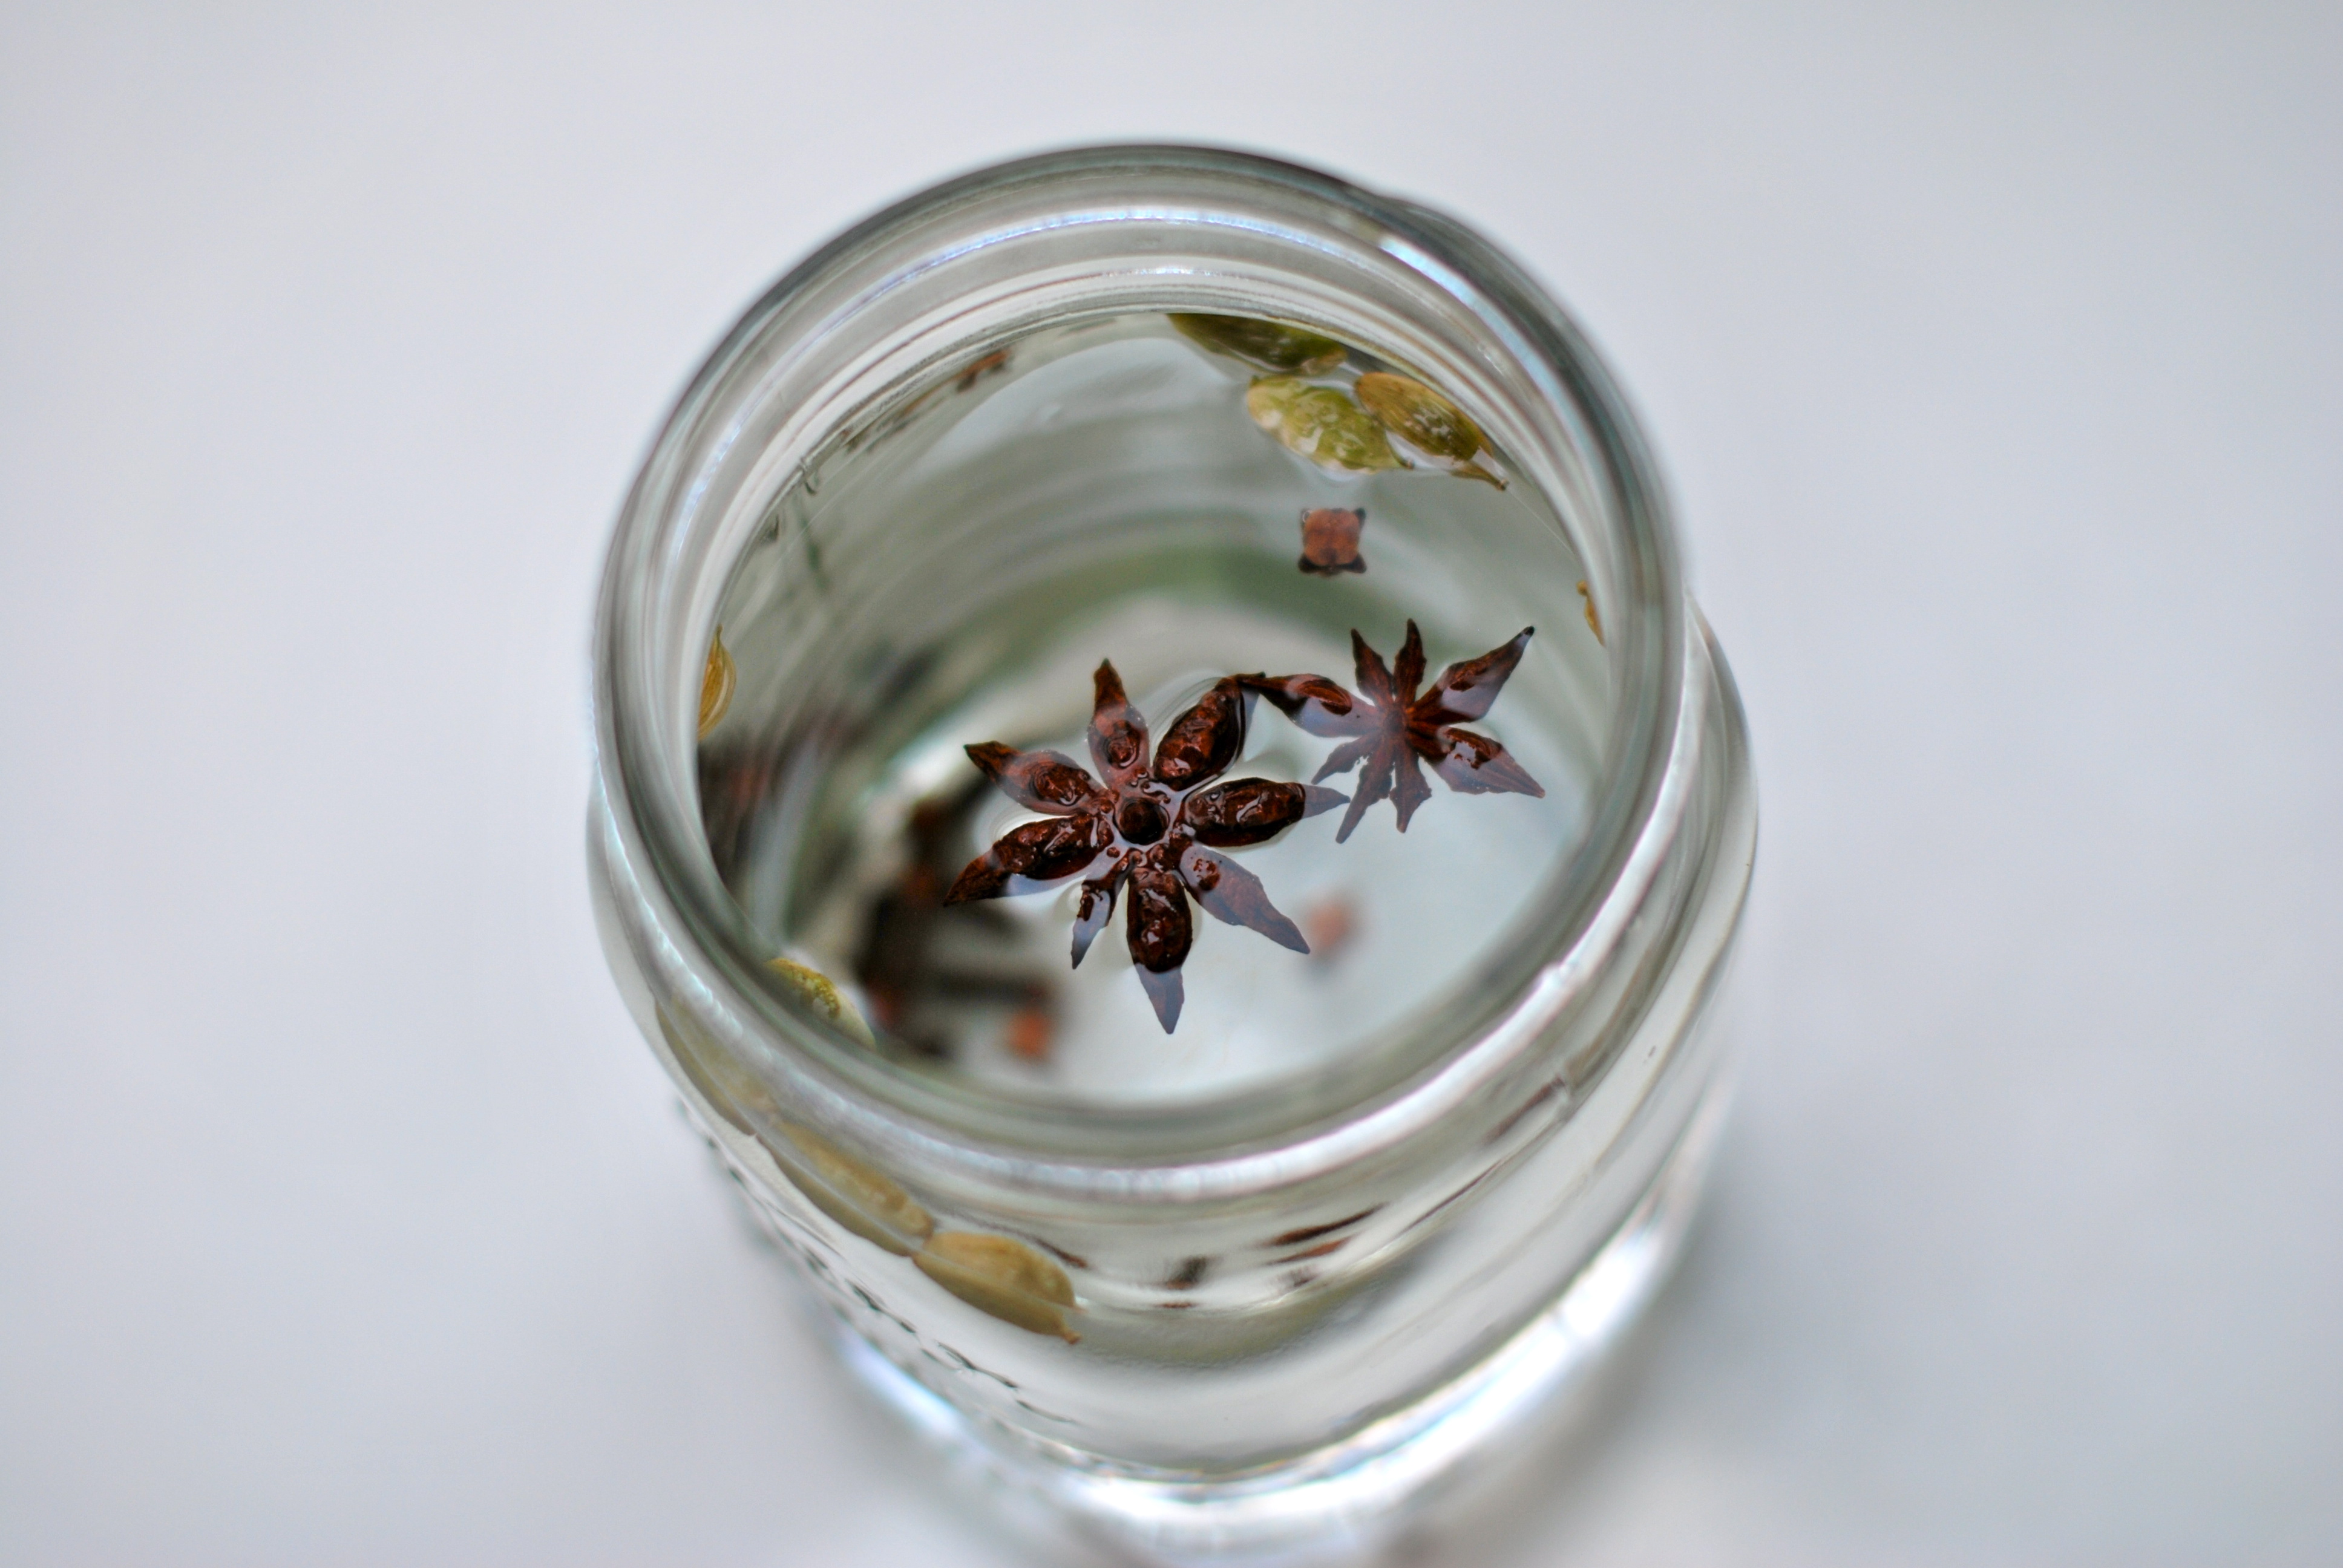
  • 10 cardamom pods
  • 2 whole star anise pods
  • 3 cinnamon sticks (each 2 1/2 in.)
  • 1 teaspoon whole cloves
  • 1 tablespoon plus 1 tsp. chopped fresh ginger
  • 1 cup sugar 

Preparation

  1. Preheat oven to 250°. Remove zest from oranges with a vegetable peeler and put zest on a baking sheet (save fruit for another use). Bake until zest dries, starts to curl up, and begins to brown, 20 to 25 minutes. Let cool.
  2. Put all ingredients except sugar in a 1-qt. glass jar and seal tightly. Let sit in a cool, dark place for 2 weeks.
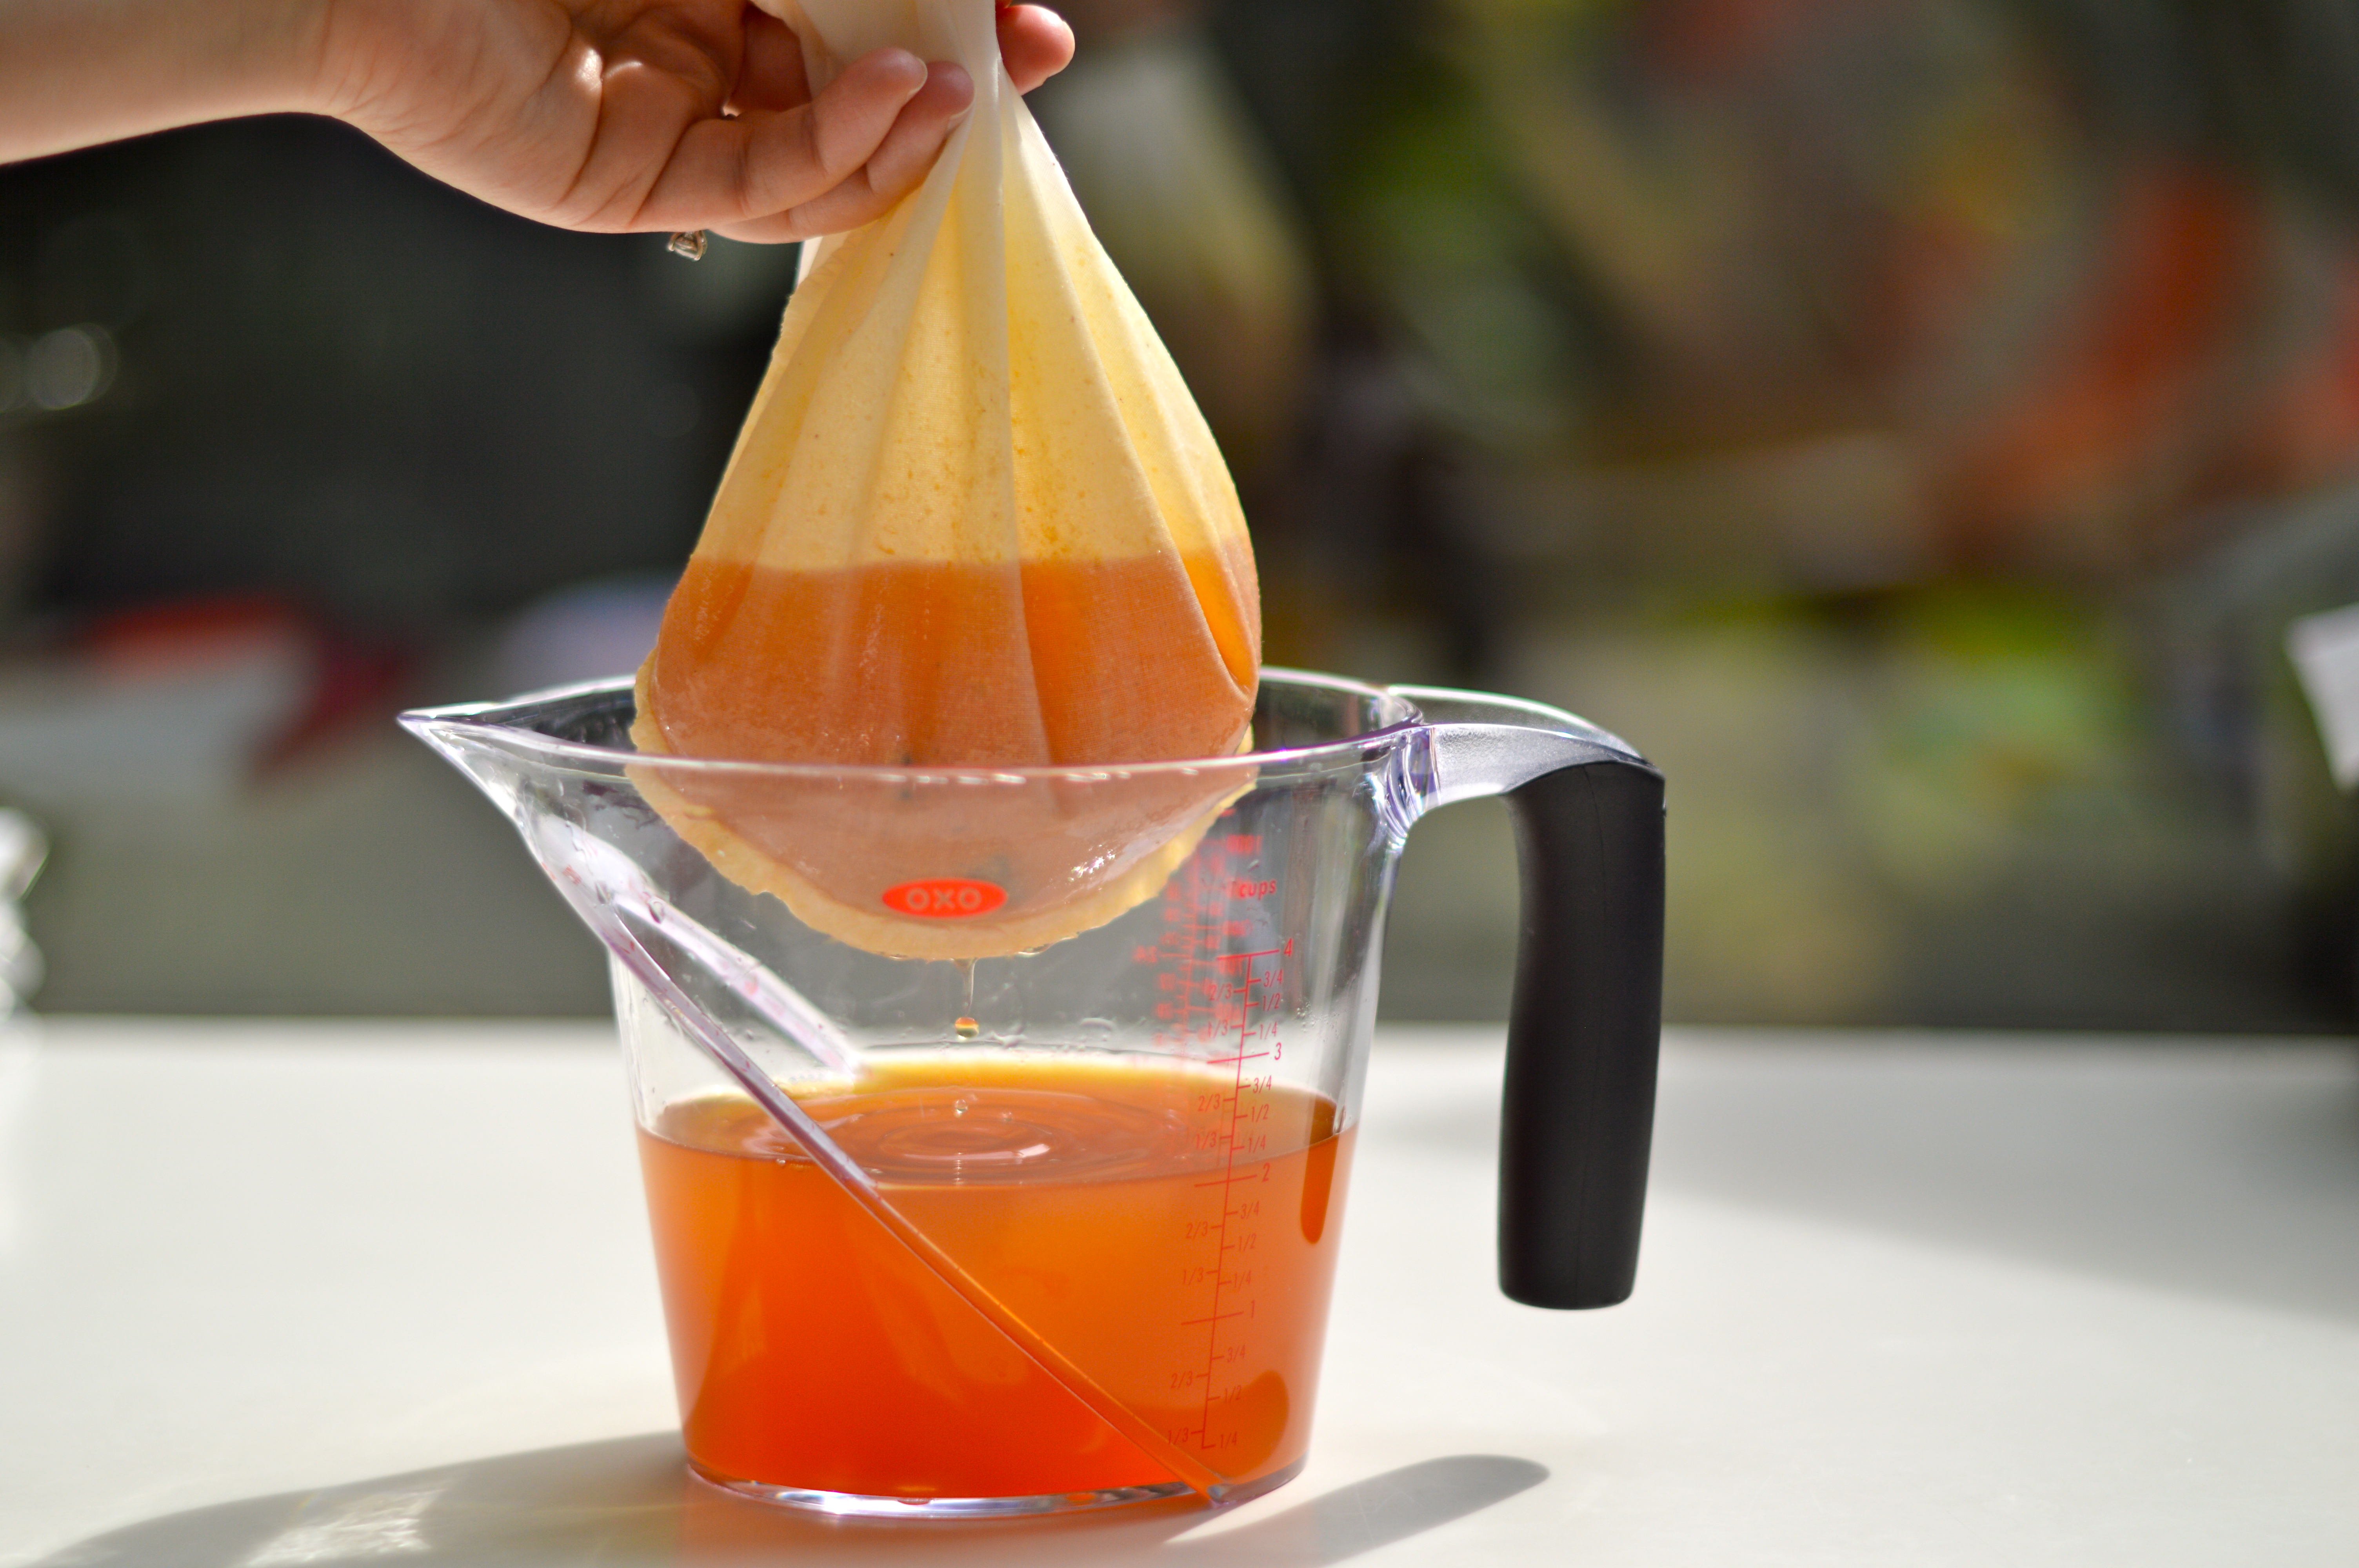
  3. Strain liquid through cheesecloth into a 1 1/2- to 2-qt. glass jar (save spice flavorings) and set aside. Put flavorings in a small saucepan with 2 cups water. Cover and bring to a boil, then reduce heat and simmer 10 minutes. Set aside.
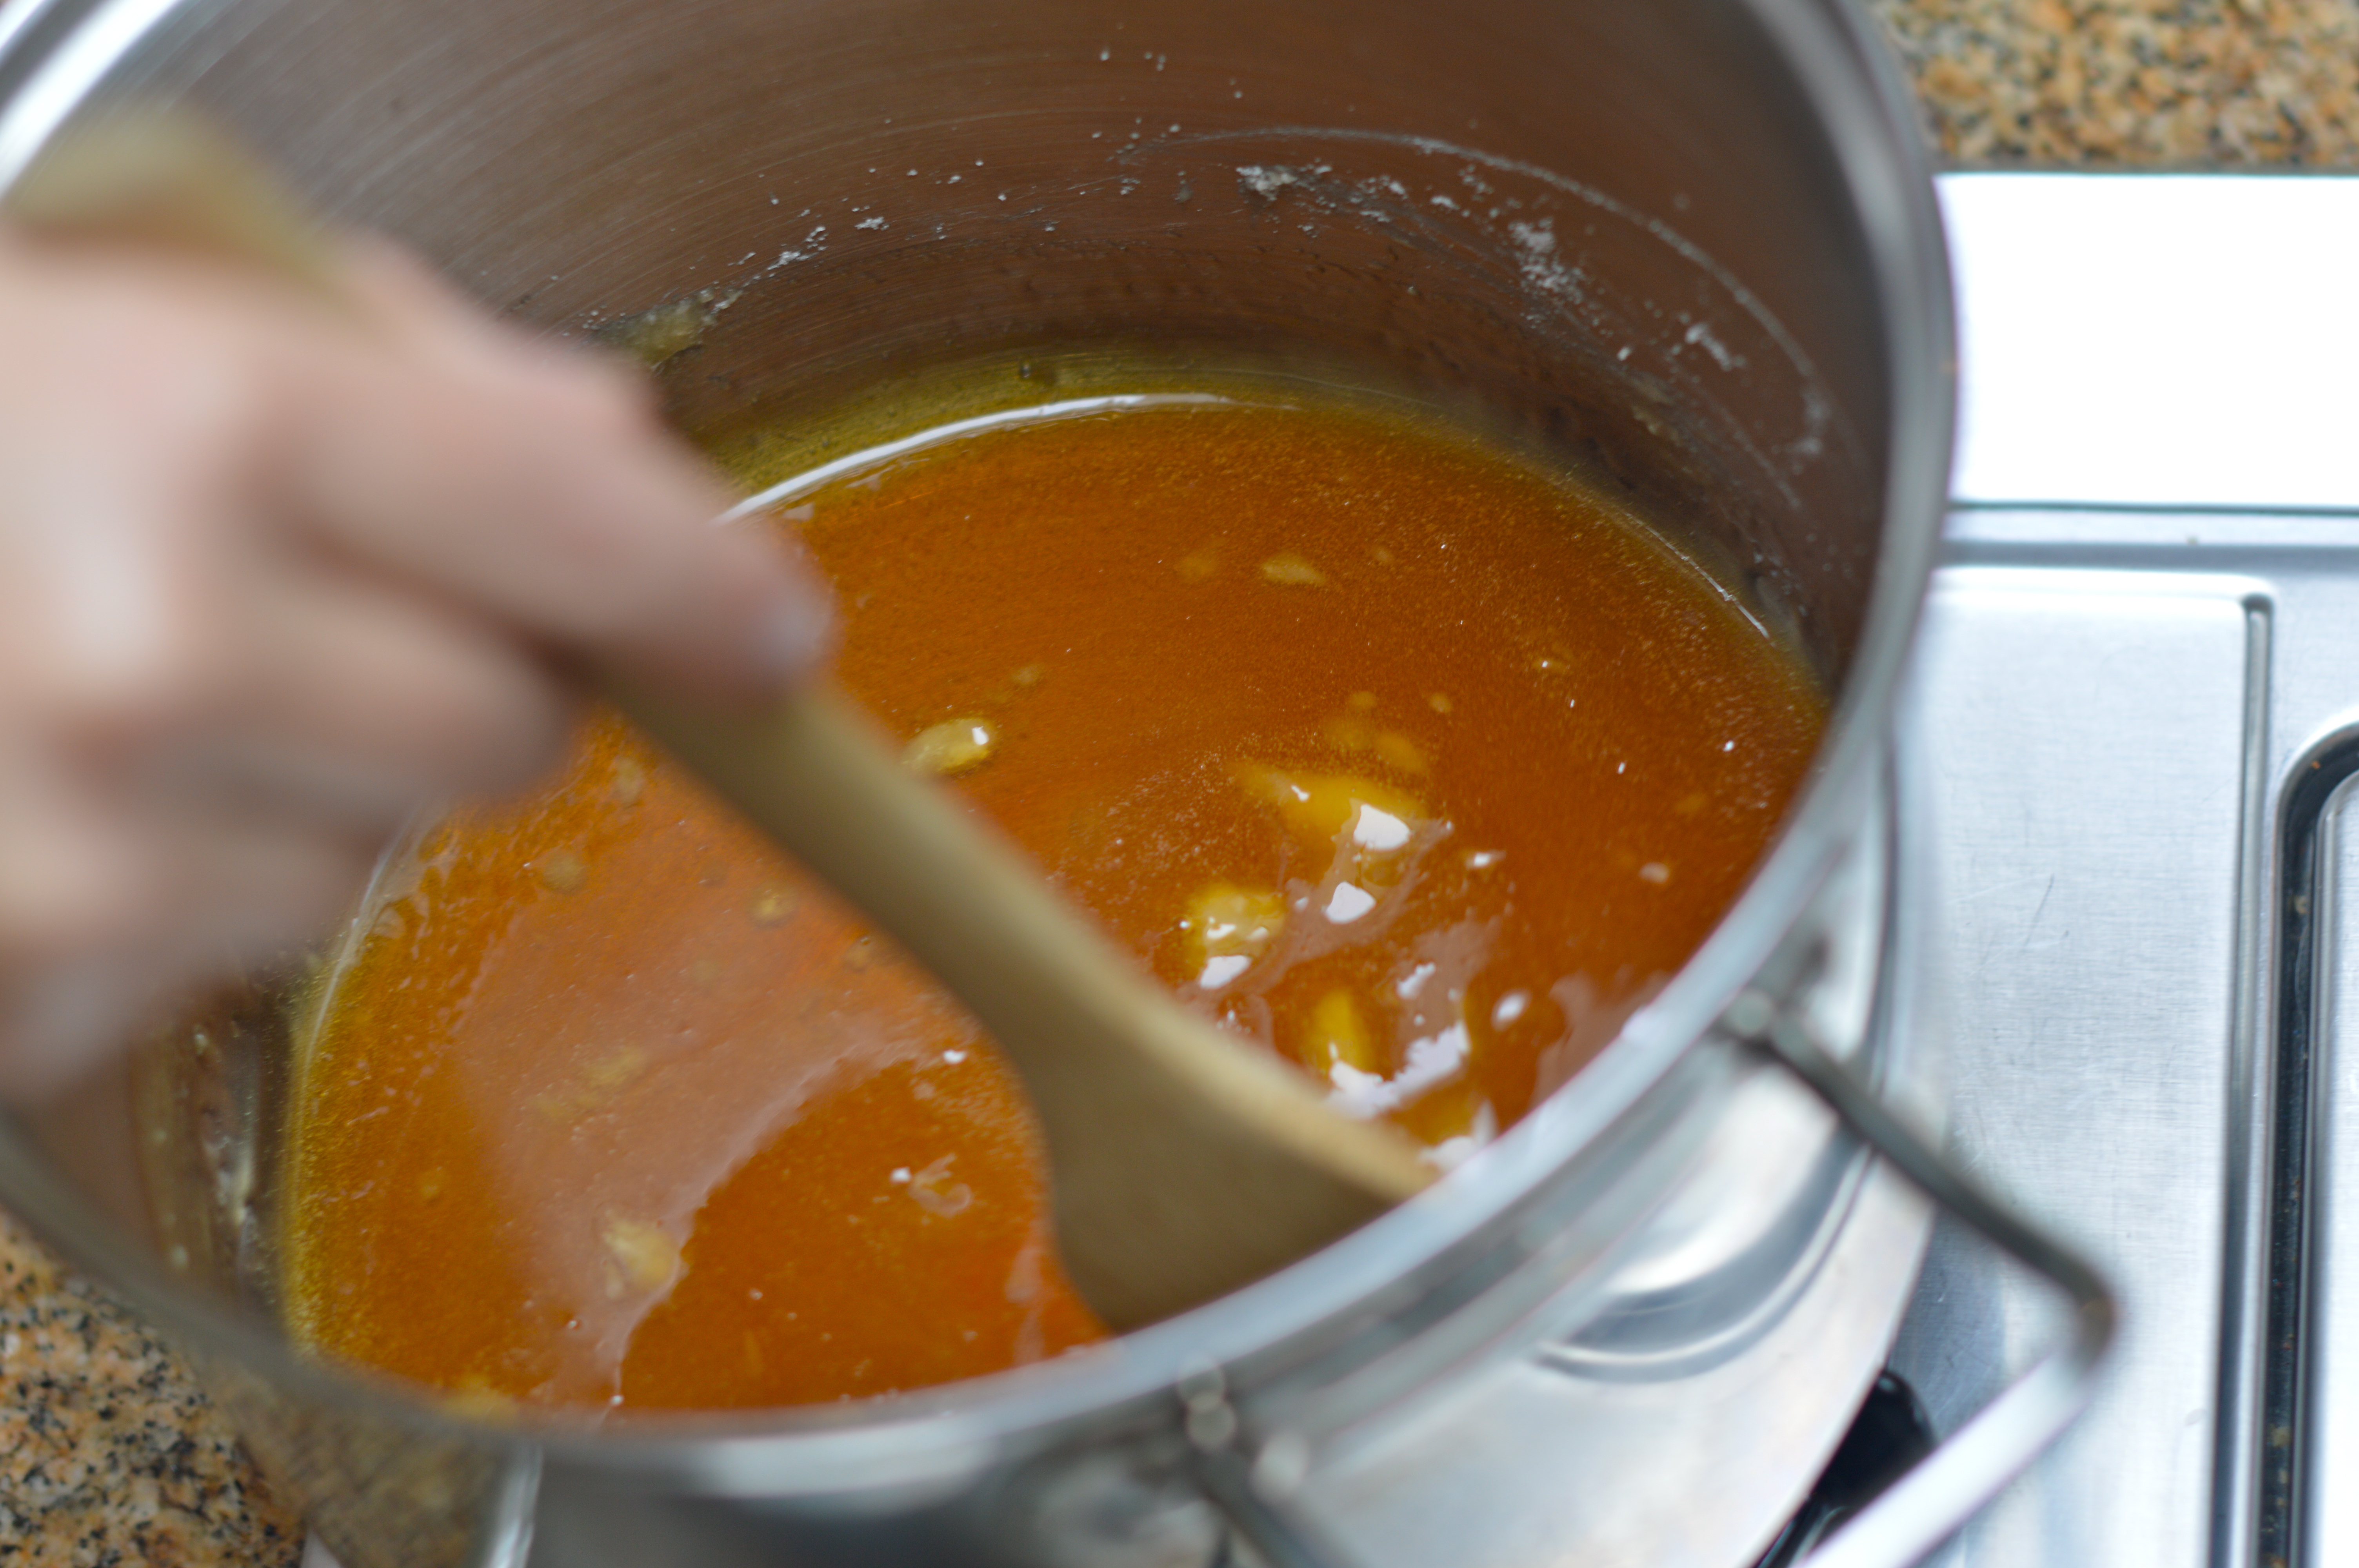
  4. Cook sugar in a small saucepan over medium-high heat, lifting and shaking pan occasionally, until sugar caramelizes and turns deep amber, 8 to 10 minutes. Pour caramel into liquid in pan (it will bubble furiously and may firm up). If needed, return pan to medium heat and cook, stirring, for a few minutes until caramel melts again.
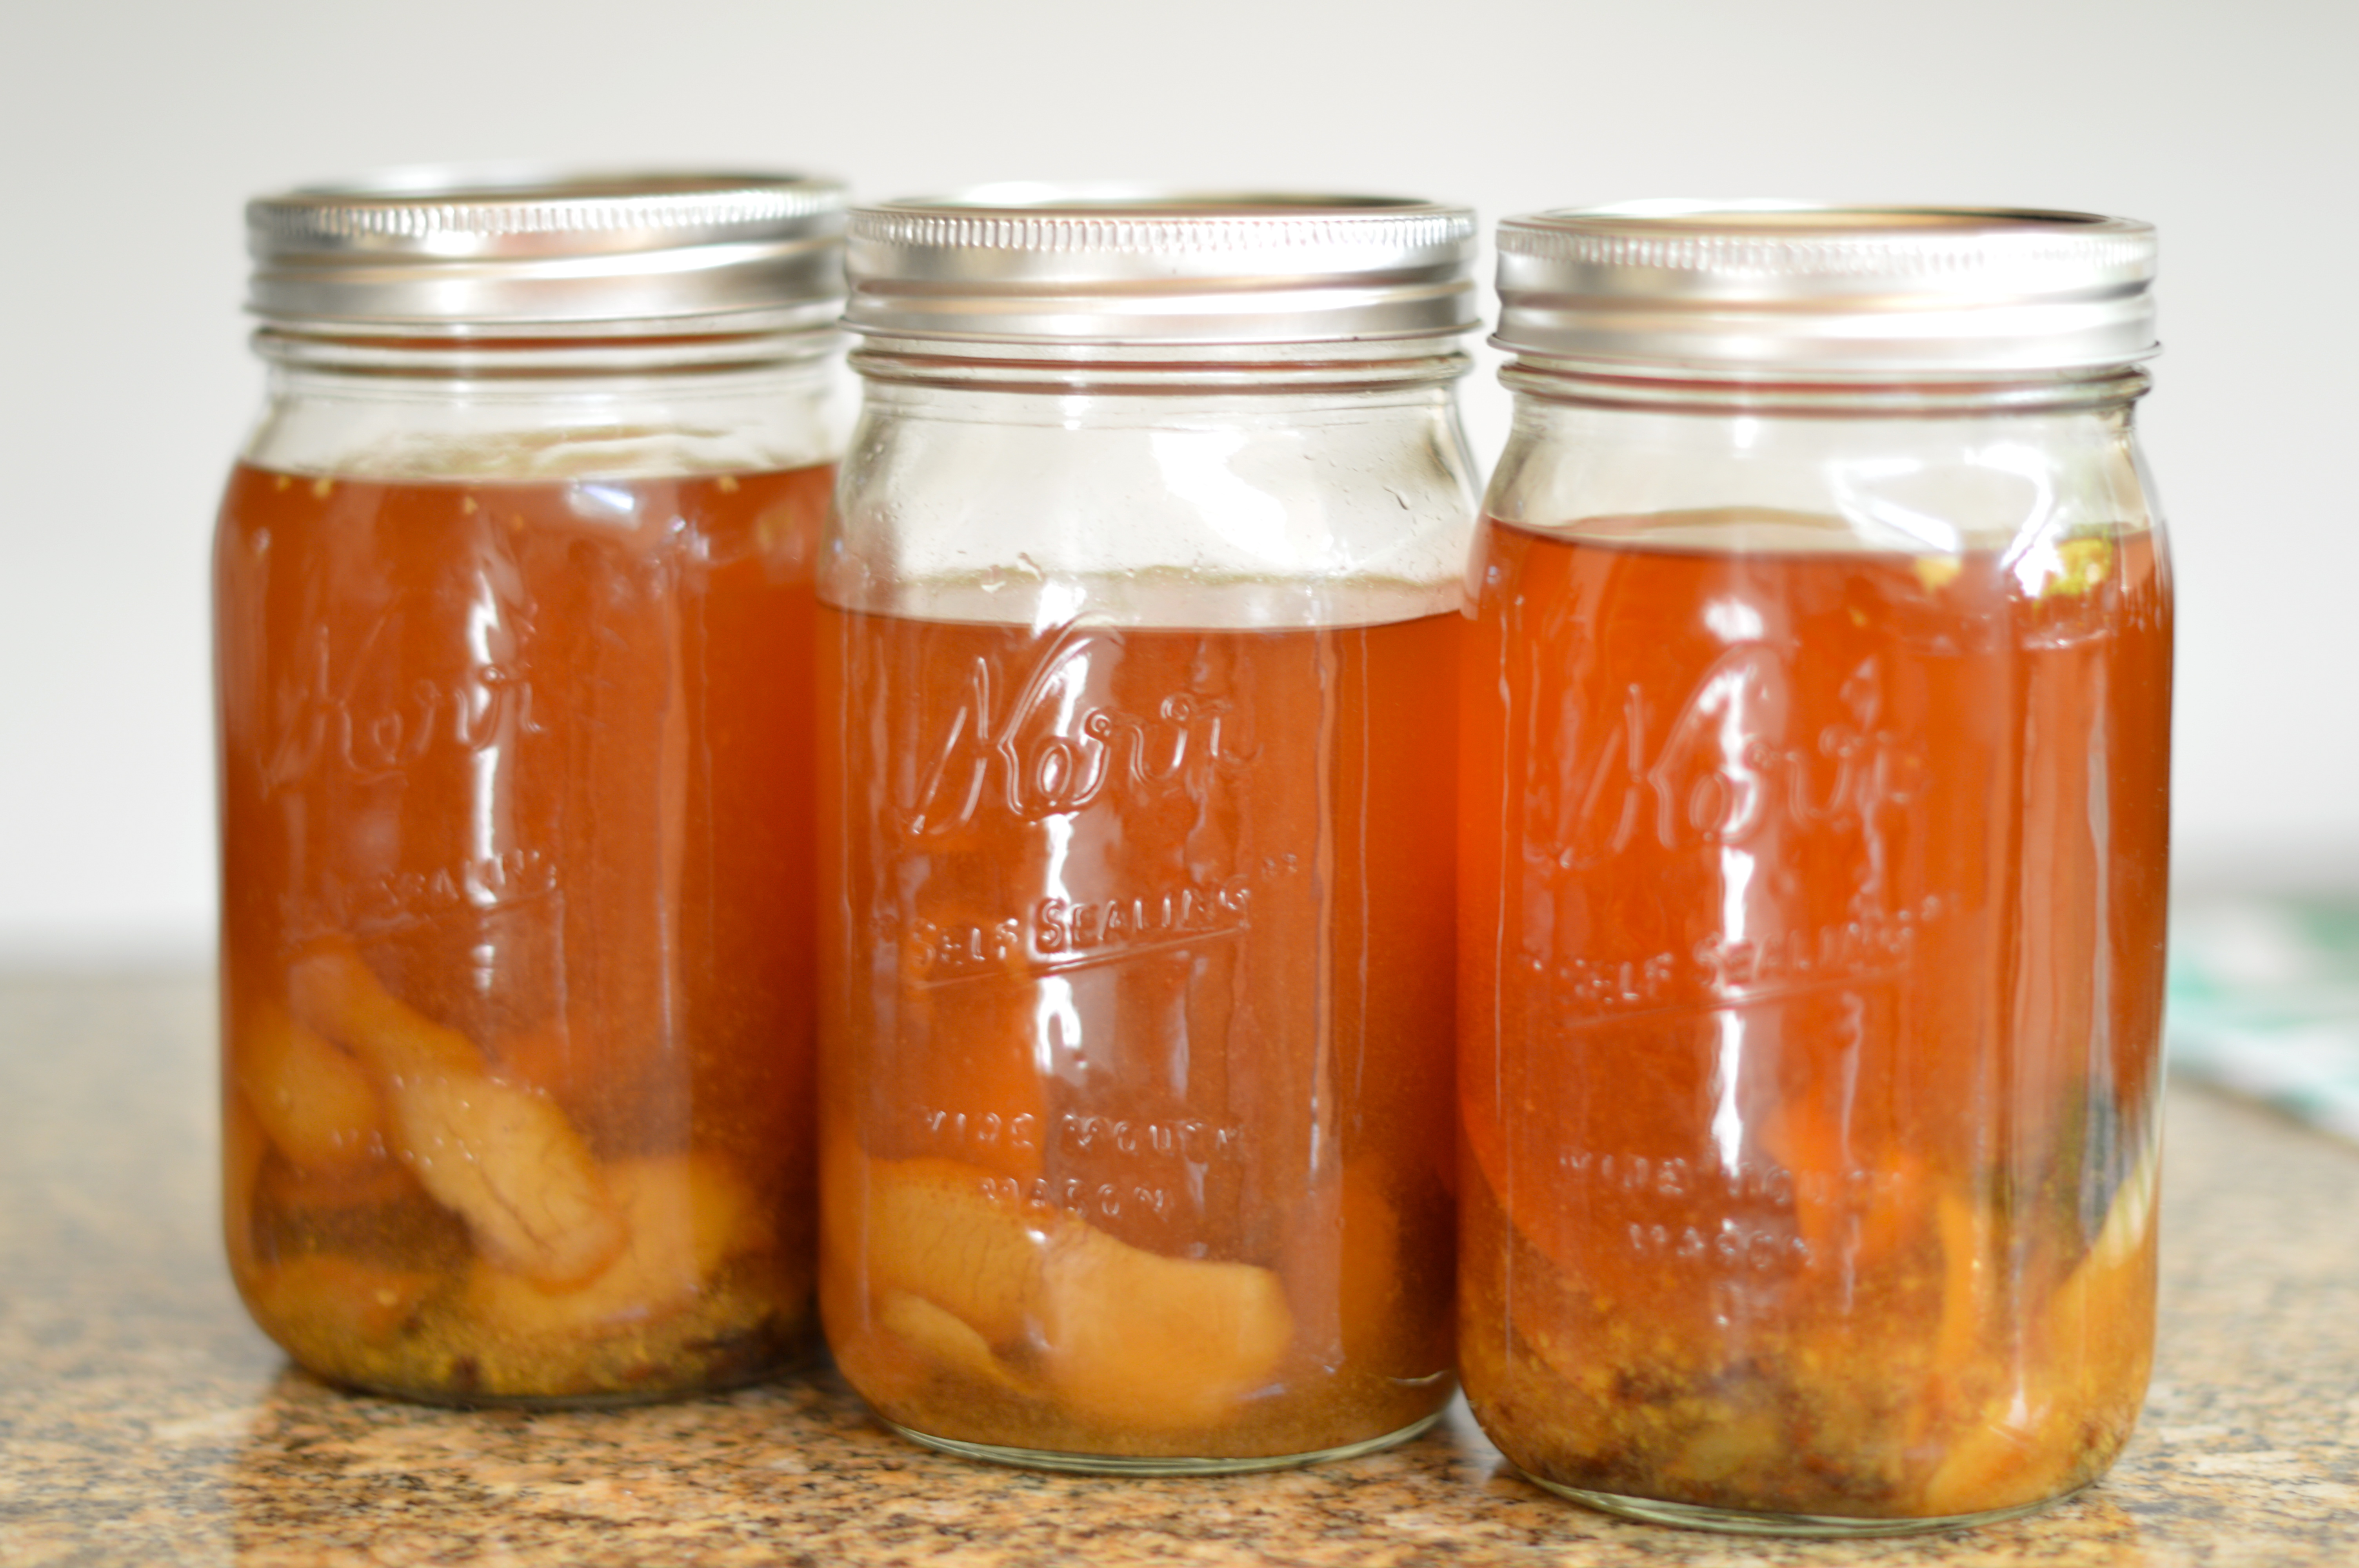
  5. Set pan in a bowl of ice water until liquid is cold, about 10 minutes. Pour into jar with first infusion. Seal and let stand in a dark place 5 days.
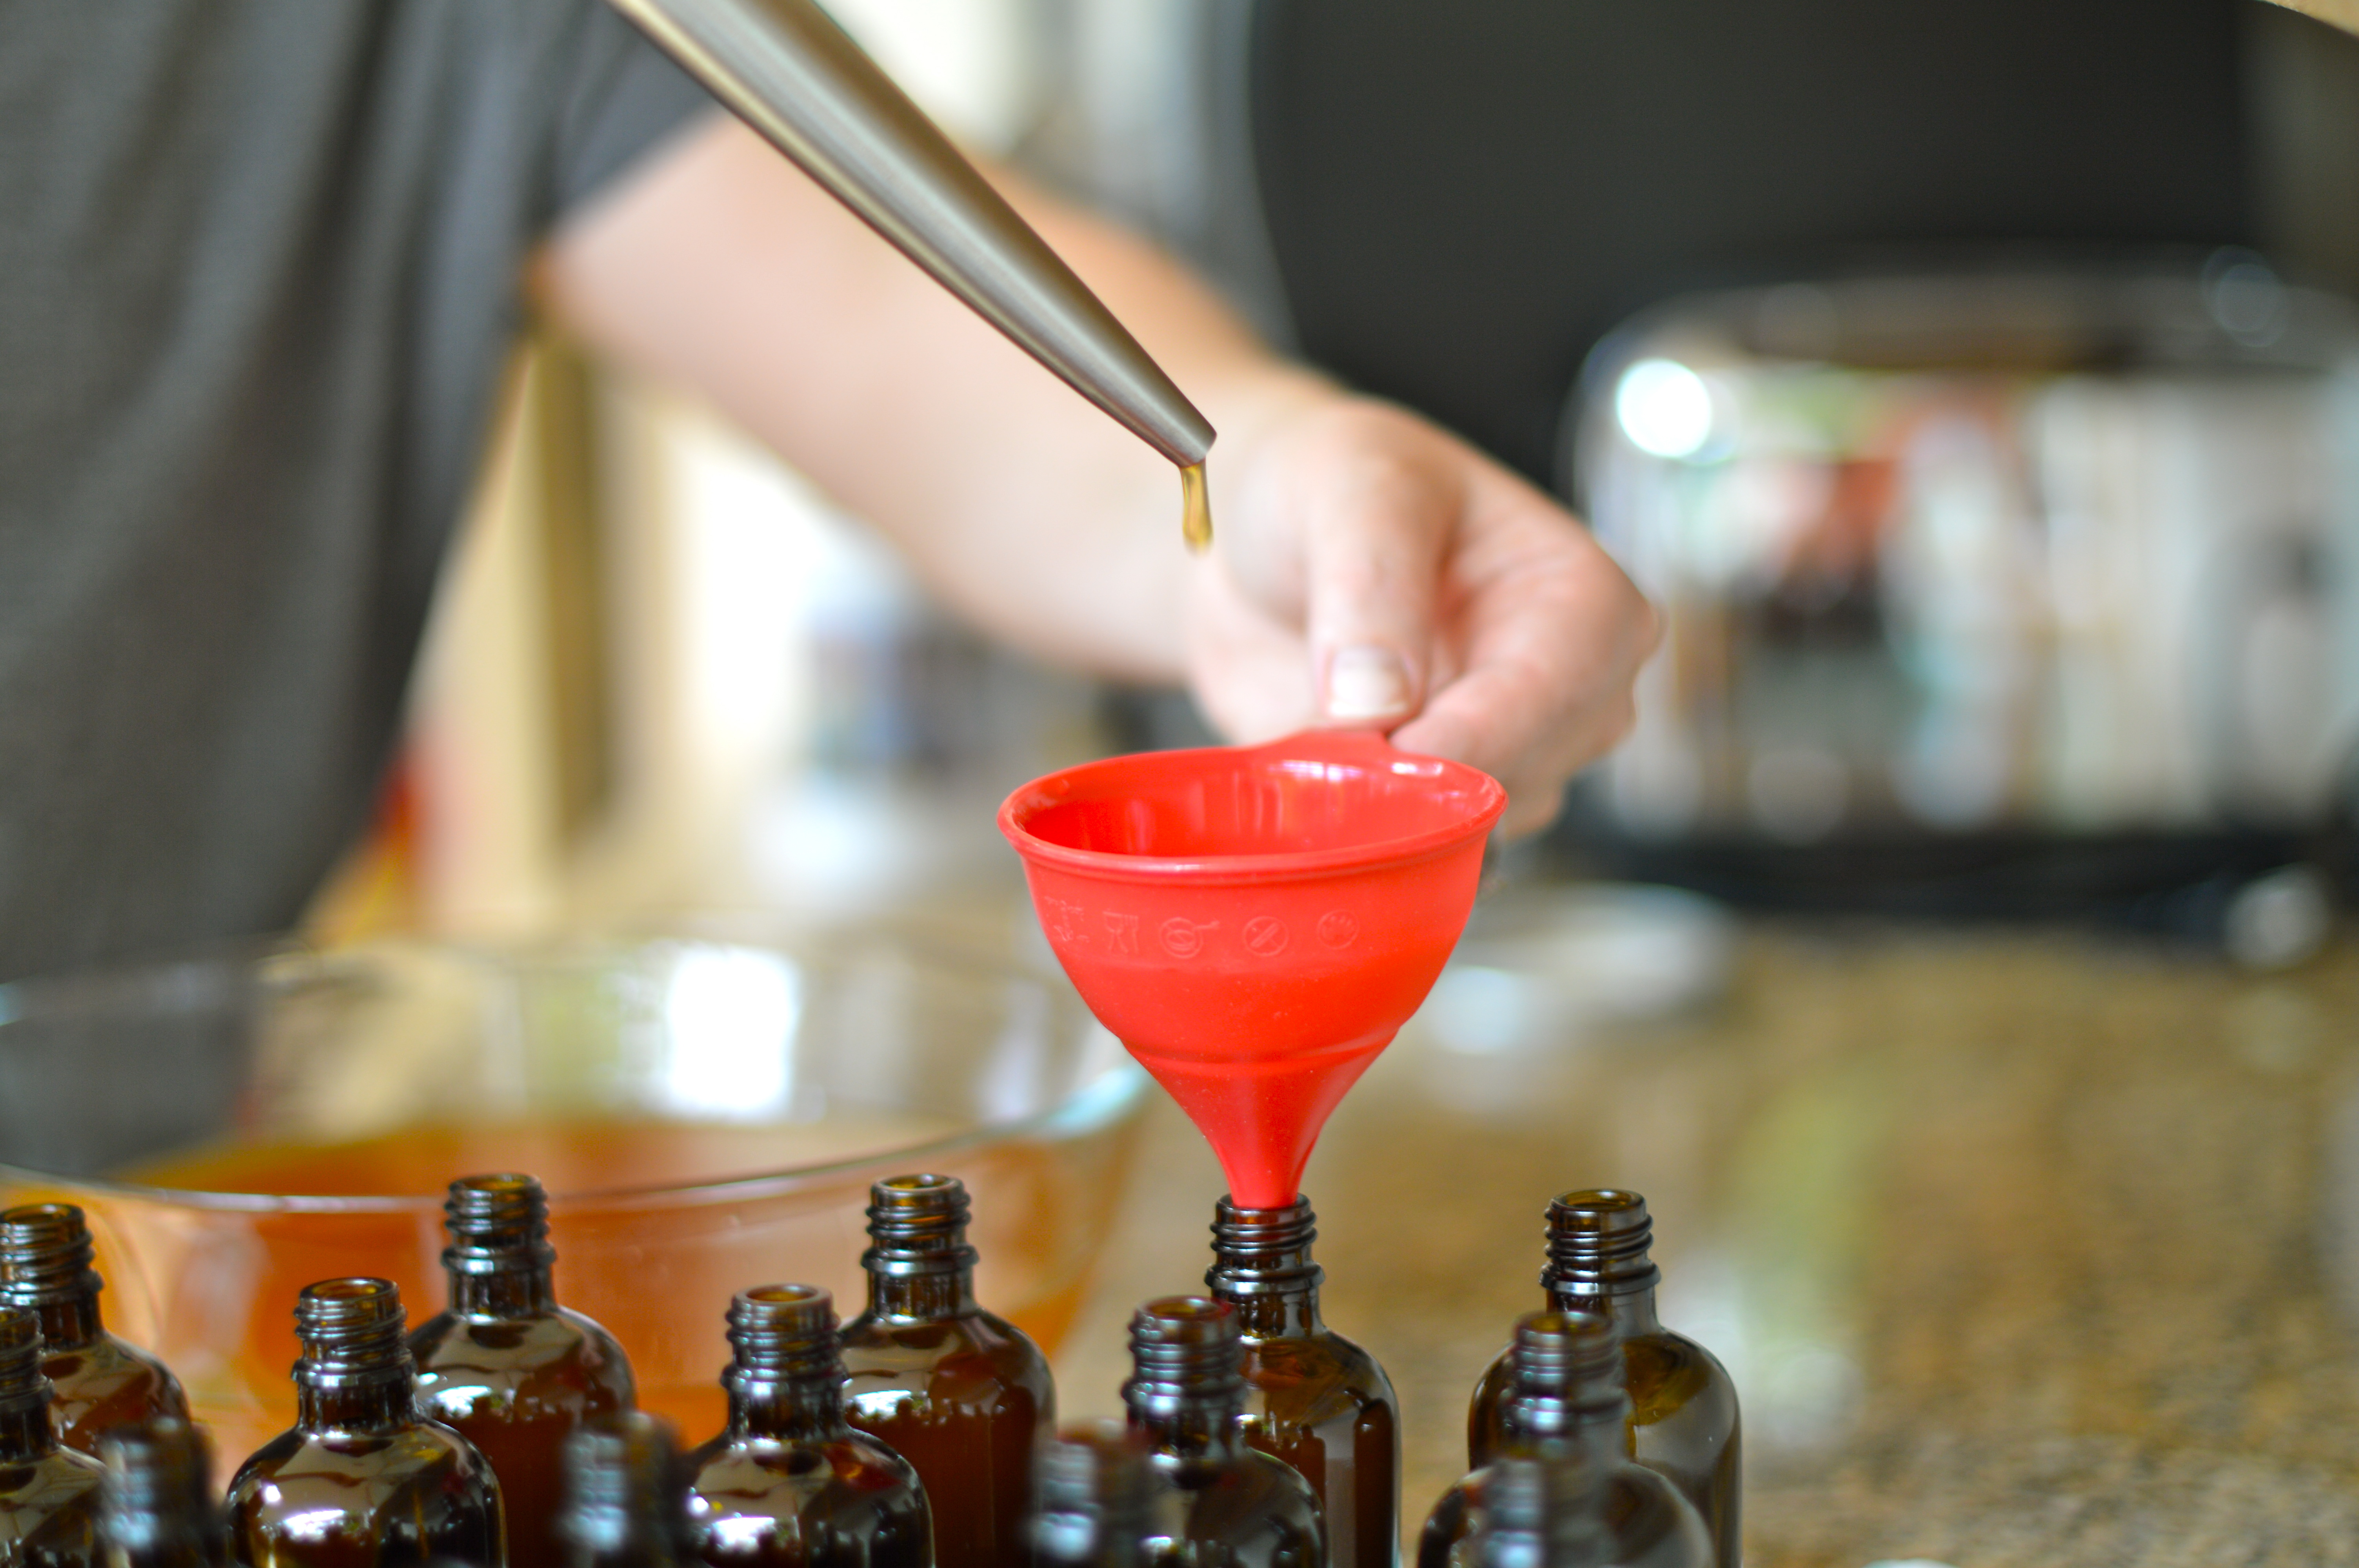
  6. Strain final mixture through cheesecloth into a glass measuring cup and discard flavorings. Divide bitters into small jars and seal tightly.
  7. Make ahead: Up to 1 year, chilled.
  8. Bottle it: 7.5-in. clear glass bottles
I am so excited to have tried this DIY recipe.  It turned out beautifully and some of you will be receiving it this winter for Christmas.  Now, you will, potentially, know what to do with it!!

Enjoy!

Figs in the PNW

DSC_0017

So it was brought to my attention this summer that figs can grow (and even ripen) in Seattle!  I had no idea.  Ciscoe Morris is a gardening expert in the Seattle area and he tells us that one can grow figs in the PNW! (click here for the seattletimes.com article)  If this bit of news excites you as much as it excites me then check out Raintree Nursery to learn more about the different types of figs that will do well in your climate.  I loved a quote from their site that reads, “If you are among the many people who associate a fig tree with only a hot dry climate, you are in for a delicious surprise.  Fig trees thrive in the Pacific Northwest and much of the nation.”  A delicious surprise, indeed…

If you have been paying attention, you might know that I have a thing for figs.  I might even be developing a reputation… (fig jam, panini sandwiches, and I haven’t even told you about the fig painting that hangs in my dining room!  Yeesh.)  So, after learning about the above, I thought, “What a perfect thing to ask for for my birthday this year!”  Well, wouldn’t you know it, two fig trees were already riding around in my husbands backseat.  I believe his immediate thought upon receiving my fabulous brainstorm, via text, was something along the lines of, “Seriously, woman!?!?”  ESP or just on the same page… we’ll never know.

So… my birthday present this year was a couple of fig trees that someday, just might grow into big trees and maybe, just maybe… will produce figs!!  The giving and planting of a few trees is just about the best birthday present a girl could get in my book.

IMG_1976

This slideshow requires JavaScript.

Summer Pool Party Birthday

What says “summer has arrived” better than a pool party?  We celebrated Sam’s 6th by diving into his birthday festivities.  As long as one has enough parents on hand to watch the swimmers, a pool party can be about as easy a party to throw as there is.  The kids couldn’t have been happier splashing around!  Just add water and let the fun begin!!

We kept the food super simple by serving sandwiches and watermelon.  I felt inspired to create a “water noodle garland” that I saw here.  And the cupcakes topped the Pool Party theme off with aqua blue icing and gummy bears floating around in their own mini-inner tubes (gummy lifesavers)!  I couldn’t resist adding a few sharks to the cupcakes, just to keep things exciting!

Happy Swimming!

DSC_0078_2DSC_0078 DSC_0081 DSC_0082 DSC_0084_2 DSC_0084 DSC_0092 DSC_0097 DSC_0124 DSC_0129 DSC_0131 DSC_0135

Frog Legs Birthday

We are having glorious weather in the Pacific Northwest and you can thank me because all it took was planning Duncan’s 4th birthday party inside to encourage those rays of sun to shine, shine, shine… Like bringing an umbrella on a walk, so too, does planning an indoor birthday party encourage the fickle Seattle sun to appear! (Click here for last year’s party: Rain Rain Go Away)

DSC_0006

Frog Legs is a hidden gem!  It is a kids culinary school, located in the Mount Baker neighborhood of Seattle, and is run by the beautiful and talented Mrs. Frog Legs, Laura Vida.  She is a picture of calm, as children bustle into her home to spend a few hours learning the particulars of measuring, stirring, and most of all having fun!  Every time I see Laura in action, I am impressed by her positive demeanor and her amazing memory for all the children’s names.  My kiddos have attended fabulous week-long summer day camps at Frog Legs in the past, which made it a natural choice for Duncan’s 4th birthday party location.  (Well, and the fact that we could be inside if it was pouring down rain.)

DSC_0074

Mrs. Frog Legs made it a very special day for Duncan.  Very Berry Smoothies, Create Your Own Pizzas, and Confetti Cupcakes were on the menu for the day.  The kids had a blast cooking, listening to some fun stories, as well as playing outside in the lovely yard.  I do enjoy planning a party, so I had to let go of that a bit by having our party at Frog Legs, but Laura’s attention to detail and decoration made me feel that I was in my own home, only better – since no clean up was required!  And I mean really, look at those cupcakes… pretty much every kid’s dream!!  Marshmallows, and gummies, and chocolate chips – OH MY!!

DSC_0026 DSC_0042 DSC_0058 DSC_0059   DSC_0071  DSC_0110 DSC_0111 DSC_0114 DSC_0116 DSC_0125 DSC_0139 DSC_0142 DSC_0163 DSC_0167 DSC_0180 DSC_0187 photo 1photo 3DSC_0013

Mrs. Frog Legs wrapped up the event with Duncan giving each of his birthday friends a recipe book of the day’s treats, a wooden spoon, and a homemade frosted cookie.  What fun!

Every so often, I believe it is the perfect choice to make things easier on ourselves, versus harder and more complicated.  This was one of those choices for me.  Duncan had a lovely day and so did I.  I was so relaxed, I think we might have even gotten a photo of our whole family!!  Something I definitely would have forgotten if I had been hosting this party!!

Thank you, Frog Legs, for making Duncan’s birthday feel super special!

DSC_0088DSC_0087

If you live in the Seattle area and are looking for a fun activity for your children this summer, check out the Frog Leg camps – your kids will love it!  And, as Mrs. Frog Legs says, “Hoppy Cooking!”

Hello, Cupcake

DSC_0004

“Winter White and One” was the theme of the party.  It was important to me that Tatum’s first birthday party feel intimate and differentiated from the Christmas celebrations we had been involved in days before.  I envisioned wiping away the holiday from one room and replacing the red and green with clean, white everything.  I liked the idea of white cupcakes on white cake plates – white, white, white… but also wanted to find some unfussy design element that would help commemorate this milestone for my little girl.

flags3

flags2

There is a company I learned about called Ticings that makes “tattoos” for cupcakes.  I was very intrigued by these when I came across them in a magazine.  If their product was not cool enough, Ticings currently has an artist doing custom silhouette art for them.  Perfect!  Despite my late planning and holiday business, Ticings was able to accommodate all my requests and the customer service was a dream.  I sent in a photo of Tatum and days later received custom cupcake tattoos with my baby girl’s silhouette.  I also asked for the artwork to keep as a momento of the day.

DSC_0033

DSC_0032

Since I had already spent some money on the tattoos, I figured that I better bake the cupcakes versus purchase designer ones.  I am a mediocre baker at best with a very old oven, so I was a little intimidated, but figured it would all work out.  (At this point, it might have benefitted me to read the directions on the Ticings packaging, as my cupcakes were not as flat as they recommended which made application more difficult.)  A few years ago I was given a cookbook called, “Hello, Cupcake! : Irresistably playful creations anyone can make”.  Most of the cupcakes in this cookbook are fun to look at, but not something I would attempt in real life.  My favorite thing about this cookbook is in the back there are some tips and tricks and recipes for semi-homemade cupcakes and frostings.  The authors allow that homemade is usually best, but in a pinch there are ways to improve flavor and texture from store bought mixes, etc… Their “Perfect Cake-Mix Cupcakes” have worked really well for me:

Perfect Cake-Mix Cupcakes from Hello, Cupcake!

1 box (18.25 ounces) cake mix (French vanilla, devil’s food, or yellow)

(Note from PP5: I like Trader Joe’s brand)

1 cup buttermilk (in place of the water called for on the box)

Vegetable oil (the amount on the box)

4 large eggs (in place of the number called for on the box)

Preheat the oven to 350 degrees.  Line 24 muffin cups with paper liners.

Follow the box instructions, putting all the ingredients in a large bowl and using the buttermilk in place of the water specified (the box will call for more water than the amount of buttermilk that you are using), using the amount of vegetable oil that is called for, and adding the eggs.  Beat with an electric mixer until moistened, about 30 seconds.  Increase the speed to high and beat until thick, 2 minutes longer.

Spoon half of the batter into a ziplock bag.  Snip a 1/4 inch corner from the bag and fill the paper liners 2/3 full.  Repeat with the remaining batter.  Bake until golden and a toothpick inserted in the center comes out clean 15-20 minutes.  Remove the cupcakes from the baking pans, place on a wire rack, and allow to cool completely.

Next, I used one of the cookbook’s frostings and was very happy with the result.

Almost-Homemade Vanilla Buttercream

Makes 3 1/2 cups

1 container (16 ounces) Marshmallow Fluff

3 sticks (3/4 pound) unsalted butter, softened and cut into 1-inch pieces

1 teaspoon vanilla extract

1/2 cup confectioners’ sugar, plus additional sugar if necessary

Spoon Marshmallow Fluff into a large bowl.  (Marshmellow Fluff twice in one month?!?!?)  Beat with an electric mixer on low.  Gradually add the butter pieces, well after each addition, until smooth.  Add the vanilla extract and the 1/2 cup confectioners’ sugar.  Scrape the bowl well to incorporate.  Add more confectioners’ sugar, if necessary, to adjust the texture.

DSC_0036

DSC_0035

As we were frosting these cupcakes, my sister and I were unsure about how messy the frosting looked.  My mom had a helpful tip that I will pass on to you.  After frosting your cupcakes, run your knife under hot water and wipe over frosted cupcake for an ultra-smooth look.  (note: The cupcakes were definitely a group effort – thanks, ladies!  The moral support was the best part of all.)

DSC_0047

DSC_0050

DSC_0051

DSC_0054

I will admit that the Ticings cupcake tattoos were a little more difficult to apply than I had hoped.  We used their gold  sprinkles to cover mistakes around the edges.  In the end, I love the modern look of the silhouette on the cupcake.  I was and am really happy with the result!

DSC_0063

DSC_0078

DSC_0061

DSC_0191

DSC_0222DSC_0170DSC_0245

The family enjoyed a beautiful morning.  Cupcakes were a hit and the birthday girl couldn’t have been happier.  Tatum is sporting a Poole Party Designs original and sitting in her custom chair from Auntie.  It is safe to say she enjoyed her day!  Success!

A Bright Idea

DSC_0016

So there is a wonderful little item on the market that you might just add to your wishlist this holiday season… Michael’s sells Submersible LED Lights.  Have you ever heard of such a thing?  These little lights are so fun.  I placed them inside Cranberry Rosemary Arrangements and they just made the whole thing glow!

DSC_0019 DSC_0021 DSC_0023

Cranberry Rosemary Arrangements

For these arrangements, I used empty mason jars for my vase.  I placed a ring of rosemary in the bottom of the jar and then dropped a light or two in the center at the base.  By doing this, the lights shine through the greenery of the rosemary and the rosemary hides some of the light casing.  Remember to turn on your lights before you do any more steps, as the arrangement will need to be taken apart in order to remove the lights.

DSC_0031 DSC_0033

Then drop a couple handfuls of fresh cranberries on top of the lights and fill the jars with water.  Adjust the water and cranberry amounts until you are happy with the amount of space between the floating cranberries and the rosemary at the bottom of the jar.  (In a few of the jars I inserted a few sprigs of rosemary that I had tied together with hemp twine to add to the height of the arrangement and maintain the natural evergreen look I was going for.) DSC_0034 DSC_0035

Lastly, tie a burlap ribbon around the top of the jar.  These arrangements are beautiful as well as wonderfully aromatic!  Happy decorating!

DSC_0036 DSC_0037 DSC_0038

Make It Personal

When my second son was born, my favorite presents were those that differentiated his arrival from his older brother’s.  Having been through it once, we already had all the equipment, clothes, and “stuff” we needed and the correct gender to boot.  I loved receiving things that were personalized for him.  Whether it was a name or a letter, I found this gesture of individual recognition to be so very thoughtful.  I have kept that sentiment in mind to this day.  Often, when I give a gift to a family that already has one child, I try to personalize it.  It is nice to recognize those older sibs as well!

The “letter” and “number” shirts have arrived!  Simple cut.  Clean lines.  Gotta have ’em.

American Apparel 3/4 sleeve, personalized, raglan tees.  Now available for the big kids!  Poly-Cotton construction.  Durable rib neckband.  Available in sizes 2-8.  The perfect gift for big brother or sister.  Great for birthday parties and sibling photos.  An ideal tool for teaching letter and number recognition!  Start your engines and get ready to be a monogram trendsetter at school!  Head over to Poole Party Designs to start shopping the new collection!

The Point.

For me, the point of this blog is to share inspiration among us through everyday life.  If by reading something I write, someone feels inspired to try something new, or think about something in a different way, then there is a point to all this writing and documenting.  My 35th birthday was this week and I feel so satisfied because I inspired.  My mother read the post about my  grandmother and her secrets … and felt inspired.

Not only has she challenged me to a “taste off” between my pickle recipes and her version of my grandmother’s pickle recipe.  (More on that sometime soon…)  I can’t wait!!

But, she also made a birthday cake for me in the tradition of my grandmother!  What a wonderful surprise.  My grandmother had two cakes that she would bake and she kept the process a secret: “the checkerboard” and “the rainbow”.  So this year I received a checkerboard cake for my birthday from my mom, a woman who does not love to cook.  I love that she felt inspired to figure out the mystery of “the checkerboard” and that I was the recipient of this fun!  Thanks, Mom!  You’re a wonderful mother and an inspiration to me too.

How cool is that?  There is a surprise checkerboard pattern inside.  I believe you can do either two or three colors.   I can just imagine purple and pink from a childhood birthday party decades ago.  In addition to this surprise cake, there was also a package for me to unwrap.  It was the secret… a special pan from Wilton that makes all this magic possible:  Checkerboard Cake Pan.  Who knew?  There are different brands, of course, that make this special pan, Wilton just happens to be the one I was gifted.

I see many a checkerboard cake in my future (and my past)… Happy Baking!

This slideshow requires JavaScript.

Warm Welcome

Welcome, Baby B.

My good friend, M, is approaching the due date of her third daughter.  All her ducks are in a row and now she is waiting for baby’s arrival, just a few weeks away.  Since she has all the material things she needs, one might think that a shower is superfluous, but I disagree.  The birth of any baby changes things forever for a family.  They go from a “family-of-four” to a “family-of-five” and things will never, ever be the same.  As I mentioned in a previous post (Nervous), this “time in waiting” is unlike any other before or after.  A tension exists between the appreciation of what has been and the excitement of what will be.  The beauty of the family that is, with that which is unknown.

When approaching the birth of my third baby, all I wanted was time to be with women close to me and a moment to celebrate my baby.  Life can be such chaos that I found carving out a space to be present with baby the hardest thing of all.  Friends hosted a luncheon for me and it was so lovely.  It was exactly what I wanted.  I wanted to be able to do the same thing for M.  Although she may not need more onesies, she probably does need her friends and family more than ever and a space to enjoy her baby.

We met at The Pink Door and had a fabulous evening.  Mother Nature cooperated and delivered a gorgeous sunset.  The food was artfully done and delicious to boot.  I tried for all things feminine with lots of flowers and included a faux flower for each lady to wear however she chose.  Everyone looked festive and feminine.  M, you are so special.  I hope you know how much you and Baby B are loved!

This slideshow requires JavaScript.

Arrgh!

Poole Pirate Picnic success this weekend!  We celebrated Sam’s 5th birthday this weekend by treasure seeking with a bunch of little scallywags!  Despite being  under the weather over the past few weeks, we pulled off a pirate picnic like we were a bunch of true buccaneers!  From hand drawn treasure maps to hand sewn burlap treasure bags to crafty Solo cup and aluminum foil hooks, we outfitted ourselves for mutiny!  Our kiddos became pirates over the course of a scavenger hunt that led them all over Luther Burbank Park, using their treasure-map reading skills to discover jewels (ring pops), booty (pirate booty snacks), weaponry (glow-in-the-dark swords), and pirate costume (hats, eye patches, and hooks). All ages got into this pirate extravaganza – the eye patches were especially popular (thanks, Target!).   The last treasure of the evening was a beautiful firework show, sponsored by the city of Mercer Island as part of their yearly Summer Celebration.  What a fantastic evening!  Yo ho ho, me hearties… Until next time!

This slideshow requires JavaScript.