Pretty Pickled Beets

Recently I heard beets described as “pedestrian”.  I was shocked… at first.  I thought to myself, “In what world are beets pedestrian?”  But after chewing on this for awhile, I am ready to admit that the presence of beets on restaurant menus has become de rigueur.  Like caesar salad, beets have become a mainstay within restaurant culture, everyone has their own slightly different version – some more successful than others.  Because of my love of beets, I can be counted on to order pretty much any beet on a menu.  I am very reliable that way.  Whereas at one point in time I was just happy to see the word “beet” on a menu, now I am becoming an expert and paying attention to how the beets are prepared and what accompaniments they are served with.  This has made me realize that not all treatments of beets are equal and I have become more discerning in my “beet love”.

Here are my unscientific findings:

  • I prefer beets cold versus warm
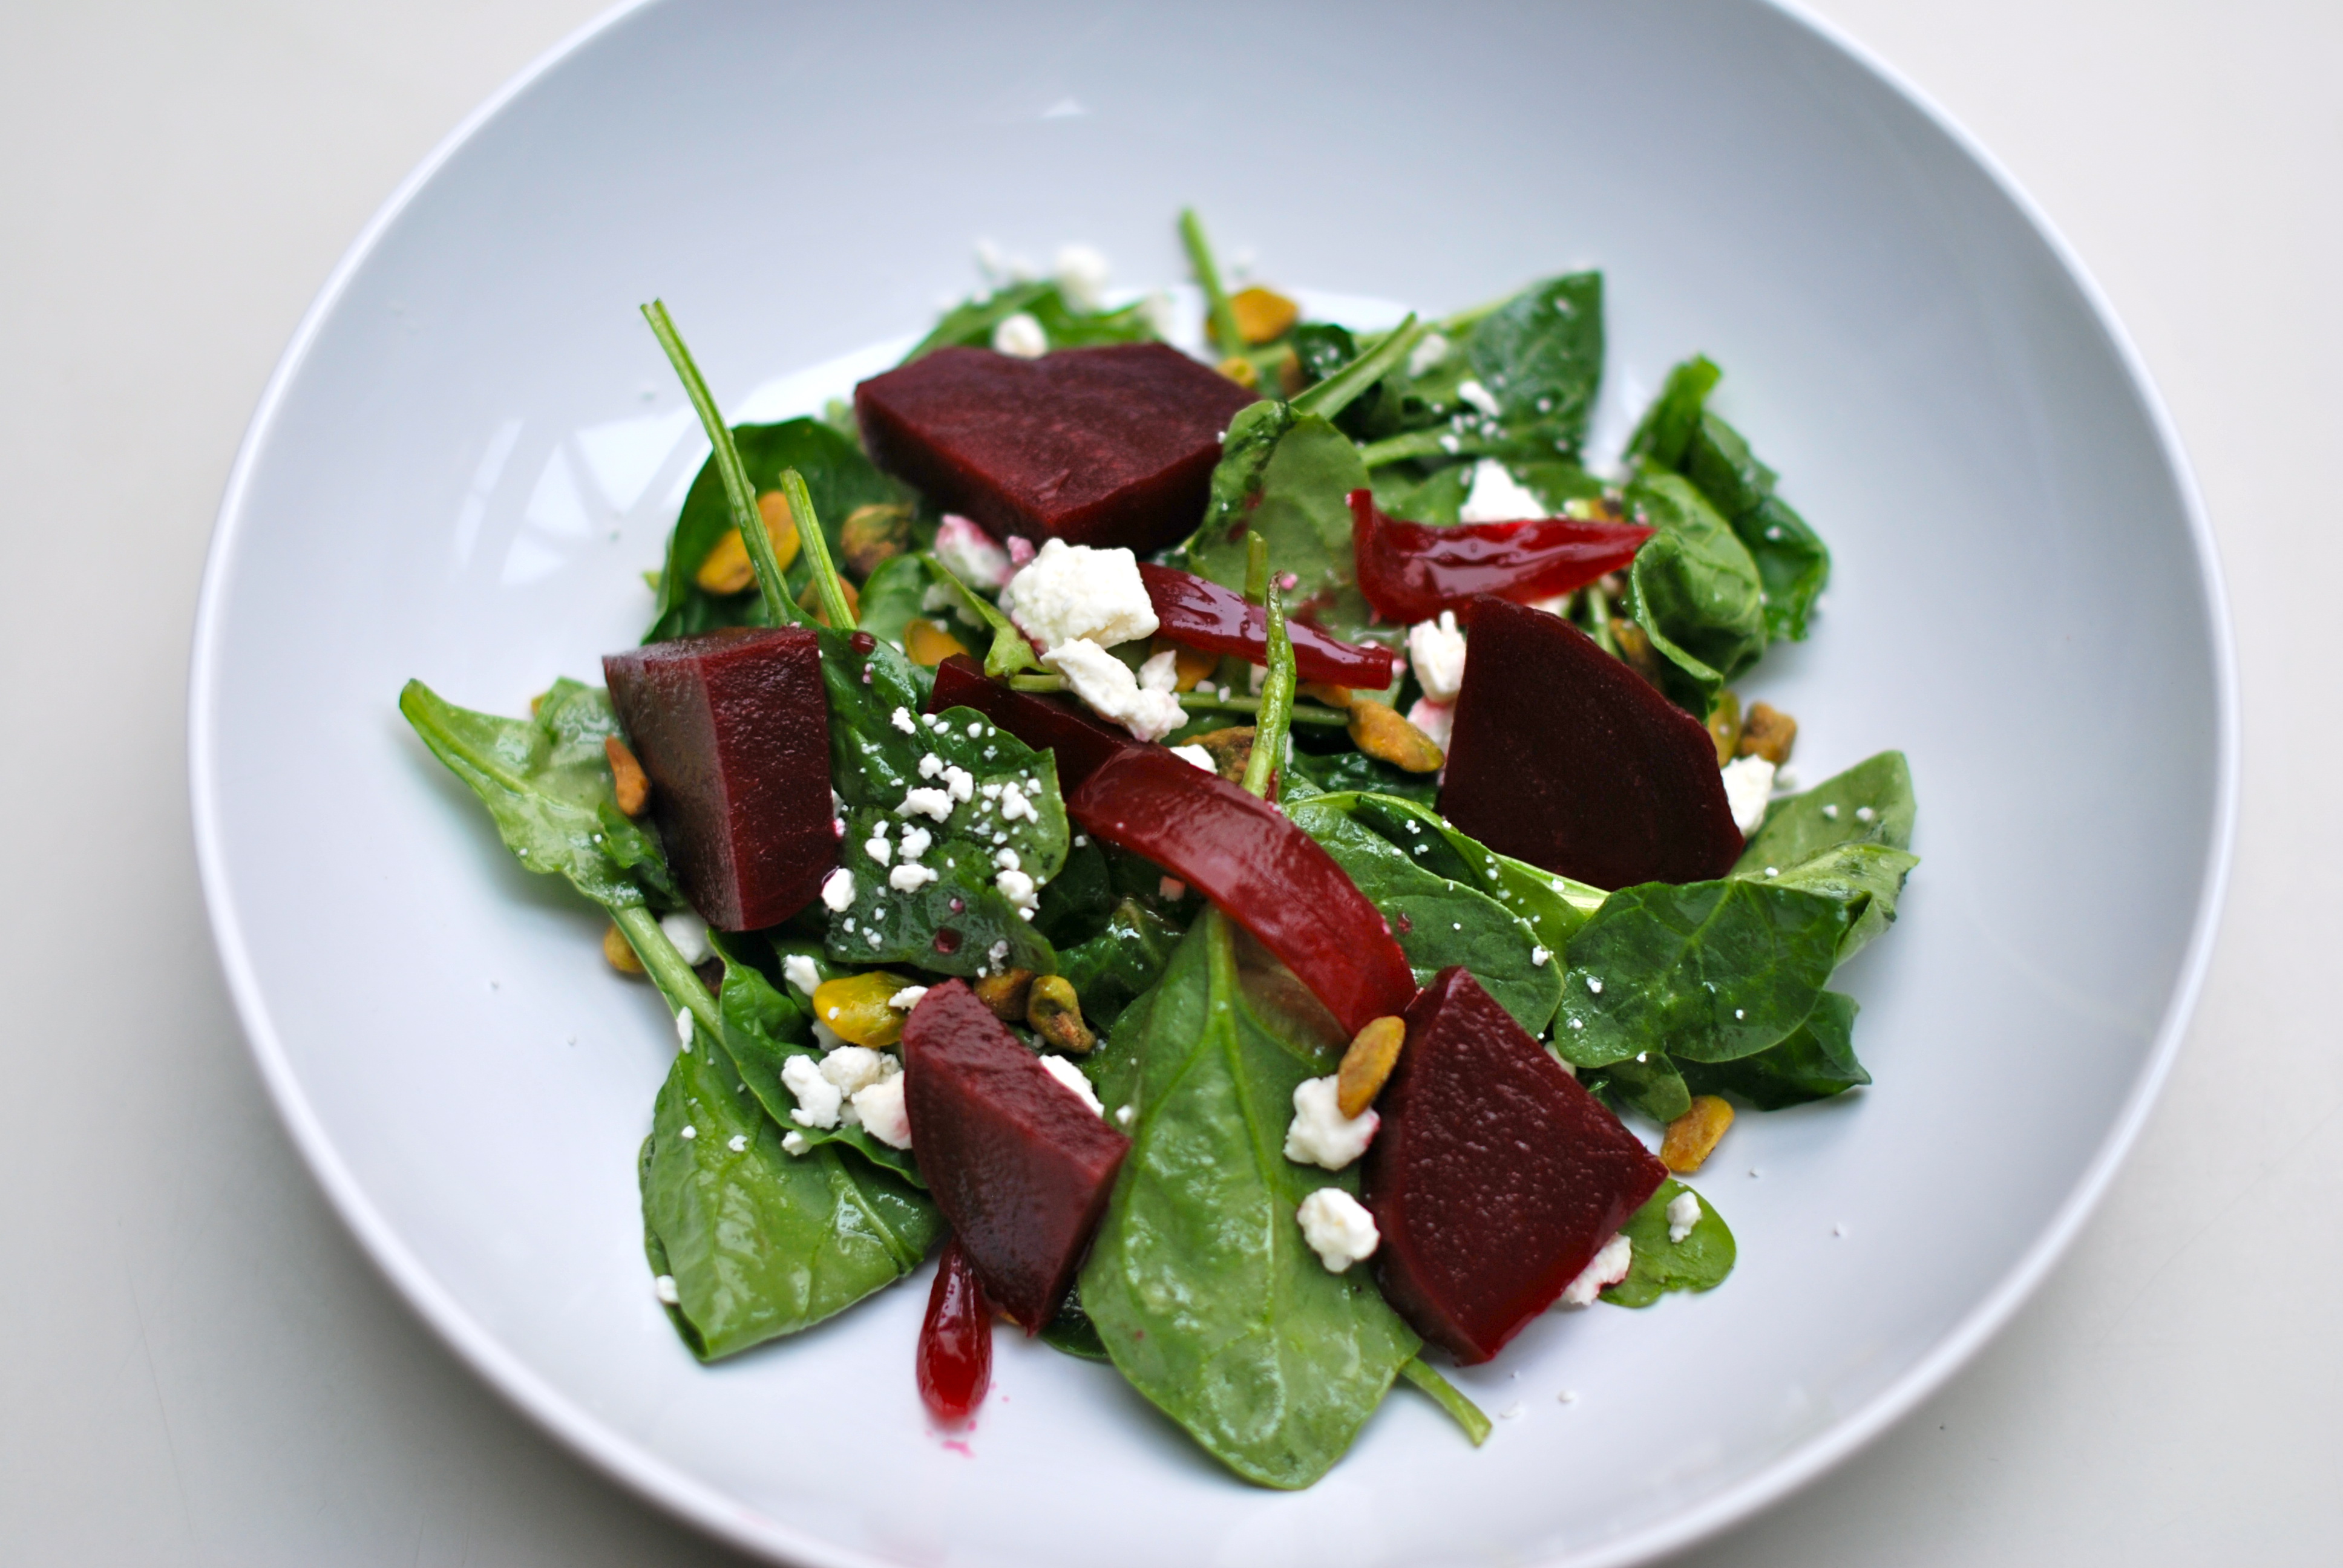
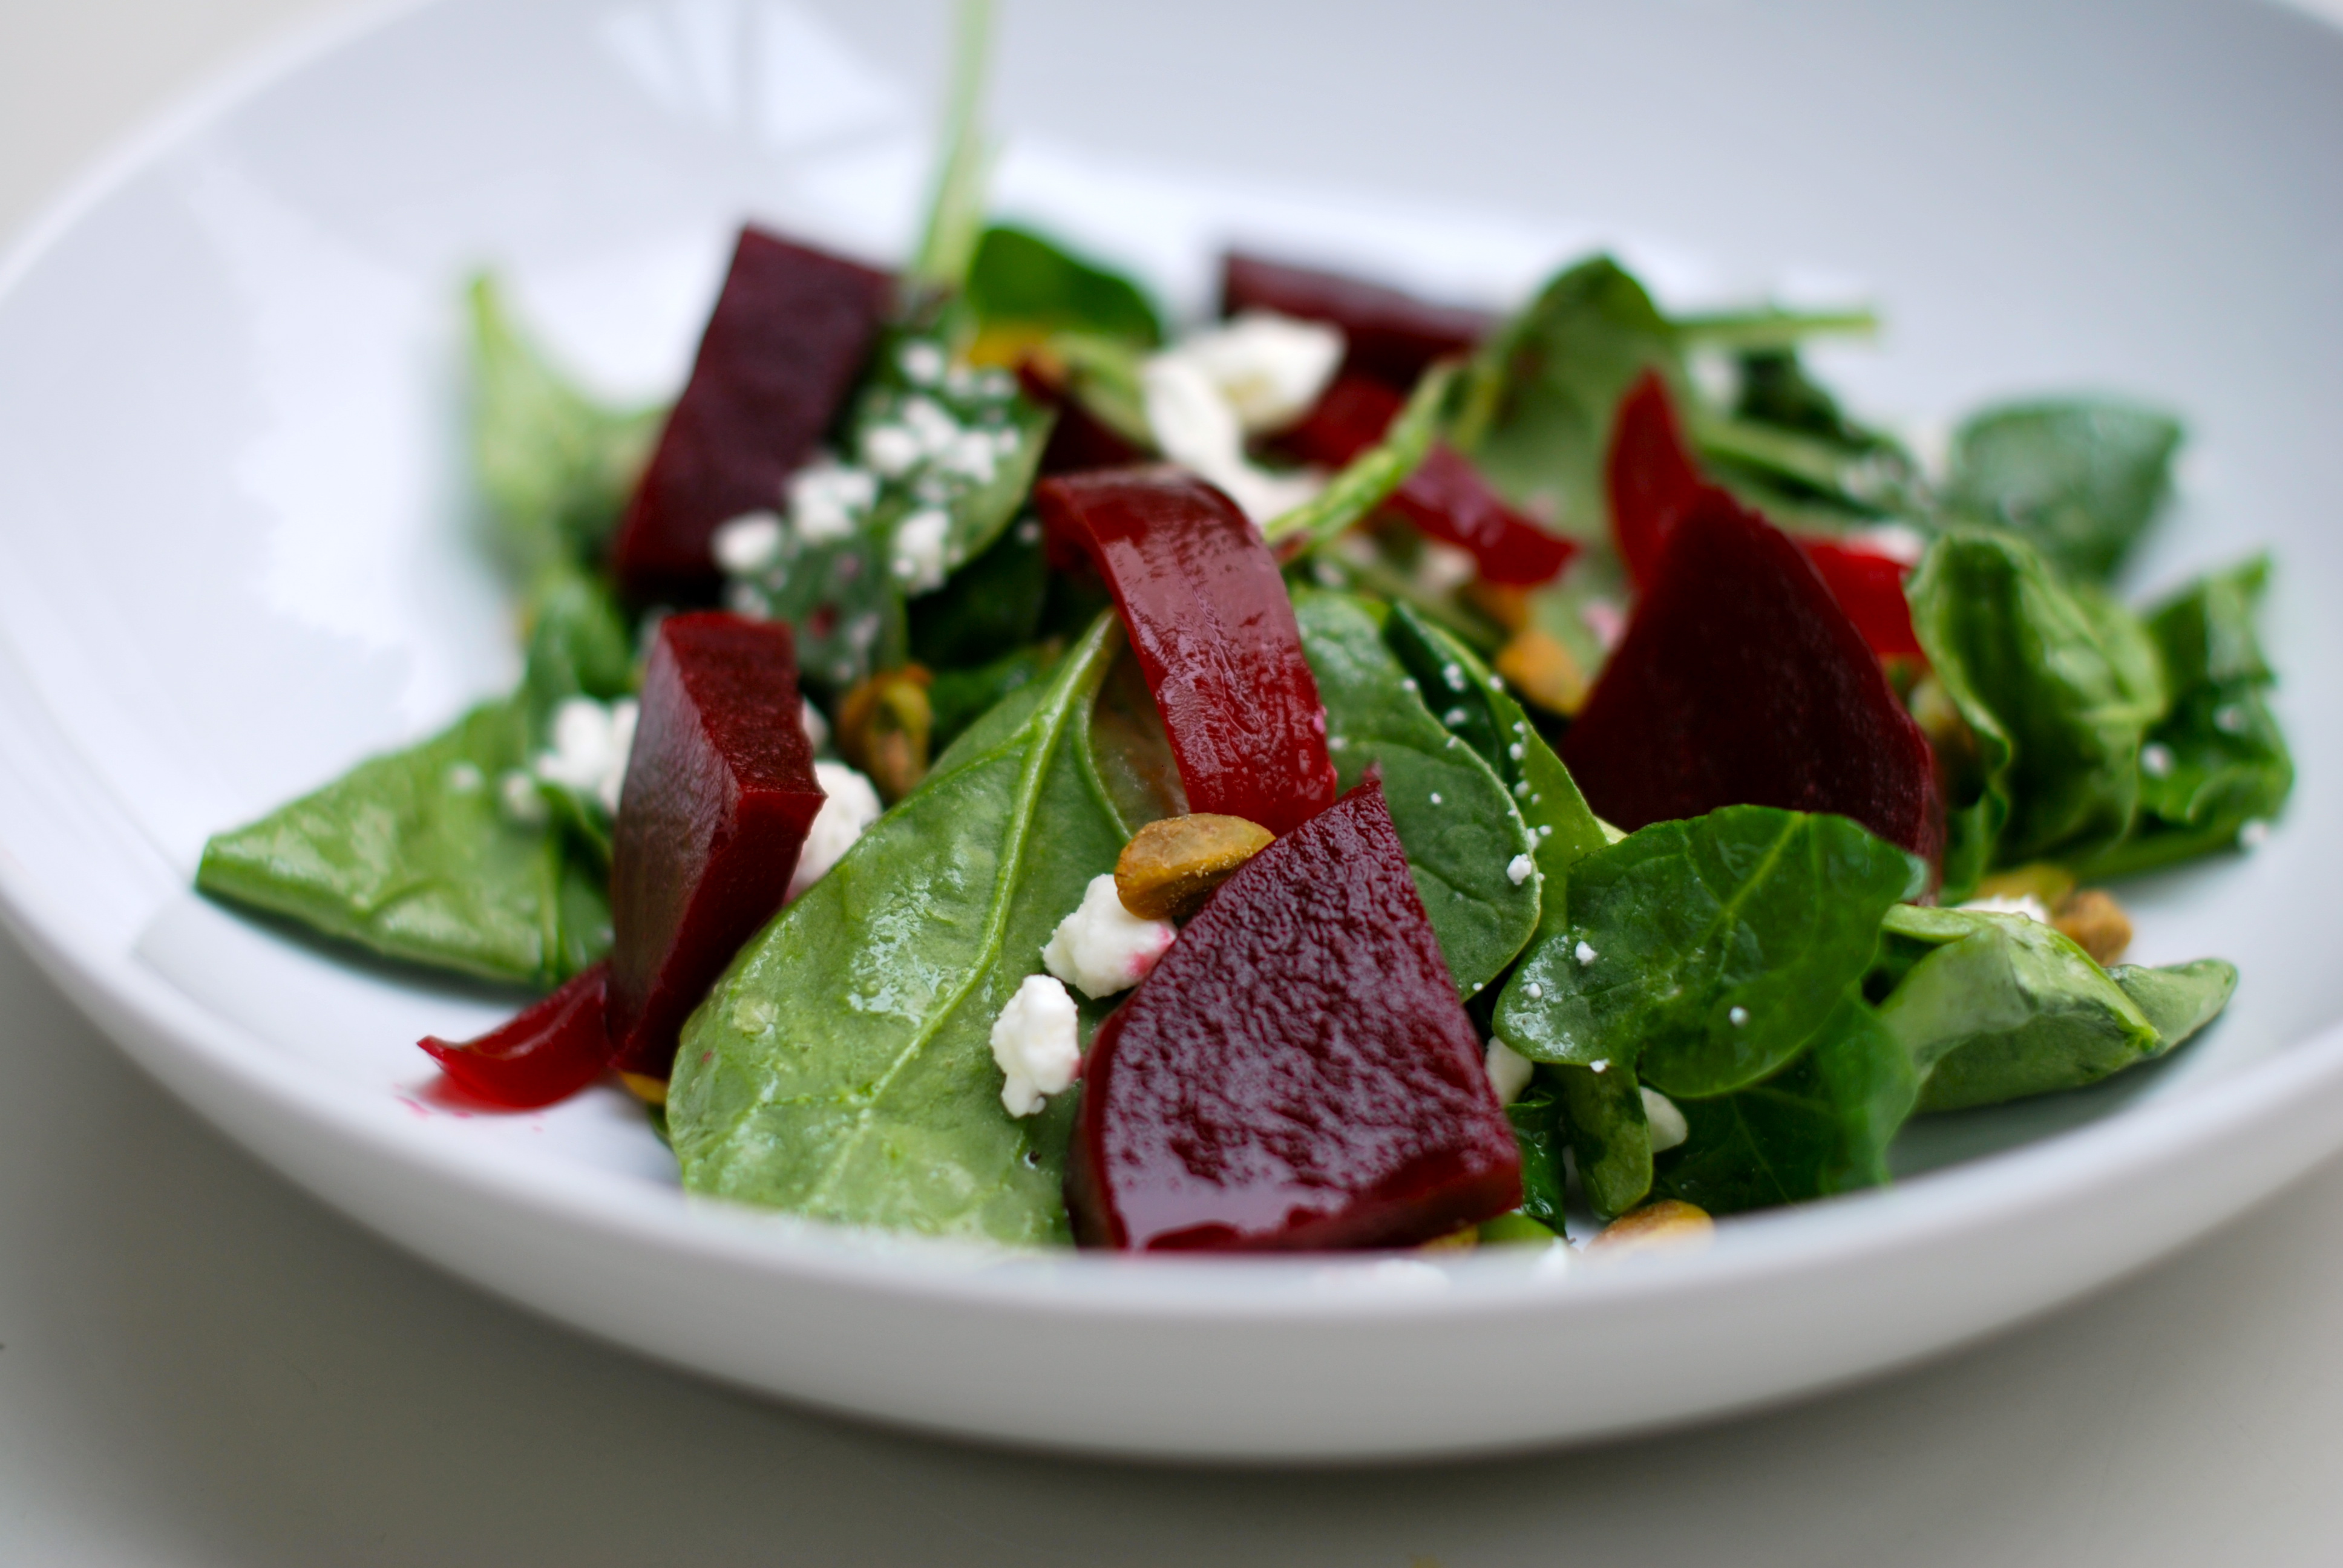
  • I like beets best in salad form, greens optional
  • Beets show off very well alongside salty cheeses (such as feta or goat) and earthy nuts (such as pistachios or walnuts)
  • Roasted beets are nice, but I have learned that I like them better once they have been marinated in vinaigrette or pickled.  They are similar to mushrooms in that they are a great vehicle for other flavors, since their own flavor can be subtle and earthy.

If you are thinking about preparing beets at home, it can feel a bit intimidating at first, with their long greens and dirt-covered skins.  But roasting beets is quite simple and I recommend that you try it, if you haven’t before.  (Here is a step-by-step guide to roasted beets.)  Pre-prepared beets are also available in most grocery stores.  I even saw a huge container of them at Costco the other day (maybe they are pedestrian after all)!  The question is, what do you do with these beets once roasted or taken out of their vacuum pack?  Have you opened that container, hoping to replicate your favorite restaurant-quality salad only to be a bit disappointed?  I have learned that by just letting them hang out in a vinaigrette for a half hour or so before adding them to a salad does wonders, or… (drum roll, please)… You can pickle them for later use!

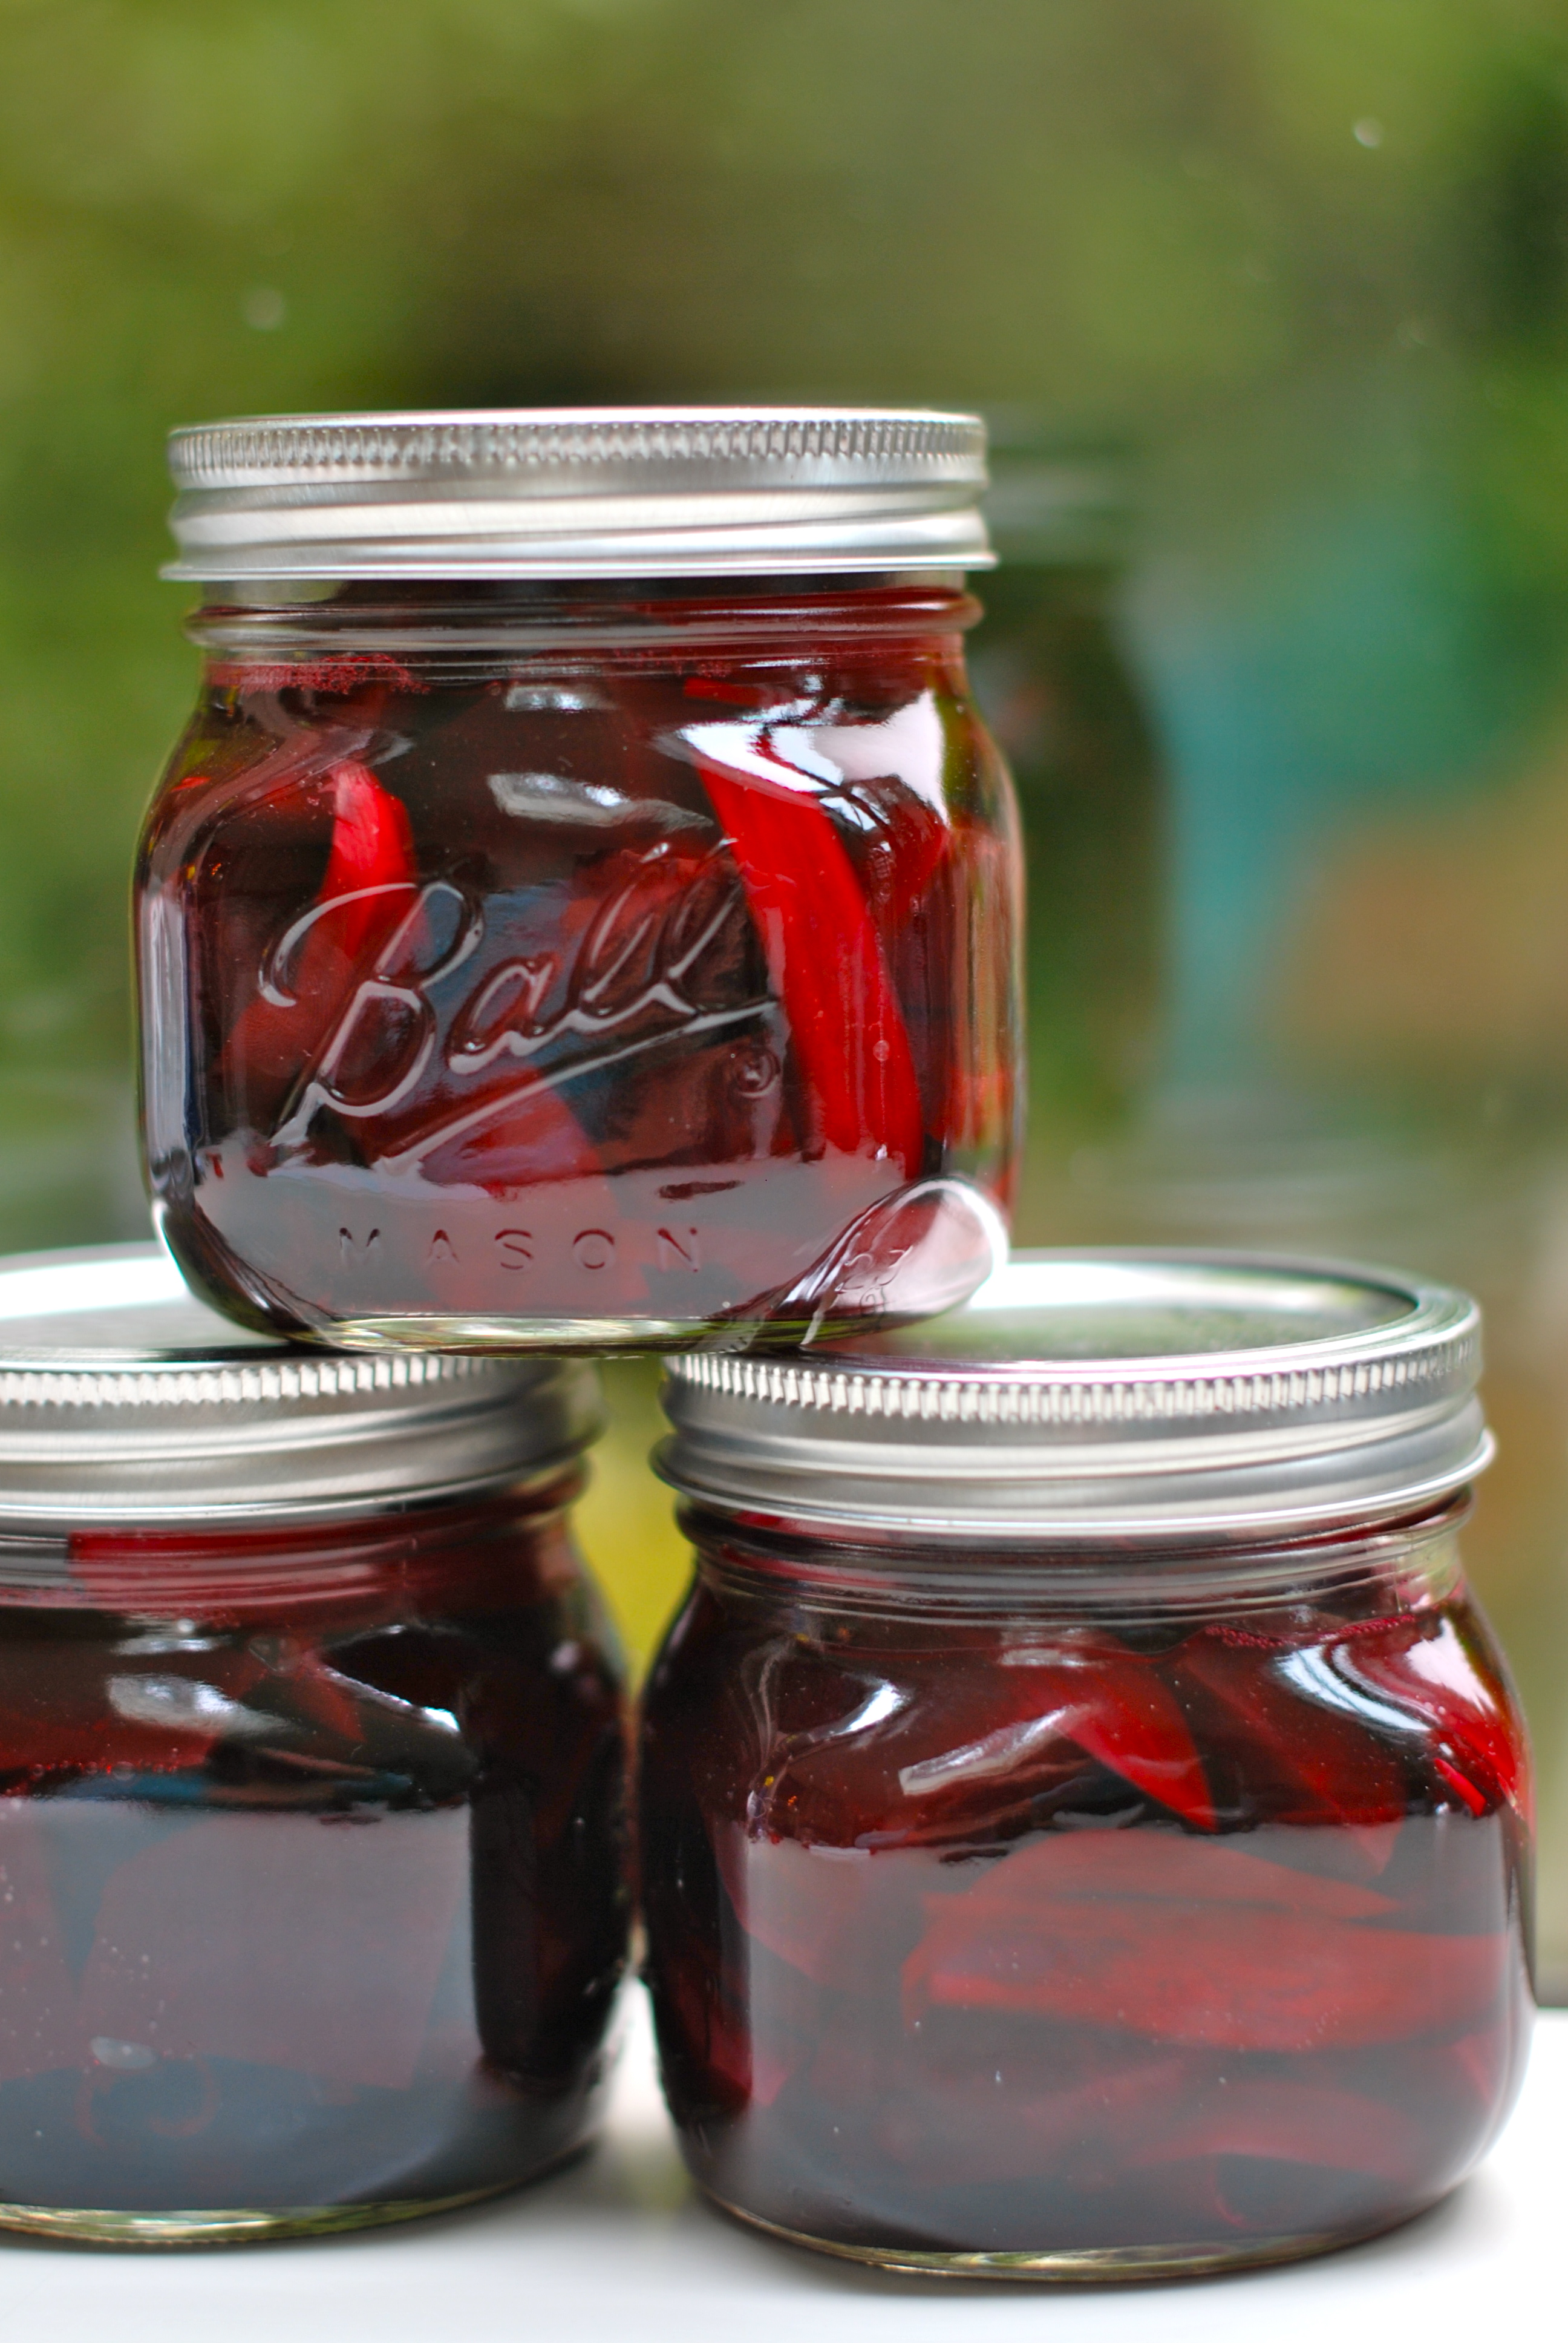
This is my first foray into the world of pickled beets.  When I began to think about attempting this project, I did my usual routine of consulting all of my canning cookbooks to compare processes and flavors.  Every canning cookbook I own had their own slightly different version of beets.  This tells me that although I am new to the process, the pickling of beets is quite standard.  The recipe I ended up adapting is from Kelly Geary and Jessie Knadler’s book, Tart and Sweet: 101 Canning and Pickling Recipes for the Modern Kitchen.  I liked that their recipe for Sweet Apple Cider Baby Beets didn’t use loads of sugar and the spices seemed nicely aromatic, but not too crazy.  I have doubled the recipe in their book and added white onions, as I believe if you are going to the trouble of canning you may as well make more than just a few pints, if possible.

DSC_0038DSC_0041DSC_0046DSC_0050DSC_0052DSC_0024DSC_0026DSC_0028DSC_0030

Pretty Pickled Beets

yield: about 8 pints

ingredients:

6 pounds baby beets, scrubbed

1 white onion, cut into large slices

4 cups water

2 cups cider vinegar

4 tablespoons kosher salt

4 tablespoons brown sugar or honey

per jar:

1/2 teaspoon allspice berries

1/4 teaspoon black peppercorns

1 star anise pod

1 cinnamon stick

Have ready hot, sterilized jars and their lids.  (After cleaning my jars, I like to keep them in a 200 degree oven so that they are ready when I am.)

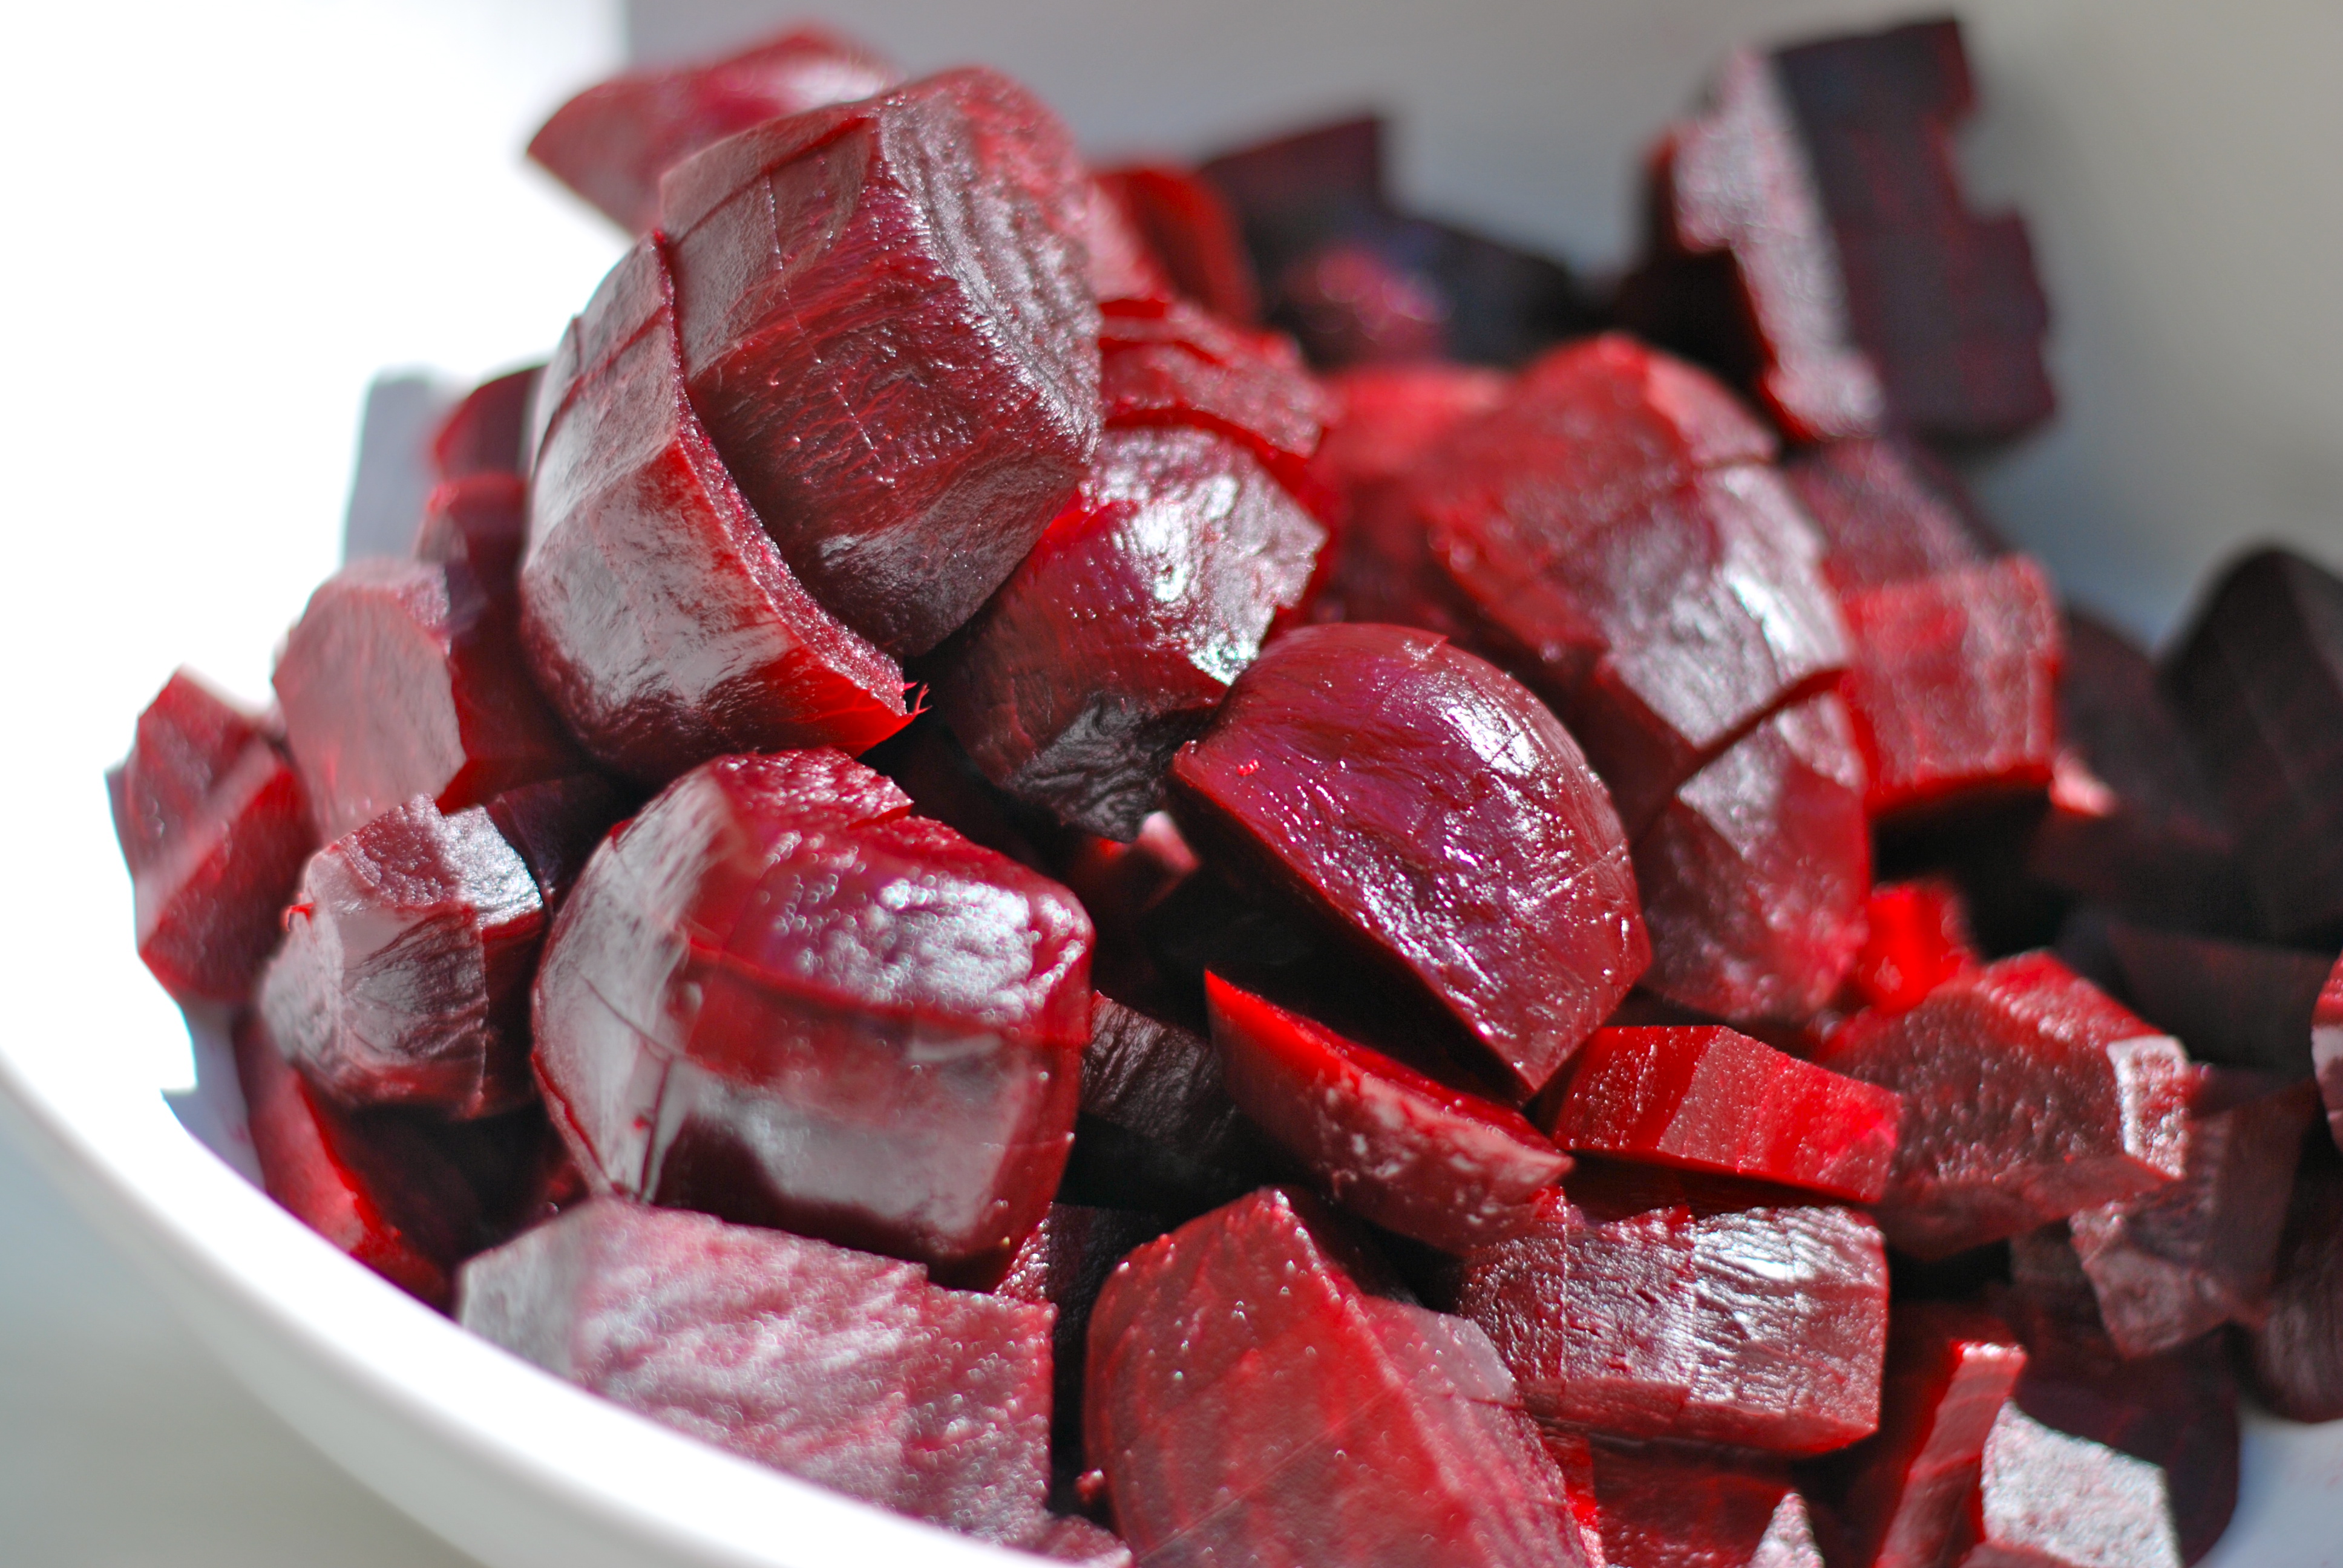
Trim the beets by cutting off the top part, near the stem, as well as the root end.  Place the beets in a large non-reative pot (if using different-colored beets, separate them into two saucepans).  Cover with water and boil for about 15 minutes, or until the beets are just tender.  (Roasting the beets is also fine.)   When the cooked beets are cool enough to handle, peel them and cut into slices 1/4 inch (6 mm) thick.

(Note: The beet skins should slip off easily – just rub them with your fingers.  You can wear latex gloves to prevent your fingers from getting stained.  If you have trouble slipping off the skins, you can also use a vegetable peeler.)

In a saucepan over medium heat, bring the vinegar, water, salt, and brown sugar to a boil.  Stir until the sugar and salt are dissolved.

Place allspice, peppercorns, star anise, and cinnamon in each hot jar.  Divide beet and onion slices among the jars, packing tightly without bruising them.  Ladle the hot vinegar mixture into jars, leaving 1/2 inch headspace.  Make sure the beets are fully covered with the liquid.

Check for air bubbles, wipe rims, and seal.  Process in a water bath for 10 minutes.  Let the jars stand undisturbed for 24 hours and then set them aside for 1 week for the flavors to develop.  If a seal has failed, store the jar in the refrigerator for up to 1 week.

Enjoy your beets straight from the jar or mixed into a salad!

Happy Pickling!

And the Winner is…

When one of my best friends got married seven years ago, her 92 year-old grandfather spoke during the wedding and he stole the show.  He gave some wonderful marital advice that Gus and I refer to to this day.  He spoke with fifty years of marriage under his belt and he said something to the effect of, “For a marriage to last, there are three things you need to say to your partner.  Hopefully the first one is easy and you say it often, ‘I love you.’  The second one can be a little bit more tricky, but is still very important, ‘I’m sorry.’  And the third can be downright maddening, but is probably the most important of all… ‘You might be right.'”

So honey, “You might be right.”

When I decided to try making pickles this summer, you might remember that my husband’s one request was that we please try a few different recipes in small batches, versus going whole hog down the road of one untested recipe and then not liking it, but having a massive amount of jars sitting waiting to be consumed or not (I assume this was his thought process).  Although I followed his advice, I did think it was rather silly, because of course all the pickles would be delectable.  Well, it turns out I was wrong… and this was a good idea.  I tried three recipes and there is a very clear winner!  Yippee!  The one that I thought would be the best, was not, in fact it was not good at all.  But I still call the event a success, because one of the recipes turned out very well.  It is a classic dill style and has just the right amount of tart, dilliness to enjoy many different ways.

So, as promised, here is the recipe for the very clear winner, Spicy Dill Pickles.  The recipe I used was from Tart & Sweet, by Kelly Geary and Jesse Knadler – a wonderful cookbook that takes urban canning to the next level with innovative recipes and great instruction.  This particular recipe is very straightforward and easy.  With pickling, since you add your spices to the jar itself, you can play with how spicy to make your pickles or omit a spice completely if it is not to your taste.  So satisfying!

Spicy Dill Pickles

4 cups white vinegar

2 cups water

1/4 cup kosher salt

4 1/2 pounds Kirby cucumbers, ends trimmed, quartered into spears

Per Jar

3 cloves garlic

3 dill heads or 4-5 large dill sprigs

2 hot peppers, such as habanero or serrano

1 tablespoon yellow mustard seed

1 tablespoon brown mustard seed

1 teaspoon dill seed

1 teaspoon black peppercorns


Bring the vinegar, water, and salt to a boil in a medium nonreactive pot.  Stir to dissolve the salt.

Place garlic, dill, peppers, and spices in each hot jar.  Pack cucumbers in as tightly as possible without crushing.  Pour in boiling brine, leaving 1/2 inch headspace.  Make sure the cucumbers are submerged in the brine.

Check for air bubbles, wipe the rims, and seal.  Process for 15 minutes, adjusting for elevation.  Yield 4 quarts.

Note: I brined the pickles overnight and kept my pickles whole as they were on the small side.  I also used pint jars versus quart, so my yield was 8 pints.  I will try these again next year, but I might also try fermenting a batch to see how they compare!

Happy Pickling!

Jam Session

Gosh, I love this time of year!  Amazing produce is in high abundance and local berries can be found around every corner.  I feel so very lucky to have delicious food available year-round, but summer is such a satisfying time for the senses!  When spring and summer arrive, I am reminded how much better in-season fruits and veggies taste!  The berries I have been seeing lately are so beautiful.  So rich in color and flavor, and they smell divine.  If we can’t have fresh summer berries all year long, opening a homemade jar of preserves to enjoy on your morning toast is the next best thing!

Last year was my first year making jam and I am hooked!  I dove in after being inspired by a friend, K, who preserves an entire pantry for the year.  Hundreds of pounds of produce… I agree, she is amazing.  On a much smaller scale, I learned to can with a good friend, S, who was also a jamming neophyte and we felt our way together.  I highly recommend this route.  If you want to try it, find a like-minded friend who is also curious and just go for it.  It became a wonderful time for real adult conversation and each session we came away with a very satisfying product (a project with a beginning and an end – hallelujah!).  Last year at this time I was pregnant and I am pretty sure this whole thing started because of a nesting urge and a wish to control something.  Baby was due in late December, so I became a little manic about being “ready” for the holidays.  Man, was I ready.

In my quest to become a preserving goddess, I found a few books to help me on my way.  There are so many great books out there, these are just the ones I happened to pick up and can recommend to you:

Tart and Sweet, 101 Canning and Pickling Recipes for the Modern Kitchen, by Kelly Geary and Jessie Knadler:  I literally read this book cover to cover before bed it was so interesting.   I love the approachable way that they describe the chemistry involved in canning.  It is part manual, part artisanal food appreciation.   I would not recommend this be your only resource for recipes, but I really enjoyed it for its style and inspiration.

http://www.amazon.com/Tart-Sweet-Canning-Pickling-Recipes/dp/1605293822/ref=sr_1_1?ie=UTF8&qid=1342814858&sr=8-1&keywords=tart+and+sweet

Canning For A New Generation, Bold Fresh Flavors for the Modern Pantry, by Liana Krissoff.  This book is a bit more traditional, but still meant for the modern canner.  I found the accompanying recipes for food dishes using the preserves helpful as well.

http://www.amazon.com/Canning-New-Generation-Flavors Modern/dp/1584798645/ref=pd_bxgy_b_img_b

Ball Complete Book of Home Preserving.  This is a canning bible to some.  Great resource to have on hand, but less fun than the others.

http://www.amazon.com/Ball-Complete-Book-Home-Preserving/dp/0778801314/ref=pd_bxgy_b_img_b

This week I’ve had a few jam sessions and I think I am up to about 30 lbs of berries (turned into freezer jam and small-batch canned jams)!  Raspberry jam is my favorite and oh-so-summery – I am feeling particularly inspired by the golden raspberries pictured above.  Aren’t they beautiful?  I chose to follow a pretty standard recipe from Tart & Sweet and am very happy with the results.

If you are interested, this is the perfect time of year to give canning a try!  I am happy to share any and all that I have learned and would like to pass on a few words of wisdom that were shared with me.

1)  Only can the best produce you can find.  There is no reason to go to a ton of work preserving the same stuff you can find year-round.  Can in-season produce, as it is cheaper and of better quality than what you can find at other times.

2)  Preserve things you like!  We go through jam like it is going out of style in our house, so we make lots of berry jam.  If you don’t eat chutney normally, don’t make jars and jars of chutney.  They will sit and sit in your pantry taking up precious real estate.  I’m not saying don’t experiment, that is part of the fun.  Just keep the way you and your family eat in mind, as you try new things.

Happy Summer!!