1st Day of School Oatmeal Cookies

Well, it happened.  The first day of kindergarten has arrived and the world appears to still be turning.  All seems okay!  The boy will come home in a few hours and we will have some homemade cookies to greet him.  It may be real, or imagined, but I believe I was greeted with these same cookies when I was in school.   This is not a complicated or secret recipe, by any means, but it is worth remembering!  It is the Vanishing Oatmeal Cookies on the inside of the Quaker Oats container.  We’re not raisin fans in this house, so we sub in some Ghiradelli Milk Chocolate Chips instead.  Hopefully, it will be just the taste of home that our kindergartener needs after his first day!

DSC_0001 DSC_0002

Vanishing Oatmeal Cookies

yield: about 4 dozen

1/2 cup (1 stick) plus 6 tablespoons butter, softened

3/4 cup firmly packed brown sugar

1/2 cup granulated sugar

2 eggs

1 teaspoon vanilla

1 1/2 cups all-purpose flour

1 teaspoon baking soda

1 teaspoon cinnamon

1/2 teaspoon salt

3 cups Quaker Oats (quick or old fashioned uncooked)

1 cup raisins (or chocolate chips)

Heat oven to 350 degrees.

In large bowl, beat butter and sugars on medium speed of electric mixer until creamy.

Add eggs and vanilla; beat well.

Add combined flour, baking soda, cinnamon and salt; mix well.

Drop dough by rounded tablespoons onto ungreased cookie sheets.

Bake 8-10 minutes or until light golden brown.  Cool 1 minute on cookie sheets; remove to wire rack.  Cool completely.  Store tightly covered.

Brie and Fig Jam Panini

DSC_0038

So often I look at a project I have completed in the past and think to myself, “Okay, I’ve done that.  Now how could I do it better next time?”  I think this is part of the creative process.  We are always looking at things and wondering how they could be improved.  (You’ll see more on that in a few weeks when I look at my pickle making process.)

But this week, I’d like to stop and say that last year I made loads of delicious fig jam.  Admittedly, fig is my favorite fruit preserve.  It just really makes me happy.  I made lots of it because the year before I ran out.   This year, I am not making one change to that recipe.  Shoot, I lied.  One teeny change… (I cut the figs into eight pieces instead of four pieces this year) But it really is perfect just the way it is.  No (read: very little) improvement necessary!  So, you are welcome to look at last year’s recipe for fig preserves in my post called Ambrosia (here).  I really do think you should try it… it could change your life.

DSC_0029

But, since I still want to offer you something new today, here is my favorite thing to do with fig jam, as mentioned in Ambrosia.

Brie, Salami and Fig Jam Panini

yield: makes one sandwich

ingredients

bread (sourdough, ciabatta roll, whatever you like)

4-5 slices of salami

3-4 slices of brie

Good amount of fig jam slathered on one side of the sandwich

Throw it all together.  Place in a panini maker or grill on the stove, like your favorite grilled cheese.

Voila!

DSC_0002 DSC_0004 DSC_0005 DSC_0006 DSC_0007 DSC_0010 DSC_0011 DSC_0013

A sophisticated, savory sweet sandwich that borders on heavenly.  I find that this is a wonderful lunch to make at home with the kids, as it is easy to pull together and make right alongside their traditional grilled cheese.  Add a simple salad and it also makes for a nice light dinner!

Enjoy!

Fresh Peach Ice Cream

The kids picked out peaches this week and we decided to make ice cream.  When the weather is warm, who doesn’t like a little ice cream to cool things down?  We have an ice cream maker that we have owned for years, but only recently discovered how easy ice cream can be!  In only a few steps we were ready for a little weeknight ice cream social!

DSC_0002 DSC_0004 DSC_0005 DSC_0008 DSC_0009 DSC_0010 DSC_0011 DSC_0014 DSC_0015

We adapted a recipe from our Cuisinart Ice Cream Maker Recipe Booklet for fresh strawberry ice cream and used peaches instead.  This ice cream is best made when peaches are at their peak of freshness – this ice cream is light, sweet and fruity!

Fresh Peach Ice Cream

Makes about 5 cups  (ten 1/2-cup servings)

Ingredients:

1 1/2  cups fresh peaches, pits removed and cut in half

3/4 cup whole milk

2/3 cup granulated sugar

pinch salt

1 1/2 cup heavy cream

1 1/2 teaspoon pure vanilla extract

1.  Put peach halves into the bowl of a food processor fitted with the chopping blade.  Pulse peaches until rough/finely chopped (depending on preference).  Reserve in bowl.

2.  In a medium bowl, use a hand mixer on low speed or whisk to combine the milk, sugar and salt until the sugar is dissolved.  Stir in the heavy cream and vanilla.  Stir in reserved peaches with all the juices.  Cover and refrigerate 1 to 2 hours, or overnight.

3.  Turn on your ice cream maker and follow instructions for your maker.  For our Cuisinart ice cream maker that means, pouring the mixture into the frozen freezer bowl and let mix until thickened, about 15-20 minutes.  The ice cream will have a soft, creamy texture.  If a firmer consistency is desired, transfer the ice cream to an airtight container and place in freezer for about 2 hours.  Remove from freezer about 15 minutes before serving.

Enjoy!

This slideshow requires JavaScript.

Summer Corn Salad

DSC_0010

It is officially summer!  I am loving that my fridge is jammed full of summer berries and corn.  These are some of my family’s favorite foods and is the sign that tells us that summer has truly arrived!  Yippee!  Since the season is short for berries and corn, we try to make the most of it by eating them all the time!

But, when the temperatures begin to rise, I really have very little desire to be in the kitchen.  All I want is to do is play outdoors with my family.  So, we do lots of picnics and meals at the pool and beach.  And, as glorious as corn on the cob is at home, we like to enjoy it on the go as well.

Before reading any further, you must raise your right hand and repeat after me: “I, (your name), promise to use this information for good and vow not to judge the author of this blog for leaning on a pre-made dressing.”

If you have eaten at our house, you have probably heard us gush about one of our very favorite things… Garlic Expressions.  It is a vinaigrette that we use on just about everything.  It is all natural and I guarantee you will love it.  It is a superb marinade for grilled chicken and it seems to do amazing things for almost any salad!  Garlic Expressions has become a staple in my kitchen and, until it was available in Maine, my mother-in-law was known to occasionally take some home in her suitcase!  (And no, Garlic Expressions is not sponsoring this post or compensating me in any way, I just want to share some of my best secrets with you.)

Summer Corn, Blueberry and Basil Salad

4 ears of fresh corn, lightly cooked and cut off the cob

2 cups blueberries

handful of basil, chopped

Garlic Expressions (or another vinaigrette of your choice if that’s what you have around)

salt and pepper, to taste

DSC_0011

This is a very flexible salad.  Quantities can be played with.  Add a grain of your choice to give it a little more heft (barley, farro, or quinoa all would work well).  Really I am just challenging you to put some interesting ingredients together that you might not normally think to pair.  The combination will surprise you.  The corn is lovely and sweet.  The blueberries add an explosion of tart.  The basil brings in some complexity.  The Garlic Expressions does its usual magic.  Enjoy!

DSC_0013

Now get outside and play!

Happy Summer!

Serious Kale

I have been obsessed with kale salad for two weeks now.  I recently went to dinner at Serious Pie in Seattle.  If you are not familiar, this is one of Tom Douglas’ restaurants.  Tom Douglas is a Seattle restauranteur, famous for his delicious crab cakes and many successful restaurants.  At Serious Pie, he has re-imagined pizza for the better.  The crust is super thin and topped with delicious items that although delicious, sometimes require a bit of navigational help from one’s server.  My favorite pizza on the menu is the traditional buffalo mozzarella, tomato and basil; showcasing the beautiful technique and high quality ingredients used at this establishment.  We often order this simple beauty along with a more exotic pie, think seasonal mushroom and truffle cheese or sweet fennel sausage.  The pizza is phenomenal, but leaving the restaurant on this particular night, I was still thinking about kale.

We had decided to try Serious Pie’s second location, Serious Pie Westlake.  I prefer this location to the original, it seems to have a bit more seating and there was no wait at all!  We ordered our food, planning to share.  The kale salad arrived I had to hold myself back from gobbling down the whole dish.  A second plate was quickly requested from our server.  Not only did it taste fresh and lemony, but the texture was nicely soft.

I have been riding on the kale bandwagon since last summer.  My husband literally rolled his eyes when I start whipping up yet another kale salad.  Usually they involve everything but the kitchen sink, but not this one.  This salad’s beauty is in its restraint.  I had to try to recreate it.

Serious Kale  

(inspired by the kale at Serious Pie), serves 4

Ingredients:
1 bunch lacinato (or Tuscan) kale
1 1/2 oz Garlic Olive Oil
juice of 1 lemon (about 2 oz)
1/3 cup finely grated parmesan (I prefer pecorino), reserve a bit for a garnish
pinch of sea salt (to taste)
1/3 cup pine nuts
finely sliced calabrian chilies  (used at Serious Pie, but omitted this time around in hopes that my kids might try it)

DSC_0002 DSC_0009 DSC_0012 DSC_0014 DSC_0016 DSC_0017 DSC_0020 DSC_0021 DSC_0022 DSC_0026 DSC_0027 DSC_0031

 Wash and cut out ribs of kale.  Dispose of ribs.  Roughly chop greens.  Massage chopped kale with olive oil, lemon juice, parmesan and salt (I find this part nicely therapeutic).  Let rest 30-45 minutes.  This step is important.  By allowing the kale to marinate and rest, the texture softens dramatically.  Add pine nuts and salt to taste.  Garnish with additional parmesan.  Serve.  Enter culinary nirvana…
 
So this is my second attempt at trying to get this recipe just right.  Last week I tried it and amazingly, three of the four of us who enjoyed dinner together were all attempting it on the same night!  Seriously, Serious Pie???  We had not spoken since having dinner the week before.  Clearly I was not the only one dreaming of kale… 

The Perfect Granola

DSC_0050

So this is an oldie and a goodie.  I have made this granola for Christmas presents over the years and it has been so well received that people often ask for the recipe.  It is the one granola I make because it is so delicious and unexpected.  Unexpected, you say?  Well, yes!  The key ingredient is olive oil.  It is just the right amount of savory and lightly sweet.  I usually add a little more salt and a little less cardamom.  The fruit / nut combinations can be changed to what you have around or prefer.  The amounts can be played with all day long and it still works.

DSC_0051

Some great friends from our time in the Bay Area are coming to visit Seattle for the weekend, so it seemed like the ideal time to make some of this yummy granola.  The best part?  When the kids woke up super early this morning, I poured myself a cup of coffee, looked in my pantry, and was able to make it with ingredients I had on hand.  Once you try this, you, too, will keep all the necessary items in your pantry, just in case.

We have been looking forward to this reunion weekend for weeks.  Plotting out the best plans to show off our dear city in both rain and shine weather.  As much as I am looking forward to all our fun adventures, the thing I am anticipating most is the down time,  everyone waking up in the morning, chatting over cups of coffee (and bowls of granola), picking up these special relationships just where we left off… Enjoy!  I know we will.

Olive Oil Granola with Dried Apricots and Pistachios

(from The New York Times, 2009)

3 cups old-fashioned rolled oats

1 1/2 cups raw pistachios, hulled

1 cup raw pumpkin seeds, hulled

1 cup coconut chips

3/4 cup pure maple syrup

1/2 cup extra virgin olive oil

1/2 cup packed light brown sugar

1 teaspoon kosher salt

1/2 teaspoon ground cinnamon

1/2 teaspoon ground cardamom

3/4 cup chopped dried apricots

Fresh ricotta, for serving (optional)

Fresh berries, for serving (optional).

DSC_0006 DSC_0007 DSC_0008 DSC_0011 DSC_0012 DSC_0015 DSC_0018 DSC_0019 DSC_0021 DSC_0023 DSC_0025

1. Preheat oven to 300 degrees. In a large bowl, combine oats, pistachios, pumpkin seeds, coconut chips, maple syrup, olive oil, brown sugar, salt, cinnamon and cardamom. Spread mixture on a rimmed baking sheet in an even layer and bake for 45 minutes, stirring every 10 minutes, until golden brown and well toasted.

DSC_0027 DSC_0029 DSC_0033 DSC_0035

2. Transfer granola to a large bowl and add apricots (or do this step right on the cookie sheet), tossing to combine. Serve with ricotta and fruit, if desired.

Yield: About 9 cups

DSC_0037 DSC_0039 DSC_0043 DSC_0046 DSC_0053

Winter Greens Pesto

Another cabin fever recipe…

DSC_0031

Last week we were stuck at home, recuperating from some bug or another that just didn’t want to leave our house.  We’ve finally rid ourselves of all symptoms, so I have the time (and hands) to write this.  As I was experiencing that “we’ve-been-at-home-for-5-days-straight” feeling, I attempted to add in a little spice to our program with some inspiration from theKitchn.  I was intrigued when I saw that they had done a piece on winter greens pesto!  What a cool idea!  One typically thinks of pesto as a summer treat, while basil is growing like crazy in the garden.  One doesn’t necessarily think of making it in winter.  I am learning how to incorporate the likes of kale and friends into our diet, but am always looking for new ways to cook with them.  Their main point was that pesto can be made out of just about anything – it is incredibly flexible, so get creative!  TheKitchn had a link of “How to Make Perfect Pesto Every Time” and I really liked their description below:

“Traditional Italian pesto is, of course, made strictly with basil, pine nuts, parmesan, garlic, and really good olive oil. It’s a classic sauce, no contest.

But you can switch out the basil for another handy herb or leafy green, replace the (crazy expensive, if delicious) pine nuts with a different favorite nut, or swap the parm for pecorino or asiago. Use more or less of anything to suit your tastes. Heck, you can even make a lower-fat pesto by replacing some of the olive oil with ricotta cheese!

Bottom line: green + nuts + cheese + olive oil = awesome sauce, literally. Whiz it up in a blender and you can’t go wrong.”

I tried two different varieties last week just to test out the versatility of this recipe.  First up was arugula, and next was kale; both turned out beautifully.  The two best things about this recipe were that I already had most of the ingredients in my pantry and it only dirtied one appliance.  Since the recipe is made in the Cuisinart, it was super simple to throw together and also a quick clean up!  Like traditional pesto, these versions are great tossed with pasta, spread on a sandwich or bruschetta, or added by the spoonful to your favorite soup!  The recipe I liked the looks of best was from My Homespun Home.  It is delicious!

DSC_0008 DSC_0010 DSC_0012 DSC_0014 DSC_0016 DSC_0017 DSC_0021 DSC_0024 DSC_0027 DSC_0029

Arugula Walnut Pesto
Makes about 1 1/2 cups

2 cups loosely packed arugula
4-5 basil leaves
1 1/2 cups walnut halves
1-2 garlic cloves
1/3-1/2 cup high quality olive oil
3/4 cup freshly grated pecorino romano cheese
1/2 teaspoon lemon zest
1 teaspoon lemon juice
Finely ground sea salt, to taste

In a food processor, combine the arugula, basil, walnuts, and garlic. Blend until the mixture is a coarse paste, then slowly add in about half the olive oil as the machine is running. Stop, scrape down the sides of the bowl, add the cheese, lemon juice, and zest, and continue blending, adding the remaining oil until the pesto reaches your preferred consistency–I like it nicely spreadable and creamy. Depending on how salty your cheese is (and, honestly, how finely or coarsely it’s grated), you may need to add a pinch or two of salt at the end. Or more cheese. Everything is better with more cheese.

Enjoy!

Soul Satisfying Winter Soup

The flu and winter colds are currently making their way around Seattle with a vengeance.  We have been washing hands and spraying sanitizer like mad trying to keep it out of our home, but to no avail.  Our family spent the weekend, laying low, quarantined due to snotty noses and fevers.  I thought today would be the day to get out for an adventure, but unfortunately the symptoms persist.  I am a firm believer in keeping germs to ourselves when possible,  so, in order to assuage my own bout with stir craziness I started looking around for a cooking project to stimulate the senses.

DSC_0038

I love soup.  It is one of the things I really enjoy cooking (and eating).  There is something so soul satisfying about eating a bowl of homemade soup.  While sick kiddos napped today, I tried a new recipe.  I had been thinking about the  Portobella Mushroom Soup served at Palomino Restaurant and how the mushroom soups I have tried to make in the past just did not live up to it.  So, being the resourceful gal that I am, I googled “palomino portobello mushroom soup”, just to see if someone else had imagined recreating this deliciousness.  Ha!  The first thing on the list is a recipe on epicurious.com, receiving 3.5/4 stars.  I may not be very creative with this idea, but I am also not the only one fantasizing about this yummy soup!  The one annoyance with this particular recipe is that it looks to be scaled down from the large restaurant recipe with a few errors.  The below recipe is adapted and inspired by both Palomino and epicurious.

Portobello Mushroom Soup

2/3 cup unsalted butter
2 medium leeks (white and green) cross sliced at 1/4″
1 large yellow onion, diced
8 oz portabello mushrooms, chopped
12 oz crimini mushrooms, chopped
1/2 cup all- purpose flour
4 cups chicken stock, plus 2 cups water
2 oz. dry sherry
8 oz cream
1/4 t. cayenne pepper
1/4 t. kosher salt

Melt 1/3 of the butter in a stock pot over medium heat.  Add leaks and onions.  Saute until tender.  Add mushrooms and saute for five minutes.  In a second pot, melt remaining butter.  Add flour and cook roux for five minutes.  Slowly add in chicken stock and whisk until incorporated.  Add water, whisk until incorporated.  Simmer for 30 minutes, stirring frequently to keep roux from sticking to bottom of pot.  Add cream, cayenne pepper and salt to mushroom and leek mixture.  Stir in sherry.  Strain the thickened chicken stock mixture into the mushroom and leek mixture. Let soup slowly simmer for an additional 15 minutes or until all ingredients are completely incorporated.  Adjust consistency by adding more water or a touch more cream as necessary.  (I blended a portion of the soup in order to achieve a little smoother texture.)  Garnish soup with a swirl of port wine.

DSC_0039

I am very happy with how this recipe turned out.  The ingredients of sherry and cayenne pepper add a kick and help capture the depth and complexity of the Palomino version.  I will definitely be making this recipe again.  This soup may not exactly be low in fat, but it is made with real ingredients and when paired with a simple green salad makes for a lovely and satisfying winter dinner.

We will be enjoying it tonight!

DSC_0041

Author note: I am the first to say this is not the most beautiful soup to look at, but I guarantee that it is delicious!

January Giardiniera

DSC_0042

Do you remember when summer was in full bloom and it was difficult to believe that grey winter months would eventually and inevitably arrive?  Here we are in the post-holiday winter and I have been smugly cracking open preserves right and left, in an effort to breathe a little summer color and flavor into our January doldrums.  This is the time that I feel I should take some good notes about what we are enjoying and using up, so that when canning season arrives again, I will know what the favorites of 2012 were.  So far my list includes raspberry freezer jam and fig preserves (of course).  Also, after a busy December of gifting and parties, I see that my pickle  supply is totally gone!

Giardiniera is the official name for a mix of spicy pickled vegetables with Italian roots.  This is a recipe I have been wanting to try for awhile now.  I have purchased mixed vegetable pickle products from the grocery store before and not been terribly inspired, but the idea of making my own intrigues me.  The vegetables typically included are carrots, celery, bell peppers and cauliflower, making it a perfect mid-winter project – just the thing to tide my canning interests over until warmer weather arrives!

DSC_0036

Most of the work on this recipe is done at the front-end, simply chopping all the vegetables.  Giardiniera is a wonderful project to try with friends, as the work can be divided at the beginning and then the spoils can be shared as well.  Once made, these vegetables are delicious on an antipasto platter or right out of the jar.  (I doubt ours will even make it to a platter before they are eaten up!)  I invited a few friends over to try the America’s Test Kitchen D.I.Y. Cookbook version of Giardiniera.  We split up the vegetables so that we were all responsible for chopping one or two types prior to meeting up.  Then, once together, the pickling was a very straight forward process.  We quadrupled the above recipe which worked out well, allowing us each to take home four plus pint jars.

DSC_0028

GIARDINIERA

1/2 head of califlower (1 pound), cored and cut into 1/2-inch florets

3 carrots, peeled and sliced 1/4 inch thick on bias

3 celery ribs, cut crosswise into 1/2-inch pieces

1 red bell pepper, stemmed and seeded, and cut into 1/2 inch wide strips

2 serrano chiles, stemmed and sliced thin

4 garlic cloves, sliced thin

1 cup fresh dill

2 3/4 cups white wine vinegar

2 1/4 cups water

1/4 cup sugar

1/4 cup Diamond Crystal kosher salt

Toss cauliflower, carrots, celery, bell pepper, serranos, and garlic together in large bowl until combined.  Transfer vegetables to jars with tight-fitting lids.

Bundle dill in cheesecloth and tie with kitchen twine to secure.  Combine dill sachet, vinegar, water, sugar, and salt in large saucepan.  Bring to a boil over medium-high heat.  Cover, removed from heat, and let steep for 10 minutes.  Discard dill sachet.  Return brine to boil.

Pour brine evenly over vegetables.  Let cool to room temperature, then cover and refrigerate for 7 days before eating.  Pickles can be refrigerated for up to 1 month.

To Process for Long-Term Storage:  In step 1, don’t pack jars with vegetables.  Prepare brine as directed in step 2, then transfer vegetables to hot, sterilized 1-pint jars.  Pour brine, while still hot, evenly over vegetables, leaving 1/2 inch of headspace at top.  Process in water canning bath for 10 minutes.

Makes four 1-pint jars

Make today, enjoy in 1 week

Note: I decided to split our project into two batches to test some variations.  In one batch we omitted the serrano chiles in case our spice-sensitive kids might want to give these veggies a try.  Another variation we tried was white wine vinegar in one batch and white balsamic vinegar in the other, just for fun.  Crazy times around here!  In both, I split the amount of wine vinegar with distilled white vinegar, since I had lots of distilled white vinegar on hand and not as much white wine.  It worked fine.  I was so curious, I couldn’t even wait a week before breaking into these.  One of my jars did not seal, so I just opened it right up.  I tried the spicy white wine vinegar version and they are fantastic.  We will definitely be making these again!

Enjoy!

Hello, Cupcake

DSC_0004

“Winter White and One” was the theme of the party.  It was important to me that Tatum’s first birthday party feel intimate and differentiated from the Christmas celebrations we had been involved in days before.  I envisioned wiping away the holiday from one room and replacing the red and green with clean, white everything.  I liked the idea of white cupcakes on white cake plates – white, white, white… but also wanted to find some unfussy design element that would help commemorate this milestone for my little girl.

flags3

flags2

There is a company I learned about called Ticings that makes “tattoos” for cupcakes.  I was very intrigued by these when I came across them in a magazine.  If their product was not cool enough, Ticings currently has an artist doing custom silhouette art for them.  Perfect!  Despite my late planning and holiday business, Ticings was able to accommodate all my requests and the customer service was a dream.  I sent in a photo of Tatum and days later received custom cupcake tattoos with my baby girl’s silhouette.  I also asked for the artwork to keep as a momento of the day.

DSC_0033

DSC_0032

Since I had already spent some money on the tattoos, I figured that I better bake the cupcakes versus purchase designer ones.  I am a mediocre baker at best with a very old oven, so I was a little intimidated, but figured it would all work out.  (At this point, it might have benefitted me to read the directions on the Ticings packaging, as my cupcakes were not as flat as they recommended which made application more difficult.)  A few years ago I was given a cookbook called, “Hello, Cupcake! : Irresistably playful creations anyone can make”.  Most of the cupcakes in this cookbook are fun to look at, but not something I would attempt in real life.  My favorite thing about this cookbook is in the back there are some tips and tricks and recipes for semi-homemade cupcakes and frostings.  The authors allow that homemade is usually best, but in a pinch there are ways to improve flavor and texture from store bought mixes, etc… Their “Perfect Cake-Mix Cupcakes” have worked really well for me:

Perfect Cake-Mix Cupcakes from Hello, Cupcake!

1 box (18.25 ounces) cake mix (French vanilla, devil’s food, or yellow)

(Note from PP5: I like Trader Joe’s brand)

1 cup buttermilk (in place of the water called for on the box)

Vegetable oil (the amount on the box)

4 large eggs (in place of the number called for on the box)

Preheat the oven to 350 degrees.  Line 24 muffin cups with paper liners.

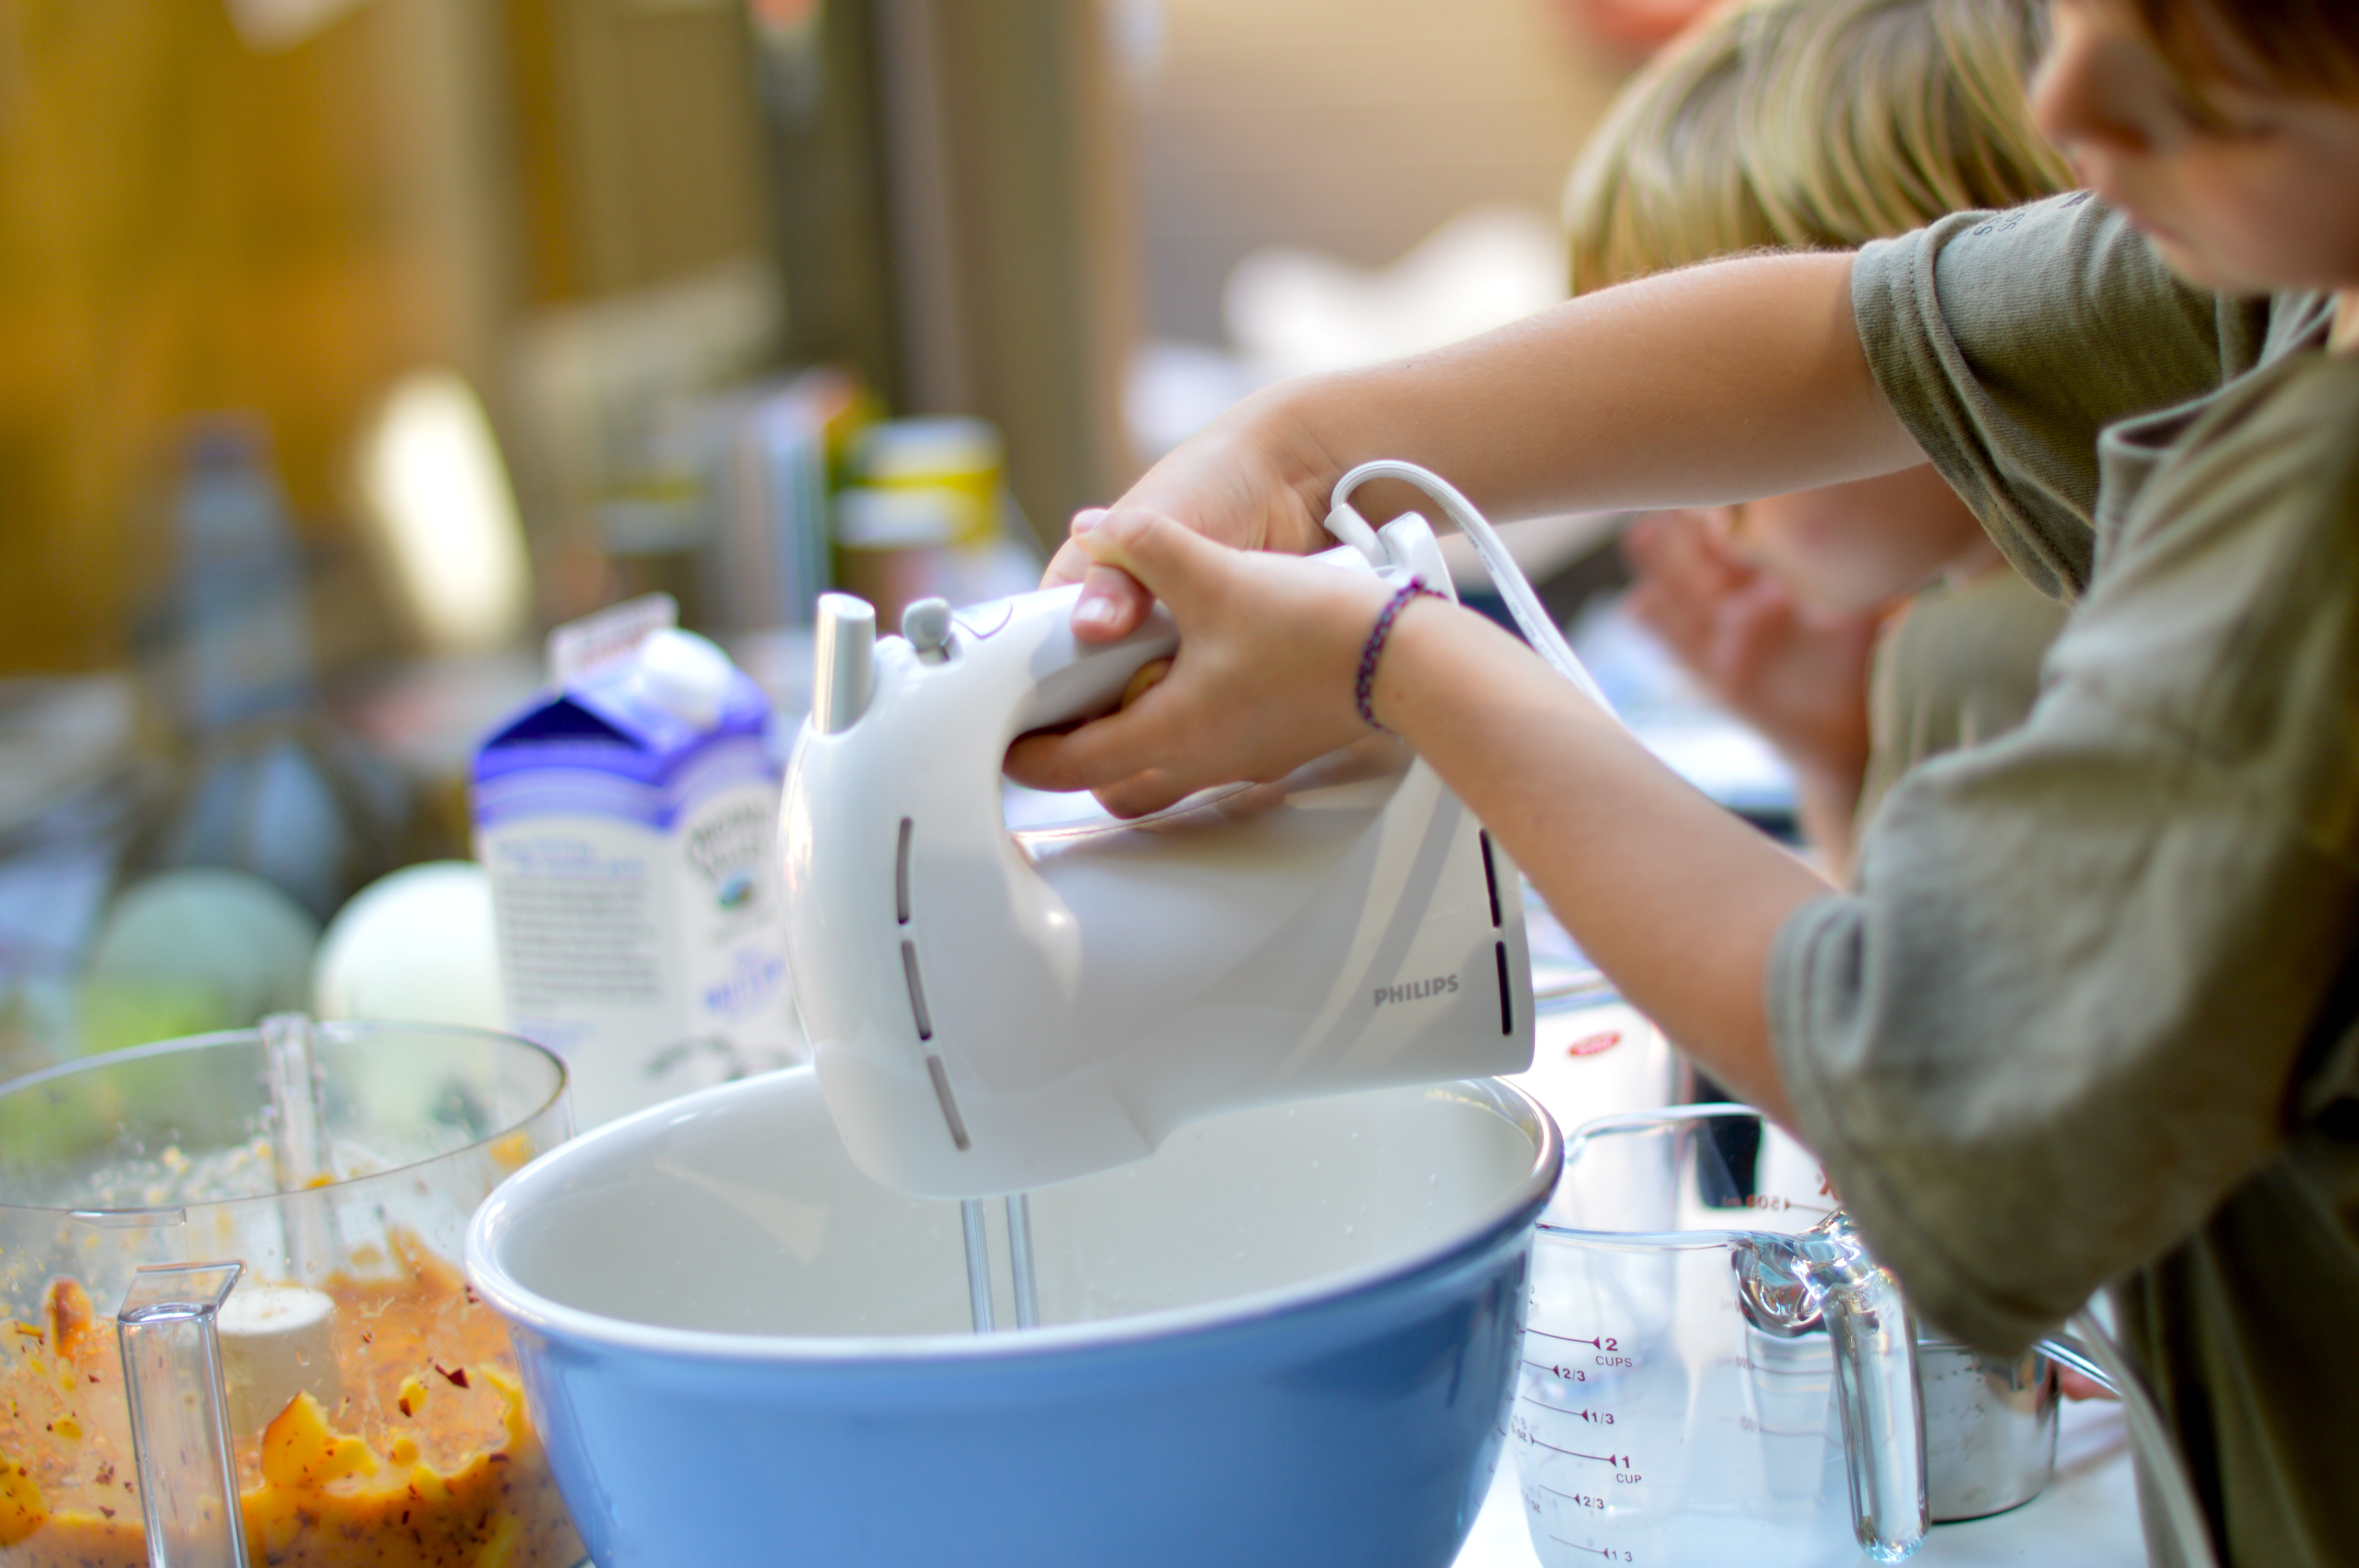
Follow the box instructions, putting all the ingredients in a large bowl and using the buttermilk in place of the water specified (the box will call for more water than the amount of buttermilk that you are using), using the amount of vegetable oil that is called for, and adding the eggs.  Beat with an electric mixer until moistened, about 30 seconds.  Increase the speed to high and beat until thick, 2 minutes longer.

Spoon half of the batter into a ziplock bag.  Snip a 1/4 inch corner from the bag and fill the paper liners 2/3 full.  Repeat with the remaining batter.  Bake until golden and a toothpick inserted in the center comes out clean 15-20 minutes.  Remove the cupcakes from the baking pans, place on a wire rack, and allow to cool completely.

Next, I used one of the cookbook’s frostings and was very happy with the result.

Almost-Homemade Vanilla Buttercream

Makes 3 1/2 cups

1 container (16 ounces) Marshmallow Fluff

3 sticks (3/4 pound) unsalted butter, softened and cut into 1-inch pieces

1 teaspoon vanilla extract

1/2 cup confectioners’ sugar, plus additional sugar if necessary

Spoon Marshmallow Fluff into a large bowl.  (Marshmellow Fluff twice in one month?!?!?)  Beat with an electric mixer on low.  Gradually add the butter pieces, well after each addition, until smooth.  Add the vanilla extract and the 1/2 cup confectioners’ sugar.  Scrape the bowl well to incorporate.  Add more confectioners’ sugar, if necessary, to adjust the texture.

DSC_0036

DSC_0035

As we were frosting these cupcakes, my sister and I were unsure about how messy the frosting looked.  My mom had a helpful tip that I will pass on to you.  After frosting your cupcakes, run your knife under hot water and wipe over frosted cupcake for an ultra-smooth look.  (note: The cupcakes were definitely a group effort – thanks, ladies!  The moral support was the best part of all.)

DSC_0047

DSC_0050

DSC_0051

DSC_0054

I will admit that the Ticings cupcake tattoos were a little more difficult to apply than I had hoped.  We used their gold  sprinkles to cover mistakes around the edges.  In the end, I love the modern look of the silhouette on the cupcake.  I was and am really happy with the result!

DSC_0063

DSC_0078

DSC_0061

DSC_0191

DSC_0222DSC_0170DSC_0245

The family enjoyed a beautiful morning.  Cupcakes were a hit and the birthday girl couldn’t have been happier.  Tatum is sporting a Poole Party Designs original and sitting in her custom chair from Auntie.  It is safe to say she enjoyed her day!  Success!