In Between

There is a phase in friendship where all feels natural and wonderfully close, but there is a phase right before all that loveliness that feels like a lot of work.  As thirty-somethings with three kids, there is not the abundance of time that we once had during college days to forge friendships – through all night gab sessions over beer and mediocre pizza.  Most recently we were making baby friends.  This is a special phase where new parents support one another with bleary-eyed conversation fueled by coffee and wine, all while googling over our new little lovelies.  But time goes on, and relationships shift.  Families begin to reallocate time and energy resources to the school community.  It makes sense, I get it.  We’ll be there soon.  With Sam starting kindergarten this fall, I am really looking forward to settling into that new community and being a part of things too.

But right now, this minute, we are in a funny place.  We have friends, lots of great friends – some near and some far.  Yet, I see that we (and they) are all in transition.  Everyone is so damn busy!  It is tough to actually carve out time to see one another.  People talk about the times in one’s life when close friends are made: early childhood, high school, college, post-college work, when babies are born, and when those babies start elementary school and you meet those kids’ parents… The cycle goes on and on.  Plus, add to that the many geographical moves that take us away from loved ones, and there you have it.  We’re currently in between.  It feels like we are starting over (again).

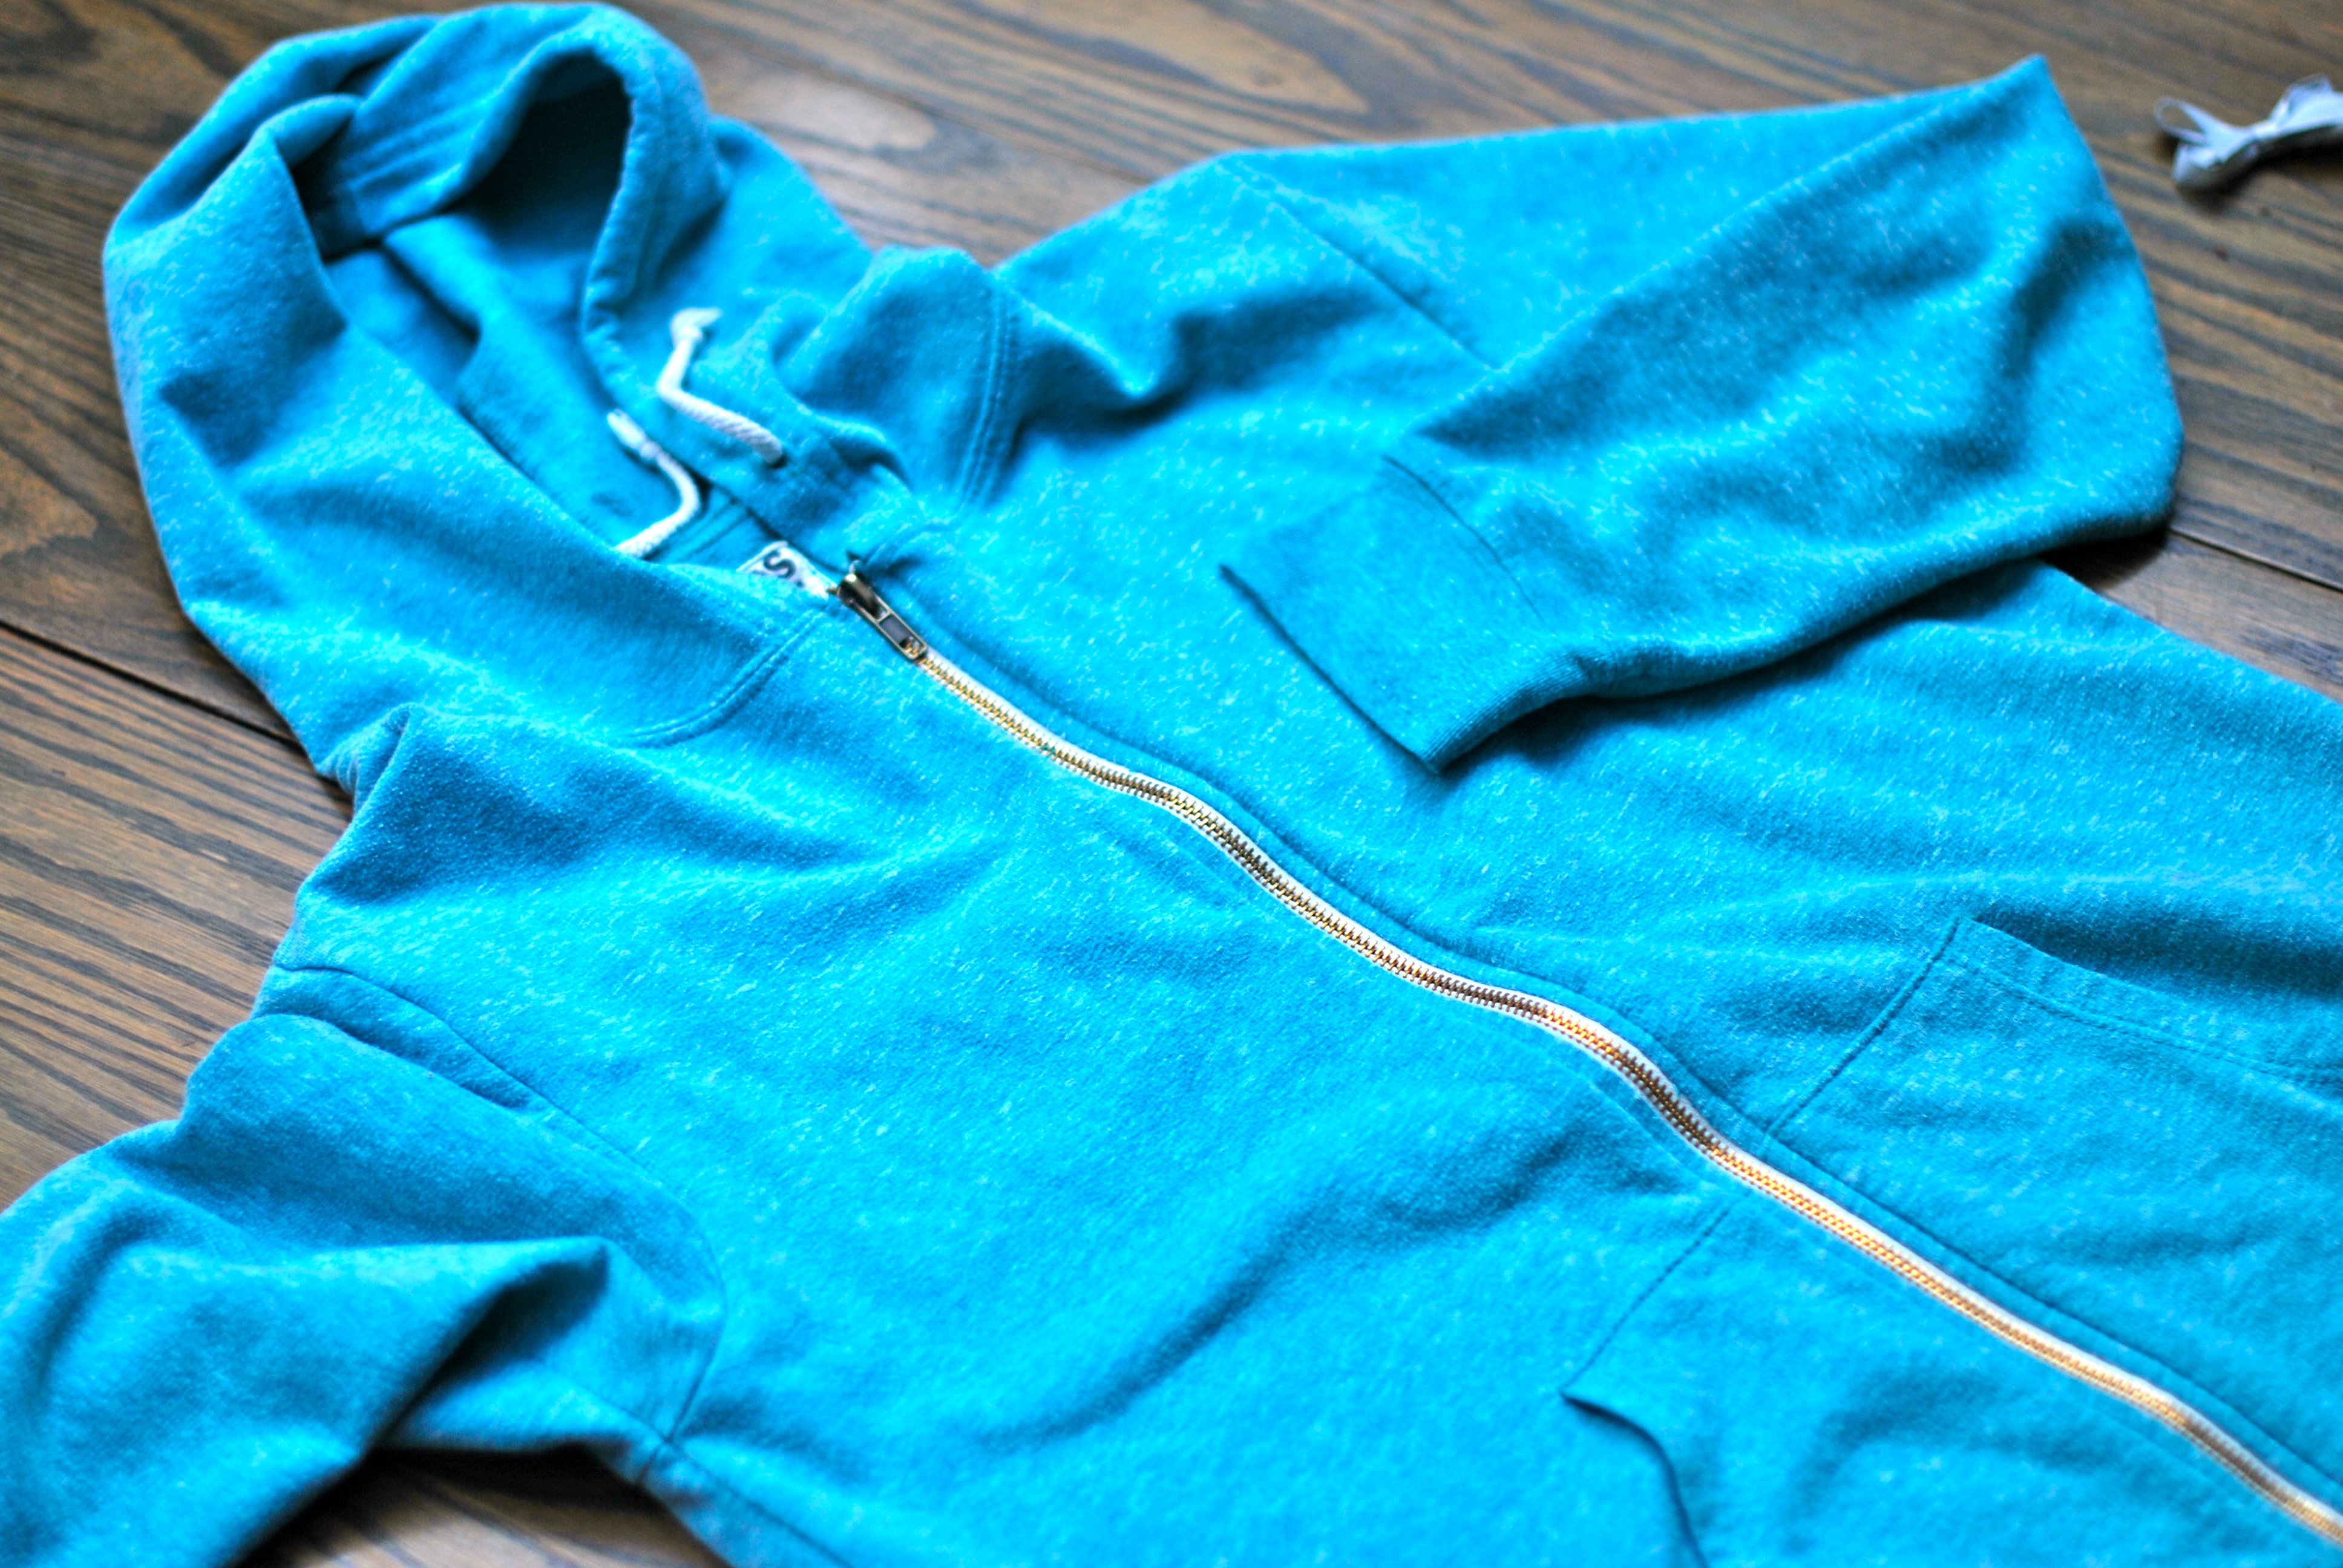
I yearn to jump forward to a place with a cozy group of friends that feels comfortable, like your favorite hoodie.  The one you reach for when you just want to be yourself, to be known.  Lately, as we meet new folks and try to find our way, it feels like wearing beautiful heels all the time.  The ones that you take off the minute you walk through your front door… And maybe that’s the problem.  Eureka!  Maybe I have solved it after all!  We need to go out into the world with a big smile and favorite-sweatshirt-attitude versus a high-heels-attitude.  We’re nice people.  Yes, a bit sleep deprived, but we try not to let this fact get us down.  Our favorite shows are: Parenthood (well, obviously) and Mentalist (Simon Baker, enough said).  We’re semi-sporty.  We enjoy long walks and great conversation.  We’re perfecting our creme brulee recipe in hopes of wooing you and yours.  Just FYI… we’re looking for some new friends and you might be next on our list.  Watch out.

I know that this bit of discomfort will pass.  Like everything else, it will shift and change.  In a few weeks, or months, or years (please god, no), we will nudge each other and say… “Wow!  Look at this group of friends we are a part of!  I don’t even remember a time when George, and Sally, and Sue weren’t around!”  Its probably just around the corner…

DSC_0005

Milestones

toothfairy

My favorite projects start out with a custom request!

My wonderful friend Andie said, “Hey Lesley, I have a god son who has begun losing his teeth.  I would love to be the one to give him a tooth fairy pillow.  Any chance you could make one?”  What a fabulous idea!!  I played around with a design until I was satisfied and now Andie’s god son has a sweet little home to keep those baby teeth safe until pick-up from The Tooth Fairy.

And now, the pillows are available for your little ones as well on Poole Party Designs!

toothfairyaqua1

As I look at what I am creating these days, it has a lot to do with milestones.  Shirts that recognize how many years a child has under his or her belt or a onesie that announces the letter or name that is bestowed at birth.  We celebrate birthdays at our house with quite a lot of hoopla and other milestones seem to be the same.  As time passes in both a whirlwind and quite imperceptibly, it feels like the only thing I can do is notice, document, and celebrate!

toothfairynavy1

toothfairyyellow1

One milestone that we are inching ever closer to, but have yet to hit is the losing of baby teeth.  This rite of passage officially moves a child from baby years into kid years and is one more thing to relish and celebrate.  The Tooth Fairy.  Yikes.  As a parent I look at it this event with a bit of trepidation as well.  Here is yet another imaginary individual who we, as parents, will answer questions about with false confidence in an effort to make this legend appear magical versus creepy.  The fact that we allow a fairy to enter our home undetected time after time is already enough to make me lose a bit of confidence in the telling.  One more legend (like the darn Elf on the Shelf) that I will try desperately to remember and try not to totally screw up.  Then there is the actual execution.  My children are light sleepers.  I do not look forward to entering their room once they are (finally) asleep only to possibly wake them up while rummaging around under their pillow!  And to remember to do this over sixty times?!?!  Wish us luck!!  Maybe a personalized pillow will help?!?!  Here’s hoping.

toothfairyred

Note:  My husband would like all readers to know that our family does not necessarily endorse the giving of paper money if and when The Tooth Fairy visits.  As I said, we have yet to cross this bridge and don’t have a clue what we are doing!  Paper money has been used above for artistic purposes only!

The Perfect Granola

DSC_0050

So this is an oldie and a goodie.  I have made this granola for Christmas presents over the years and it has been so well received that people often ask for the recipe.  It is the one granola I make because it is so delicious and unexpected.  Unexpected, you say?  Well, yes!  The key ingredient is olive oil.  It is just the right amount of savory and lightly sweet.  I usually add a little more salt and a little less cardamom.  The fruit / nut combinations can be changed to what you have around or prefer.  The amounts can be played with all day long and it still works.

DSC_0051

Some great friends from our time in the Bay Area are coming to visit Seattle for the weekend, so it seemed like the ideal time to make some of this yummy granola.  The best part?  When the kids woke up super early this morning, I poured myself a cup of coffee, looked in my pantry, and was able to make it with ingredients I had on hand.  Once you try this, you, too, will keep all the necessary items in your pantry, just in case.

We have been looking forward to this reunion weekend for weeks.  Plotting out the best plans to show off our dear city in both rain and shine weather.  As much as I am looking forward to all our fun adventures, the thing I am anticipating most is the down time,  everyone waking up in the morning, chatting over cups of coffee (and bowls of granola), picking up these special relationships just where we left off… Enjoy!  I know we will.

Olive Oil Granola with Dried Apricots and Pistachios

(from The New York Times, 2009)

3 cups old-fashioned rolled oats

1 1/2 cups raw pistachios, hulled

1 cup raw pumpkin seeds, hulled

1 cup coconut chips

3/4 cup pure maple syrup

1/2 cup extra virgin olive oil

1/2 cup packed light brown sugar

1 teaspoon kosher salt

1/2 teaspoon ground cinnamon

1/2 teaspoon ground cardamom

3/4 cup chopped dried apricots

Fresh ricotta, for serving (optional)

Fresh berries, for serving (optional).

DSC_0006 DSC_0007 DSC_0008 DSC_0011 DSC_0012 DSC_0015 DSC_0018 DSC_0019 DSC_0021 DSC_0023 DSC_0025

1. Preheat oven to 300 degrees. In a large bowl, combine oats, pistachios, pumpkin seeds, coconut chips, maple syrup, olive oil, brown sugar, salt, cinnamon and cardamom. Spread mixture on a rimmed baking sheet in an even layer and bake for 45 minutes, stirring every 10 minutes, until golden brown and well toasted.

DSC_0027 DSC_0029 DSC_0033 DSC_0035

2. Transfer granola to a large bowl and add apricots (or do this step right on the cookie sheet), tossing to combine. Serve with ricotta and fruit, if desired.

Yield: About 9 cups

DSC_0037 DSC_0039 DSC_0043 DSC_0046 DSC_0053

Patience, Not Perfection

In our house, the Valentine Season is more about the valentines kids bring to their friends at school than a declaration of romantic love.  Meaning, a few weeks ago we set out to make our school valentines and have yet to finish…

DSC_0002

The part of me that loves coming up with projects to do with my kids finds this situation completely satisfactory.  We get to work on a project together and have hours of entertainment!  The kids will have an end product that they get to share with their peers!  Fun!  The other part of me that is a bit of a perfectionist with said projects is having a harder time with the process.  In my mind’s eye, the valentines we made together were finished weeks ago and were exceptionally cute (read: professional).

DSC_0011

Then came the realization that I had a choice to make.  Would these by my valentines?  Or, (correct answer) would these be my kids’ valentines?  We all love to show the world what we can do (me included, obviously)…  And yes, I do love me a good craft project.  So, we compromised.  The project did involve Shrinky Dink hearts and it did involve some group stamping, but more importantly, it involved letting my kiddo practice writing names over and over again.  I must admit to feeling a teensy bit proud of myself that I did not take the pen away to write all the valentines myself (in my efficient, adult penmanship), but rather I am allowing my five-year-old the time and space to practice his budding handwriting skills night, after night, after night… This may not seem like a big deal.  In fact, it may sound quite insane.  But each of us has things we do well and areas where we are challenged.  Right?  (Insert head nod here.)  Small victories.

DSC_0013

In the end, these valentines will end up in the recycling bin after a day or two, but my son will feel more confident writing his and his brother’s names going forward.  As we encourage our little people to spread their wings and master new skills, it is a good reminder, that although a project may take longer (most likely), will be messier (guaranteed),  and may turn out differently than imagined (quite probably), there is more to be gained from the process than from doing it all ourselves.  I am hopeful that we will be done by Thursday morning… Fingers crossed.  Clearly, handwriting is not the only lesson being learned from this project!

DSC_0005

Winter Greens Pesto

Another cabin fever recipe…

DSC_0031

Last week we were stuck at home, recuperating from some bug or another that just didn’t want to leave our house.  We’ve finally rid ourselves of all symptoms, so I have the time (and hands) to write this.  As I was experiencing that “we’ve-been-at-home-for-5-days-straight” feeling, I attempted to add in a little spice to our program with some inspiration from theKitchn.  I was intrigued when I saw that they had done a piece on winter greens pesto!  What a cool idea!  One typically thinks of pesto as a summer treat, while basil is growing like crazy in the garden.  One doesn’t necessarily think of making it in winter.  I am learning how to incorporate the likes of kale and friends into our diet, but am always looking for new ways to cook with them.  Their main point was that pesto can be made out of just about anything – it is incredibly flexible, so get creative!  TheKitchn had a link of “How to Make Perfect Pesto Every Time” and I really liked their description below:

“Traditional Italian pesto is, of course, made strictly with basil, pine nuts, parmesan, garlic, and really good olive oil. It’s a classic sauce, no contest.

But you can switch out the basil for another handy herb or leafy green, replace the (crazy expensive, if delicious) pine nuts with a different favorite nut, or swap the parm for pecorino or asiago. Use more or less of anything to suit your tastes. Heck, you can even make a lower-fat pesto by replacing some of the olive oil with ricotta cheese!

Bottom line: green + nuts + cheese + olive oil = awesome sauce, literally. Whiz it up in a blender and you can’t go wrong.”

I tried two different varieties last week just to test out the versatility of this recipe.  First up was arugula, and next was kale; both turned out beautifully.  The two best things about this recipe were that I already had most of the ingredients in my pantry and it only dirtied one appliance.  Since the recipe is made in the Cuisinart, it was super simple to throw together and also a quick clean up!  Like traditional pesto, these versions are great tossed with pasta, spread on a sandwich or bruschetta, or added by the spoonful to your favorite soup!  The recipe I liked the looks of best was from My Homespun Home.  It is delicious!

DSC_0008 DSC_0010 DSC_0012 DSC_0014 DSC_0016 DSC_0017 DSC_0021 DSC_0024 DSC_0027 DSC_0029

Arugula Walnut Pesto
Makes about 1 1/2 cups

2 cups loosely packed arugula
4-5 basil leaves
1 1/2 cups walnut halves
1-2 garlic cloves
1/3-1/2 cup high quality olive oil
3/4 cup freshly grated pecorino romano cheese
1/2 teaspoon lemon zest
1 teaspoon lemon juice
Finely ground sea salt, to taste

In a food processor, combine the arugula, basil, walnuts, and garlic. Blend until the mixture is a coarse paste, then slowly add in about half the olive oil as the machine is running. Stop, scrape down the sides of the bowl, add the cheese, lemon juice, and zest, and continue blending, adding the remaining oil until the pesto reaches your preferred consistency–I like it nicely spreadable and creamy. Depending on how salty your cheese is (and, honestly, how finely or coarsely it’s grated), you may need to add a pinch or two of salt at the end. Or more cheese. Everything is better with more cheese.

Enjoy!

Soul Satisfying Winter Soup

The flu and winter colds are currently making their way around Seattle with a vengeance.  We have been washing hands and spraying sanitizer like mad trying to keep it out of our home, but to no avail.  Our family spent the weekend, laying low, quarantined due to snotty noses and fevers.  I thought today would be the day to get out for an adventure, but unfortunately the symptoms persist.  I am a firm believer in keeping germs to ourselves when possible,  so, in order to assuage my own bout with stir craziness I started looking around for a cooking project to stimulate the senses.

DSC_0038

I love soup.  It is one of the things I really enjoy cooking (and eating).  There is something so soul satisfying about eating a bowl of homemade soup.  While sick kiddos napped today, I tried a new recipe.  I had been thinking about the  Portobella Mushroom Soup served at Palomino Restaurant and how the mushroom soups I have tried to make in the past just did not live up to it.  So, being the resourceful gal that I am, I googled “palomino portobello mushroom soup”, just to see if someone else had imagined recreating this deliciousness.  Ha!  The first thing on the list is a recipe on epicurious.com, receiving 3.5/4 stars.  I may not be very creative with this idea, but I am also not the only one fantasizing about this yummy soup!  The one annoyance with this particular recipe is that it looks to be scaled down from the large restaurant recipe with a few errors.  The below recipe is adapted and inspired by both Palomino and epicurious.

Portobello Mushroom Soup

2/3 cup unsalted butter
2 medium leeks (white and green) cross sliced at 1/4″
1 large yellow onion, diced
8 oz portabello mushrooms, chopped
12 oz crimini mushrooms, chopped
1/2 cup all- purpose flour
4 cups chicken stock, plus 2 cups water
2 oz. dry sherry
8 oz cream
1/4 t. cayenne pepper
1/4 t. kosher salt

Melt 1/3 of the butter in a stock pot over medium heat.  Add leaks and onions.  Saute until tender.  Add mushrooms and saute for five minutes.  In a second pot, melt remaining butter.  Add flour and cook roux for five minutes.  Slowly add in chicken stock and whisk until incorporated.  Add water, whisk until incorporated.  Simmer for 30 minutes, stirring frequently to keep roux from sticking to bottom of pot.  Add cream, cayenne pepper and salt to mushroom and leek mixture.  Stir in sherry.  Strain the thickened chicken stock mixture into the mushroom and leek mixture. Let soup slowly simmer for an additional 15 minutes or until all ingredients are completely incorporated.  Adjust consistency by adding more water or a touch more cream as necessary.  (I blended a portion of the soup in order to achieve a little smoother texture.)  Garnish soup with a swirl of port wine.

DSC_0039

I am very happy with how this recipe turned out.  The ingredients of sherry and cayenne pepper add a kick and help capture the depth and complexity of the Palomino version.  I will definitely be making this recipe again.  This soup may not exactly be low in fat, but it is made with real ingredients and when paired with a simple green salad makes for a lovely and satisfying winter dinner.

We will be enjoying it tonight!

DSC_0041

Author note: I am the first to say this is not the most beautiful soup to look at, but I guarantee that it is delicious!

Love Note to Our Nanny

DSC_0002DSC_0012DSC_0019

About a year ago, life changed in a big way for our family.  No, I am not talking about the birth of our daughter… well, one thing led to another, I suppose.  No, I am talking about the addition of a nanny to our family unit.

DSC_0001DSC_0014

While pregnant with Tatum, it was clear to me that if another chickadee was going to join the nest, this mama needed some help!  Still, I was reluctant to ask for assistance, and even more reluctant to really want another person floating around in our midst.  Although this person was only going to work part-time for us, being a stay-at-home mom, I realized I would need to like this individual, as well as respect him or her.

DSC_0017

As a first step, we enlisted the help of a tried and true nanny placement service to help us find our very own Mary Poppins.  We went about our search, meeting various people who looked great on paper, realizing that no matter how great someone’s resume was, we were looking for someone who would just “click” with our family.  I had been advised by a veteran-nanny-searching-parent that “with the right person, it won’t feel strange to have someone in your home”.  So, like finding a mate, chemistry obviously plays a big part in finding a nanny.  After a few missed connections with nannies from the service, I began to wonder if we would, in fact, find someone.  Already the baby was born and we were still searching with no great leads on the horizon… Then, as luck or fate would have it, the perfect person fell into our life at the perfect time.  We spent a few weeks gingerly feeling around the edges of this new relationship, wondering if this person might like us as much as we liked her.  Thankfully, the rest is history.

DSC_0023

Dear Andrea,

We think you are wonderful and feel so lucky to know you.  Thank you for all that you do to keep our family moving forward.  You are flexible and kind and have mixed right into our chaos.  You add order to our mess and fun to our routine.  Because of you, I know my way around our ironing board (whereas before I didn’t even know where it was).  Our laundry is washed, folded, and put away (often on the same day)!  You are the extra set of hands that allow me to hold my baby and not feel guilty that the dishes haven’t been done.  You are the board that I bounce ideas off of and you keep me accountable with all the projects I take on.  Your refreshingly frank nature means that you usually mention if you think my methods could use a little tweaking.  You are teaching me that it is okay to ask for help.  I trust, respect, and like you… The kids love you.  We love you.  Thank you.  You don’t know how much this means to our family.

Love, The Poole Family

DSC_0018

This has been a pivotal year for all of us.  It speaks to growth, change, and adaptability.  Our family is larger now, not by one, but by two.  This is not a forever situation.  There will come a day (sooner than I would like), when our nanny will move on with her own life.  The relationship will change, but my hope is that she will stay a part of our family.  By total chance, we found someone who has grown to love us as much as we love her.  We feel so lucky.

DSC_0026

January Giardiniera

DSC_0042

Do you remember when summer was in full bloom and it was difficult to believe that grey winter months would eventually and inevitably arrive?  Here we are in the post-holiday winter and I have been smugly cracking open preserves right and left, in an effort to breathe a little summer color and flavor into our January doldrums.  This is the time that I feel I should take some good notes about what we are enjoying and using up, so that when canning season arrives again, I will know what the favorites of 2012 were.  So far my list includes raspberry freezer jam and fig preserves (of course).  Also, after a busy December of gifting and parties, I see that my pickle  supply is totally gone!

Giardiniera is the official name for a mix of spicy pickled vegetables with Italian roots.  This is a recipe I have been wanting to try for awhile now.  I have purchased mixed vegetable pickle products from the grocery store before and not been terribly inspired, but the idea of making my own intrigues me.  The vegetables typically included are carrots, celery, bell peppers and cauliflower, making it a perfect mid-winter project – just the thing to tide my canning interests over until warmer weather arrives!

DSC_0036

Most of the work on this recipe is done at the front-end, simply chopping all the vegetables.  Giardiniera is a wonderful project to try with friends, as the work can be divided at the beginning and then the spoils can be shared as well.  Once made, these vegetables are delicious on an antipasto platter or right out of the jar.  (I doubt ours will even make it to a platter before they are eaten up!)  I invited a few friends over to try the America’s Test Kitchen D.I.Y. Cookbook version of Giardiniera.  We split up the vegetables so that we were all responsible for chopping one or two types prior to meeting up.  Then, once together, the pickling was a very straight forward process.  We quadrupled the above recipe which worked out well, allowing us each to take home four plus pint jars.

DSC_0028

GIARDINIERA

1/2 head of califlower (1 pound), cored and cut into 1/2-inch florets

3 carrots, peeled and sliced 1/4 inch thick on bias

3 celery ribs, cut crosswise into 1/2-inch pieces

1 red bell pepper, stemmed and seeded, and cut into 1/2 inch wide strips

2 serrano chiles, stemmed and sliced thin

4 garlic cloves, sliced thin

1 cup fresh dill

2 3/4 cups white wine vinegar

2 1/4 cups water

1/4 cup sugar

1/4 cup Diamond Crystal kosher salt

Toss cauliflower, carrots, celery, bell pepper, serranos, and garlic together in large bowl until combined.  Transfer vegetables to jars with tight-fitting lids.

Bundle dill in cheesecloth and tie with kitchen twine to secure.  Combine dill sachet, vinegar, water, sugar, and salt in large saucepan.  Bring to a boil over medium-high heat.  Cover, removed from heat, and let steep for 10 minutes.  Discard dill sachet.  Return brine to boil.

Pour brine evenly over vegetables.  Let cool to room temperature, then cover and refrigerate for 7 days before eating.  Pickles can be refrigerated for up to 1 month.

To Process for Long-Term Storage:  In step 1, don’t pack jars with vegetables.  Prepare brine as directed in step 2, then transfer vegetables to hot, sterilized 1-pint jars.  Pour brine, while still hot, evenly over vegetables, leaving 1/2 inch of headspace at top.  Process in water canning bath for 10 minutes.

Makes four 1-pint jars

Make today, enjoy in 1 week

Note: I decided to split our project into two batches to test some variations.  In one batch we omitted the serrano chiles in case our spice-sensitive kids might want to give these veggies a try.  Another variation we tried was white wine vinegar in one batch and white balsamic vinegar in the other, just for fun.  Crazy times around here!  In both, I split the amount of wine vinegar with distilled white vinegar, since I had lots of distilled white vinegar on hand and not as much white wine.  It worked fine.  I was so curious, I couldn’t even wait a week before breaking into these.  One of my jars did not seal, so I just opened it right up.  I tried the spicy white wine vinegar version and they are fantastic.  We will definitely be making these again!

Enjoy!

Hello, Cupcake

DSC_0004

“Winter White and One” was the theme of the party.  It was important to me that Tatum’s first birthday party feel intimate and differentiated from the Christmas celebrations we had been involved in days before.  I envisioned wiping away the holiday from one room and replacing the red and green with clean, white everything.  I liked the idea of white cupcakes on white cake plates – white, white, white… but also wanted to find some unfussy design element that would help commemorate this milestone for my little girl.

flags3

flags2

There is a company I learned about called Ticings that makes “tattoos” for cupcakes.  I was very intrigued by these when I came across them in a magazine.  If their product was not cool enough, Ticings currently has an artist doing custom silhouette art for them.  Perfect!  Despite my late planning and holiday business, Ticings was able to accommodate all my requests and the customer service was a dream.  I sent in a photo of Tatum and days later received custom cupcake tattoos with my baby girl’s silhouette.  I also asked for the artwork to keep as a momento of the day.

DSC_0033

DSC_0032

Since I had already spent some money on the tattoos, I figured that I better bake the cupcakes versus purchase designer ones.  I am a mediocre baker at best with a very old oven, so I was a little intimidated, but figured it would all work out.  (At this point, it might have benefitted me to read the directions on the Ticings packaging, as my cupcakes were not as flat as they recommended which made application more difficult.)  A few years ago I was given a cookbook called, “Hello, Cupcake! : Irresistably playful creations anyone can make”.  Most of the cupcakes in this cookbook are fun to look at, but not something I would attempt in real life.  My favorite thing about this cookbook is in the back there are some tips and tricks and recipes for semi-homemade cupcakes and frostings.  The authors allow that homemade is usually best, but in a pinch there are ways to improve flavor and texture from store bought mixes, etc… Their “Perfect Cake-Mix Cupcakes” have worked really well for me:

Perfect Cake-Mix Cupcakes from Hello, Cupcake!

1 box (18.25 ounces) cake mix (French vanilla, devil’s food, or yellow)

(Note from PP5: I like Trader Joe’s brand)

1 cup buttermilk (in place of the water called for on the box)

Vegetable oil (the amount on the box)

4 large eggs (in place of the number called for on the box)

Preheat the oven to 350 degrees.  Line 24 muffin cups with paper liners.

Follow the box instructions, putting all the ingredients in a large bowl and using the buttermilk in place of the water specified (the box will call for more water than the amount of buttermilk that you are using), using the amount of vegetable oil that is called for, and adding the eggs.  Beat with an electric mixer until moistened, about 30 seconds.  Increase the speed to high and beat until thick, 2 minutes longer.

Spoon half of the batter into a ziplock bag.  Snip a 1/4 inch corner from the bag and fill the paper liners 2/3 full.  Repeat with the remaining batter.  Bake until golden and a toothpick inserted in the center comes out clean 15-20 minutes.  Remove the cupcakes from the baking pans, place on a wire rack, and allow to cool completely.

Next, I used one of the cookbook’s frostings and was very happy with the result.

Almost-Homemade Vanilla Buttercream

Makes 3 1/2 cups

1 container (16 ounces) Marshmallow Fluff

3 sticks (3/4 pound) unsalted butter, softened and cut into 1-inch pieces

1 teaspoon vanilla extract

1/2 cup confectioners’ sugar, plus additional sugar if necessary

Spoon Marshmallow Fluff into a large bowl.  (Marshmellow Fluff twice in one month?!?!?)  Beat with an electric mixer on low.  Gradually add the butter pieces, well after each addition, until smooth.  Add the vanilla extract and the 1/2 cup confectioners’ sugar.  Scrape the bowl well to incorporate.  Add more confectioners’ sugar, if necessary, to adjust the texture.

DSC_0036

DSC_0035

As we were frosting these cupcakes, my sister and I were unsure about how messy the frosting looked.  My mom had a helpful tip that I will pass on to you.  After frosting your cupcakes, run your knife under hot water and wipe over frosted cupcake for an ultra-smooth look.  (note: The cupcakes were definitely a group effort – thanks, ladies!  The moral support was the best part of all.)

DSC_0047

DSC_0050

DSC_0051

DSC_0054

I will admit that the Ticings cupcake tattoos were a little more difficult to apply than I had hoped.  We used their gold  sprinkles to cover mistakes around the edges.  In the end, I love the modern look of the silhouette on the cupcake.  I was and am really happy with the result!

DSC_0063

DSC_0078

DSC_0061

DSC_0191

DSC_0222DSC_0170DSC_0245

The family enjoyed a beautiful morning.  Cupcakes were a hit and the birthday girl couldn’t have been happier.  Tatum is sporting a Poole Party Designs original and sitting in her custom chair from Auntie.  It is safe to say she enjoyed her day!  Success!

What a Difference a Year Makes

DSC_0004

This week my baby turned one.  Her birthday coincides with the the New Year holiday; a time for fresh starts, moving forward, and reflection.

I find that I am always sentimental during the first anniversary of the days, hours, and minutes before any of my baby’s births.  I think about what we were doing “at this time last year.”  I try to imagine the impossibility of what it felt like not to have met the little person we have spent the last year loving.  I think of my labor and when the contractions started.  Were we at the hospital?  Were we at home still?  Was Nana here yet to take care of the boys?  I have been blessed with straightforward, lovely births, so this reminiscing evokes a feeling of love and empowerment (I know that I am lucky on this front).  These memories are something I treasure as a gift my children have given me.  I never knew I could be so strong as during the births of my children.  My last baby has just turned one and is moving out of babyhood.  She walks and climbs and is beginning to talk.  As I say goodbye to the birth chapter of life, it is with bittersweet feelings.  I hope to carry with me the strength I experienced in birth into my future adventures.

2012 draws to a close and I am struck by how different life feels this year versus last.  Last year we were in love with our newborn, wondering how we would get through the first days, let alone the year, as a family of five.  I think about how we were closer with some friends and alternatively more distanced from some family.  Poole Party of 5 did not exist.  We didn’t know who our next president would be.  What a difference a year makes…  I grew up with a phrase that my mom would tell me in times of discord.  She would say, “Make friends with change.”  Of course there is not a much truer sentiment, yet it drove me crazy.  Nothing stays the same.  We know this in our heads, but I believe it is harder for our hearts to accept.  I friend recently said, “Think back five years to what your life was…”  Well, we had a 6-month old little boy that we loved deeply, but were still getting to know.  We lived in a different house, in a different city.  We didn’t know what our family would become, or who our little guy would be.  One year is a blink.  Five years is a deep breath in and out…

While I was in labor with Tatum last year, the song playing on the iPod when she was born was “One Day” by Matisyahu.  It is such a powerful message for peace.  I love the imagery of my baby entering the world with such a hopeful message.  (I have linked to the video and copied the first verse lyrics below.)

Video Link (click here)

sometimes I lay
under the moon
and thank God I’m breathing
then I pray
don’t take me soon
cause I am here for a reason
sometimes in my tears I drown
but I never let it get me down
so when negativity surrounds
I know some day it’ll all turn around
because
all my life I’ve been waiting for
I’ve been praying for
for the people to say
that we don’t wanna fight no more
there’ll be no more wars
and our children will play
one day (x6)

As much as things change, we do have elements that continue, unmarred by the date on the calendar.  My wish for the future is peace and a time when “there’ll be no more wars / and our children will play”.  I don’t know if this will happen in my lifetime, but maybe in our children’s lifetimes.  I still wonder why I am here, but I know that one of my purposes was to be a mom.  To love my children and my husband with all that I have.  To give forgiveness when someone hurts me and to try not to do harm to others.  I’m not big on New Year resolutions; every year they are the same – dental floss more and exercise more.  But maybe a hope for peace is good too.