Apricot Rosemary Jam

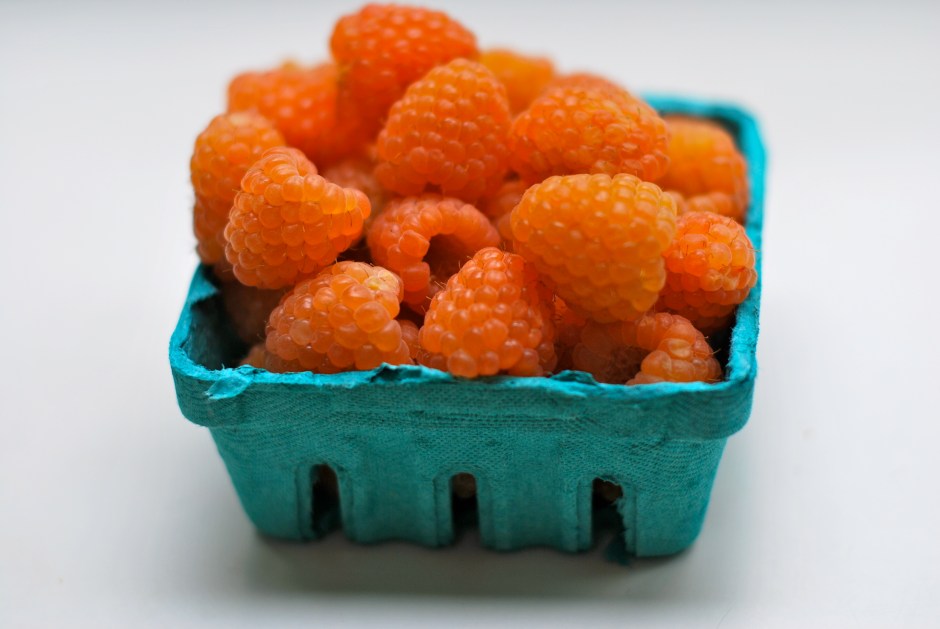
Today is apricot rosemary jam day.

I made this jam last year and loved the herbal notes that the rosemary adds to the flavor.  It is wonderful over a bit of goat cheese or as a marinade for chicken.  Unfortunately for me, I made only enough to pass along for gifts and didn’t remember to keep even one jar for our house!  This past Sunday I bought 22 pounds of apricots from our local farmer’s market to make sure I made enough!  I am excited to report that the rosemary that I am using this year comes from our little garden.


The recipe I am using is inspired by a post from Food in Jars:(http://www.foodinjars.com/2011/07/urban-preserving-apricot-rosemary-jam/)

One of the reasons I like it is that it is very easy.  I am a bit of a lazy preserver, in that I don’t really relish the idea of extra work (as in, taking the skin off of fruit).  With apricots, all you need to do is pull them apart, take out the pit and you are good to go.  The other reason I like this recipe is that it is quick.  I made six batches (24 half pints) in about 3 hours, which is exactly how long I had since preschool camp this week is from 9:00am – noon.


The cherubs are on their way home, so quickly here is the recipe if you feel inspired:

Apricot Rosemary Jam (makes 4 half pints)

4 cups apricots (halved and pitted)

2 cups sugar

3 tablespoons finely chopped rosemary (or omit for traditional apricot jam)

4 tablespoons lemon juice

Mash apricots, not necessary for them to all be the same size.  Place apricots, sugar, and rosemary in a non-reactive pot and bring to a boil.  Cook for about 10 minutes, until fruit thickens and runs slowly and thickly off back of spoon.  Add lemon juice.  Stir to combine.  Remove pot from heat.

Ladle jam into four half pint jars.  Wipe rims of jars with wet paper towel, apply lids and rings and process in your boiling water canner for 10 minutes.

Remove jars from pot.  Let cool.  When jars are cool enough to handle, test seals.  If seals are good, store jars in a cool, dark place.  If any of the jars did not seal, place those jars in the fridge and use within a month or two.

Enjoy!

This slideshow requires JavaScript.

Jam Session

Gosh, I love this time of year!  Amazing produce is in high abundance and local berries can be found around every corner.  I feel so very lucky to have delicious food available year-round, but summer is such a satisfying time for the senses!  When spring and summer arrive, I am reminded how much better in-season fruits and veggies taste!  The berries I have been seeing lately are so beautiful.  So rich in color and flavor, and they smell divine.  If we can’t have fresh summer berries all year long, opening a homemade jar of preserves to enjoy on your morning toast is the next best thing!

Last year was my first year making jam and I am hooked!  I dove in after being inspired by a friend, K, who preserves an entire pantry for the year.  Hundreds of pounds of produce… I agree, she is amazing.  On a much smaller scale, I learned to can with a good friend, S, who was also a jamming neophyte and we felt our way together.  I highly recommend this route.  If you want to try it, find a like-minded friend who is also curious and just go for it.  It became a wonderful time for real adult conversation and each session we came away with a very satisfying product (a project with a beginning and an end – hallelujah!).  Last year at this time I was pregnant and I am pretty sure this whole thing started because of a nesting urge and a wish to control something.  Baby was due in late December, so I became a little manic about being “ready” for the holidays.  Man, was I ready.

In my quest to become a preserving goddess, I found a few books to help me on my way.  There are so many great books out there, these are just the ones I happened to pick up and can recommend to you:

Tart and Sweet, 101 Canning and Pickling Recipes for the Modern Kitchen, by Kelly Geary and Jessie Knadler:  I literally read this book cover to cover before bed it was so interesting.   I love the approachable way that they describe the chemistry involved in canning.  It is part manual, part artisanal food appreciation.   I would not recommend this be your only resource for recipes, but I really enjoyed it for its style and inspiration.

http://www.amazon.com/Tart-Sweet-Canning-Pickling-Recipes/dp/1605293822/ref=sr_1_1?ie=UTF8&qid=1342814858&sr=8-1&keywords=tart+and+sweet

Canning For A New Generation, Bold Fresh Flavors for the Modern Pantry, by Liana Krissoff.  This book is a bit more traditional, but still meant for the modern canner.  I found the accompanying recipes for food dishes using the preserves helpful as well.

http://www.amazon.com/Canning-New-Generation-Flavors Modern/dp/1584798645/ref=pd_bxgy_b_img_b

Ball Complete Book of Home Preserving.  This is a canning bible to some.  Great resource to have on hand, but less fun than the others.

http://www.amazon.com/Ball-Complete-Book-Home-Preserving/dp/0778801314/ref=pd_bxgy_b_img_b

This week I’ve had a few jam sessions and I think I am up to about 30 lbs of berries (turned into freezer jam and small-batch canned jams)!  Raspberry jam is my favorite and oh-so-summery – I am feeling particularly inspired by the golden raspberries pictured above.  Aren’t they beautiful?  I chose to follow a pretty standard recipe from Tart & Sweet and am very happy with the results.

If you are interested, this is the perfect time of year to give canning a try!  I am happy to share any and all that I have learned and would like to pass on a few words of wisdom that were shared with me.

1)  Only can the best produce you can find.  There is no reason to go to a ton of work preserving the same stuff you can find year-round.  Can in-season produce, as it is cheaper and of better quality than what you can find at other times.

2)  Preserve things you like!  We go through jam like it is going out of style in our house, so we make lots of berry jam.  If you don’t eat chutney normally, don’t make jars and jars of chutney.  They will sit and sit in your pantry taking up precious real estate.  I’m not saying don’t experiment, that is part of the fun.  Just keep the way you and your family eat in mind, as you try new things.

Happy Summer!!

Arrgh!

Poole Pirate Picnic success this weekend!  We celebrated Sam’s 5th birthday this weekend by treasure seeking with a bunch of little scallywags!  Despite being  under the weather over the past few weeks, we pulled off a pirate picnic like we were a bunch of true buccaneers!  From hand drawn treasure maps to hand sewn burlap treasure bags to crafty Solo cup and aluminum foil hooks, we outfitted ourselves for mutiny!  Our kiddos became pirates over the course of a scavenger hunt that led them all over Luther Burbank Park, using their treasure-map reading skills to discover jewels (ring pops), booty (pirate booty snacks), weaponry (glow-in-the-dark swords), and pirate costume (hats, eye patches, and hooks). All ages got into this pirate extravaganza – the eye patches were especially popular (thanks, Target!).   The last treasure of the evening was a beautiful firework show, sponsored by the city of Mercer Island as part of their yearly Summer Celebration.  What a fantastic evening!  Yo ho ho, me hearties… Until next time!

This slideshow requires JavaScript.

Conservatory

Profile Picture

Conservatory Coastal Home is a new store in Port Townsend, WA.  The little town of Port Townsend has many wonderful stores and cool treasures to discover and we have been enjoying getting to know all that is there, as a home-away-from-home in the last few years.  But, Conservatory is a store of a different caliber.  They absolutely had me at “hello.”

First, let me say that I try very hard not to shop with my children.  I do lots online (thank you, Amazon) and other than that, I try to enlist sitters when I really have to get out there and hit the stores.  But, as we were doing a little vacationing last week and wandering Water Street, Port Townsend’s eclectic main drag, I could not stop from going into this lovely, light-filled space.  As our entourage (stroller, grandmother, dad, kids spilling out from all sides) entered the store, I did not see the expected look of fear pass over the shop gal’s face, but rather, she calmly pulled something small from under the counter and smiled at my children… what???  My older stepped up to the counter to say “hello” and see what it was.  This fabulous new store actually gave my children a little gift to hold in their hands as we browsed the store – what a wonderful idea!  (You may or may not know that I am a total sucker for packaging, so this also spoke to me.  A sweet little muslin bag, sporting the “conservatory” name, holding two little adorable goldfish.)

The fact that I wanted to move into this store upon first look, may or may not have something to do with the fact that it is the beginning of summer and I am loving the idea of all things “beach.” Regardless, the style is impeccable.  It is a wonderfully edited selection of coastal type things that could live anywhere.  An eclectic combination of rustic vintage and stylish modern pieces.  There were some cool leather chairs that I am still thinking about, as well as gorgeous lamps and other one-of-a-kind objects.  As I walked through the store, my mom actually said to me, “If you were to open a store, I think it would look like this.”  I couldn’t agree more.  As I already mentioned, I would just happily move right in, if they would have me.  There is fabulous old brick making up at least one of the store’s walls.  Interestingly, the store is located in the N.D. Hill Building, which was built in 1888 and is on the National Register of Historic Places!


Upon looking into this business since returning to Seattle, I have learned that the store was opened by a husband and wife team, Sam and Heather Pollock.  This pair has had a very successful farmer’s market soy candle business since 2007.  Their candles are absolutely sumptuous and sport very intriguing  scents.  We actually have been enjoying an “heirloom tomato” variety at our house for the past few months that I randomly picked up some time ago.

If you find yourself thinking about a trip out to the Olympic Peninsula and you make your way to Port Townsend, this store is a definite “must” on the list of stops to make!  I am happy to report that we did not break one single thing in the store and I believe we will be happily invited in again the next time we make our way over to Port Townsend.  Thank goodness for those sweet little goldfish!

Conservatory Coastal Home is located at: 635 Water Street, Port Townsend 98368

Here is a link to their facebook page:

http://www.facebook.com/Conservatorycoastalhome

Placemats, please!

In an earlier post, after the baby shower and onesie extravaganza, I was saying something about a new sewing project.  As happens quite a bit in my life, I got distracted.  But, I’m back at it and ready to show you my first stab at a really great (and simple) placemat design.  This design definitely showcases the fabric.  As I have kept things pretty straightforward and without much detail, it is important to choose a fabric you love!  I went with Gotcha in Summerland in grey and natural.  It gave me just the modern and sophisticated, but unfussy look I was going for!  All in all, I feel successful!  I think these placemats will look gorgeous on a summer evening with lots of bright white and maybe some yellow flowers (or orange, or pink, any color really…) to punch it up a bit.

The quick and dirty on how these were made is below if you are interested in trying to sew some fun, mod pacemats of your own!  I would not call this a full tutorial, as it is not quite perfect yet.  I learned a few things in the process, so those thoughts can also be found below.  As you will see in the photos, they turned out well – even if baby doesn’t know the difference between a sophisticated placemat and her usual burp cloth!  At least they are reversible!

Now, that I have scratched this itch, I think I need to start getting out my canning equipment!  Summer has finally arrived in Seattle!  To pickle or preserve, now that is the question!  Any requests?

This slideshow requires JavaScript.

My Notes:

This project used 1 yard of fabric, almost exactly for four placemats.  Next time I would give myself a little more fabric to play with, as I would like my mats to end up larger and I could be a bit choosier with the print layout.  The mats I made measure approximately 17.5″x13.5.”

First, I measured out my fabric.  I just looked at a placemat that I had bought along the way and used that as a rough guide, adding a few inches for seams.  I cut my fabric to be about 20″x30″ (this is a guesstimate – I promise to take better notes next time!).  The main idea is to sew this like a pillowcase on three sides, while the fabric is inside out.  Then, I turned the fabric right side out, pushed out the corners with a chopstick, and finished the last seam with the top stitch that goes all the way around.  I went with a ¾” seam, but choose what looks right to you.  I pressed the fabric with an iron at every stage and that worked well.  I didn’t remember to wash the fabric beforehand, which I will do next time  (to take care of shrinkage) and I had a hard time keeping things completely square.  Again, something I will be more diligent about next time!